User Management
The User Management page has three tabs: My Profile, All Users and Role Management.
My Profile
All users can access the My Profile tab to manage their own credentials.
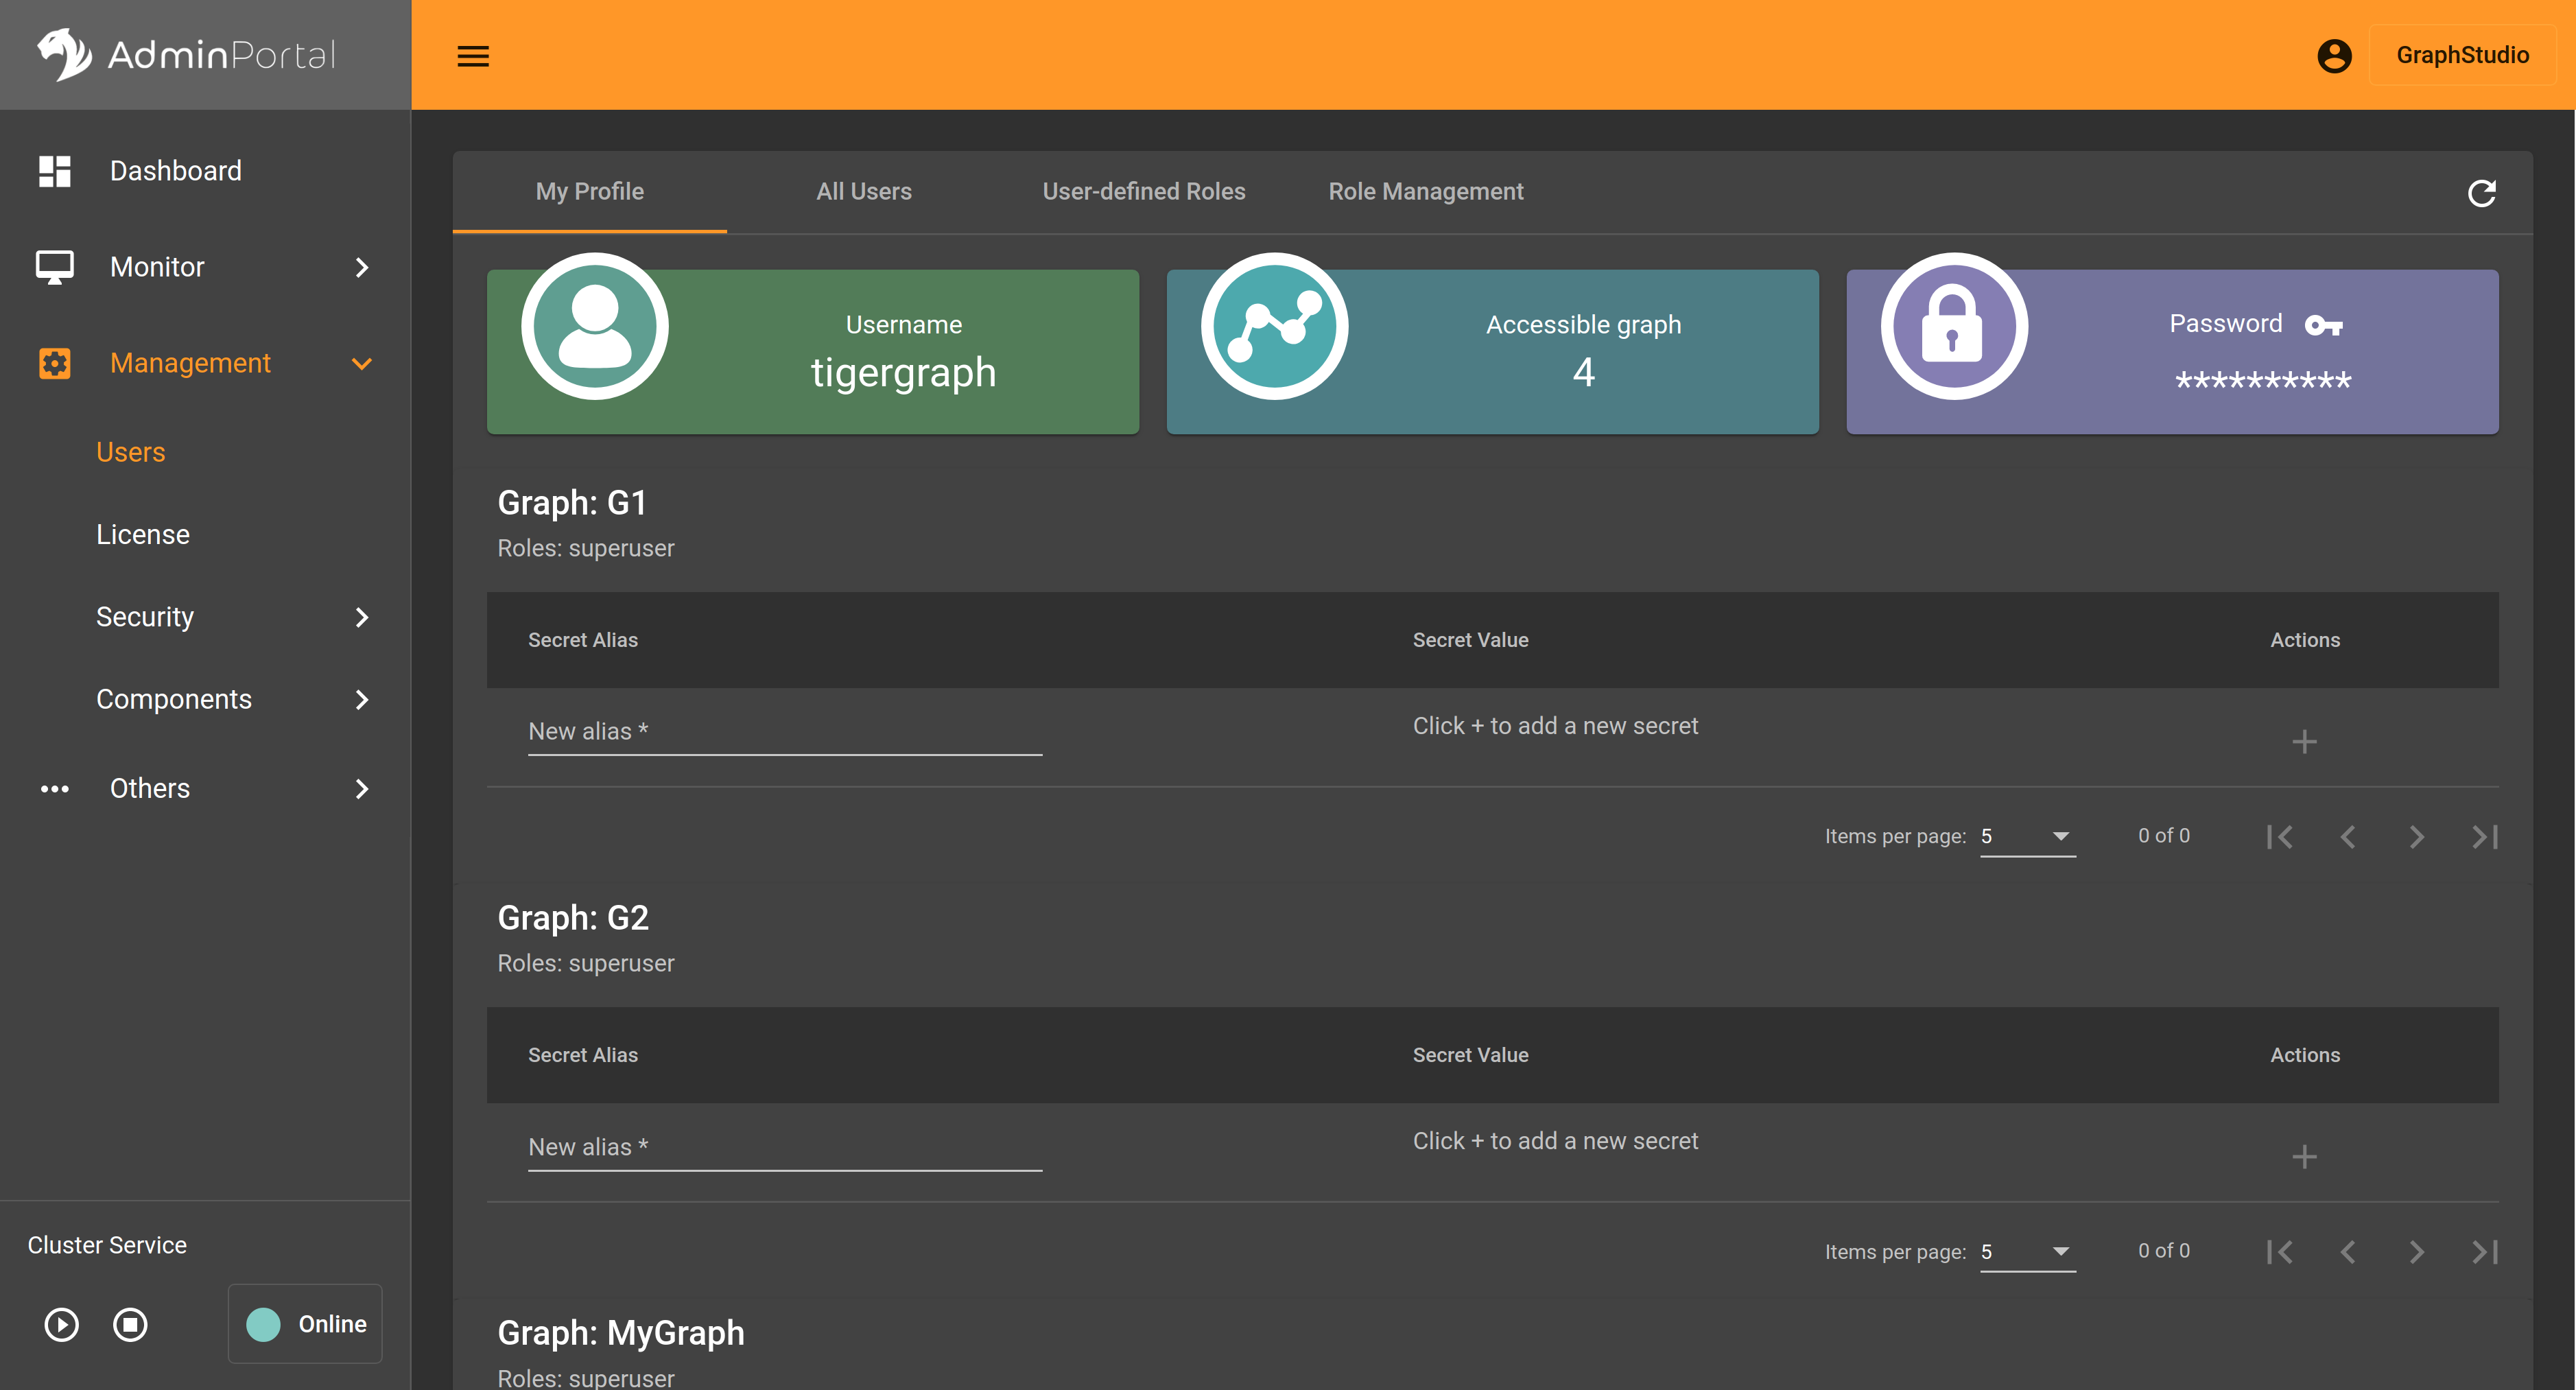
There are three information cards at the top:
-
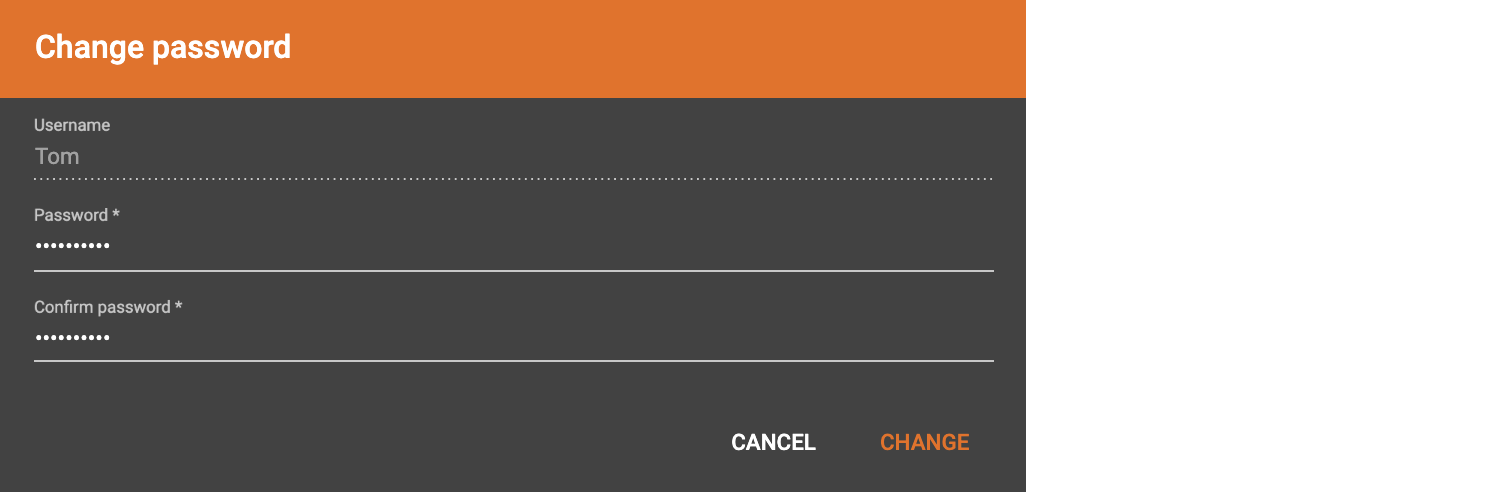
Username shows the user’s username;
-
Accessible graph shows how many graphs the user can access
-
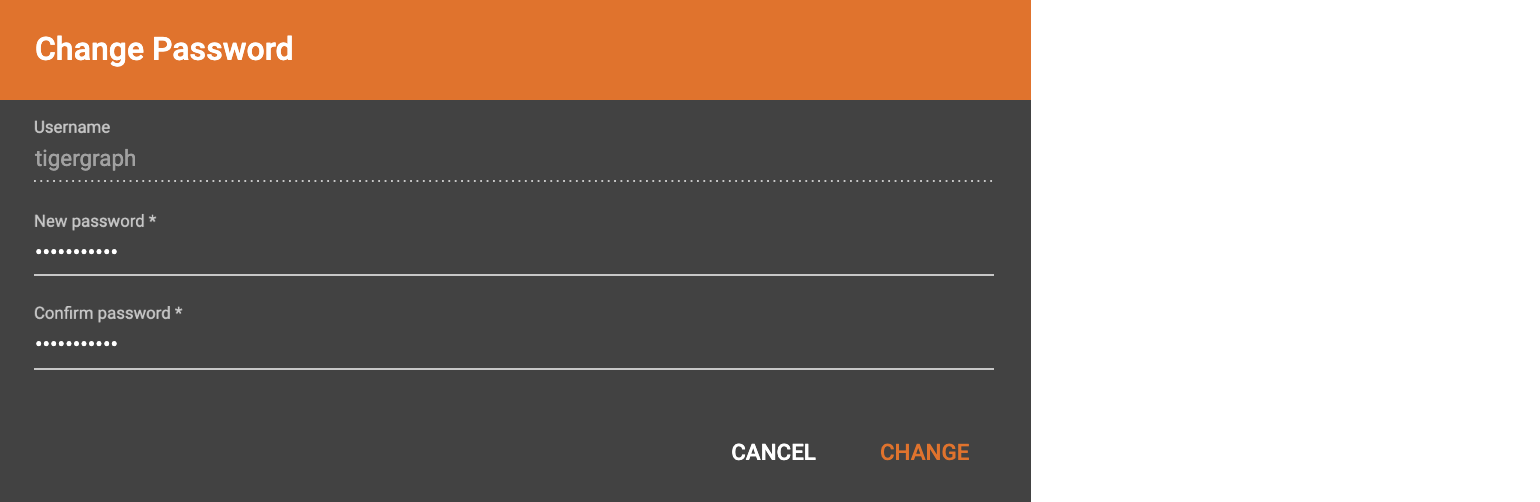
Password allows user to change password by clicking the key icon
 :
:
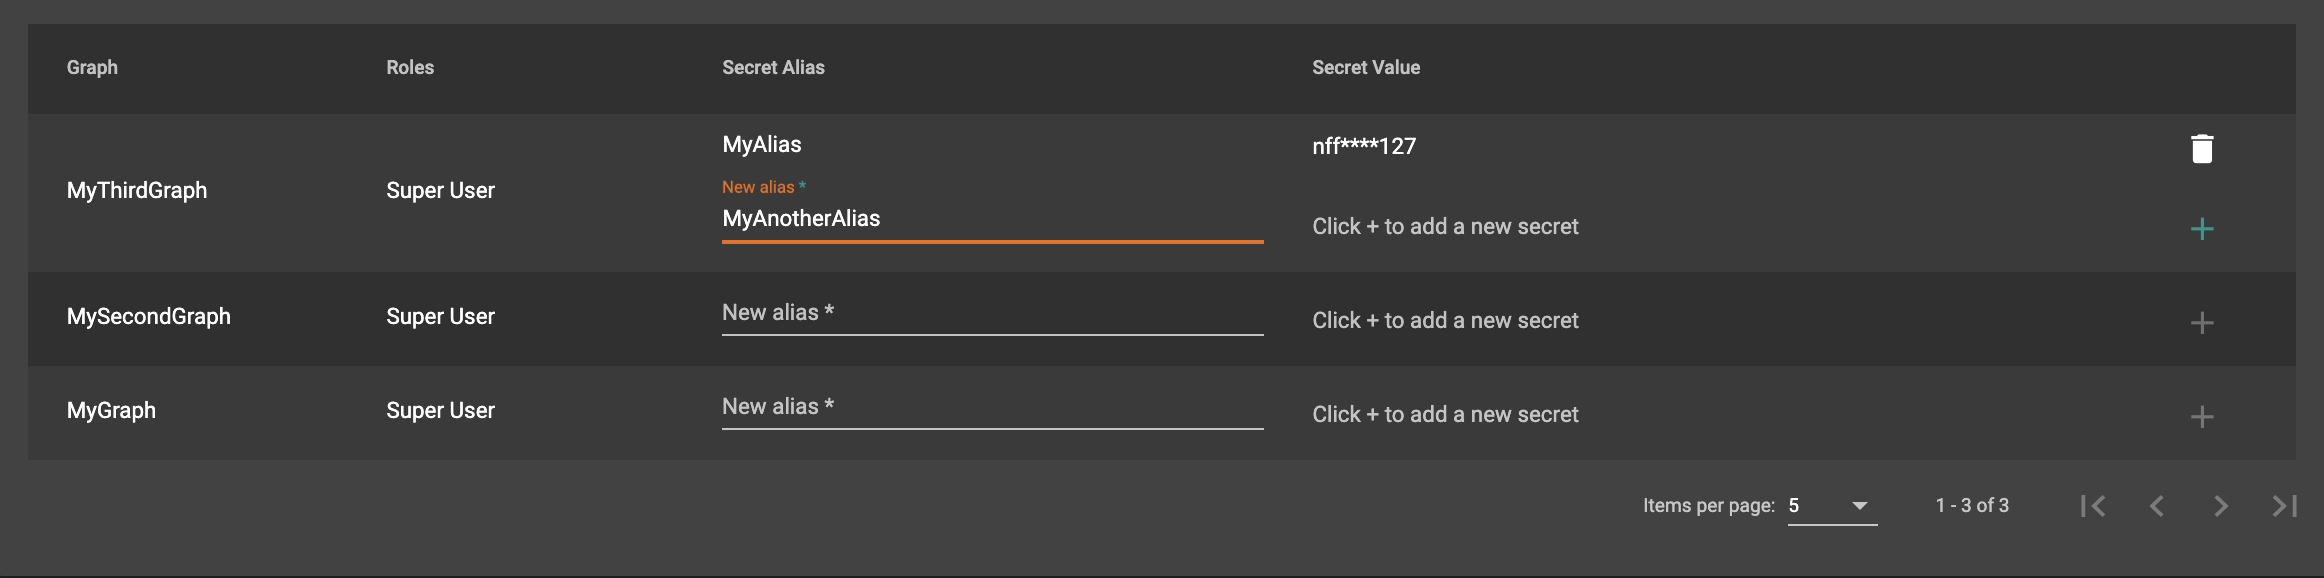
Below the cards is secret management section, where you can create and delete secrets, which are unique strings that can be used to generate authorization tokens. You need to provide an alias for the secret,
You can create as many secrets for each graph as you want, but remember to copy the secret value and save it at a secure location when you generate a secret. Once you refresh the page or go to another page and come back, the actual secret value will be masked for security.
When token authentication is enabled, you need to use the secrets to request tokens and add the tokens in the HTTP request headers to call TigerGraph REST endpoints. Read more at: User Access Management.
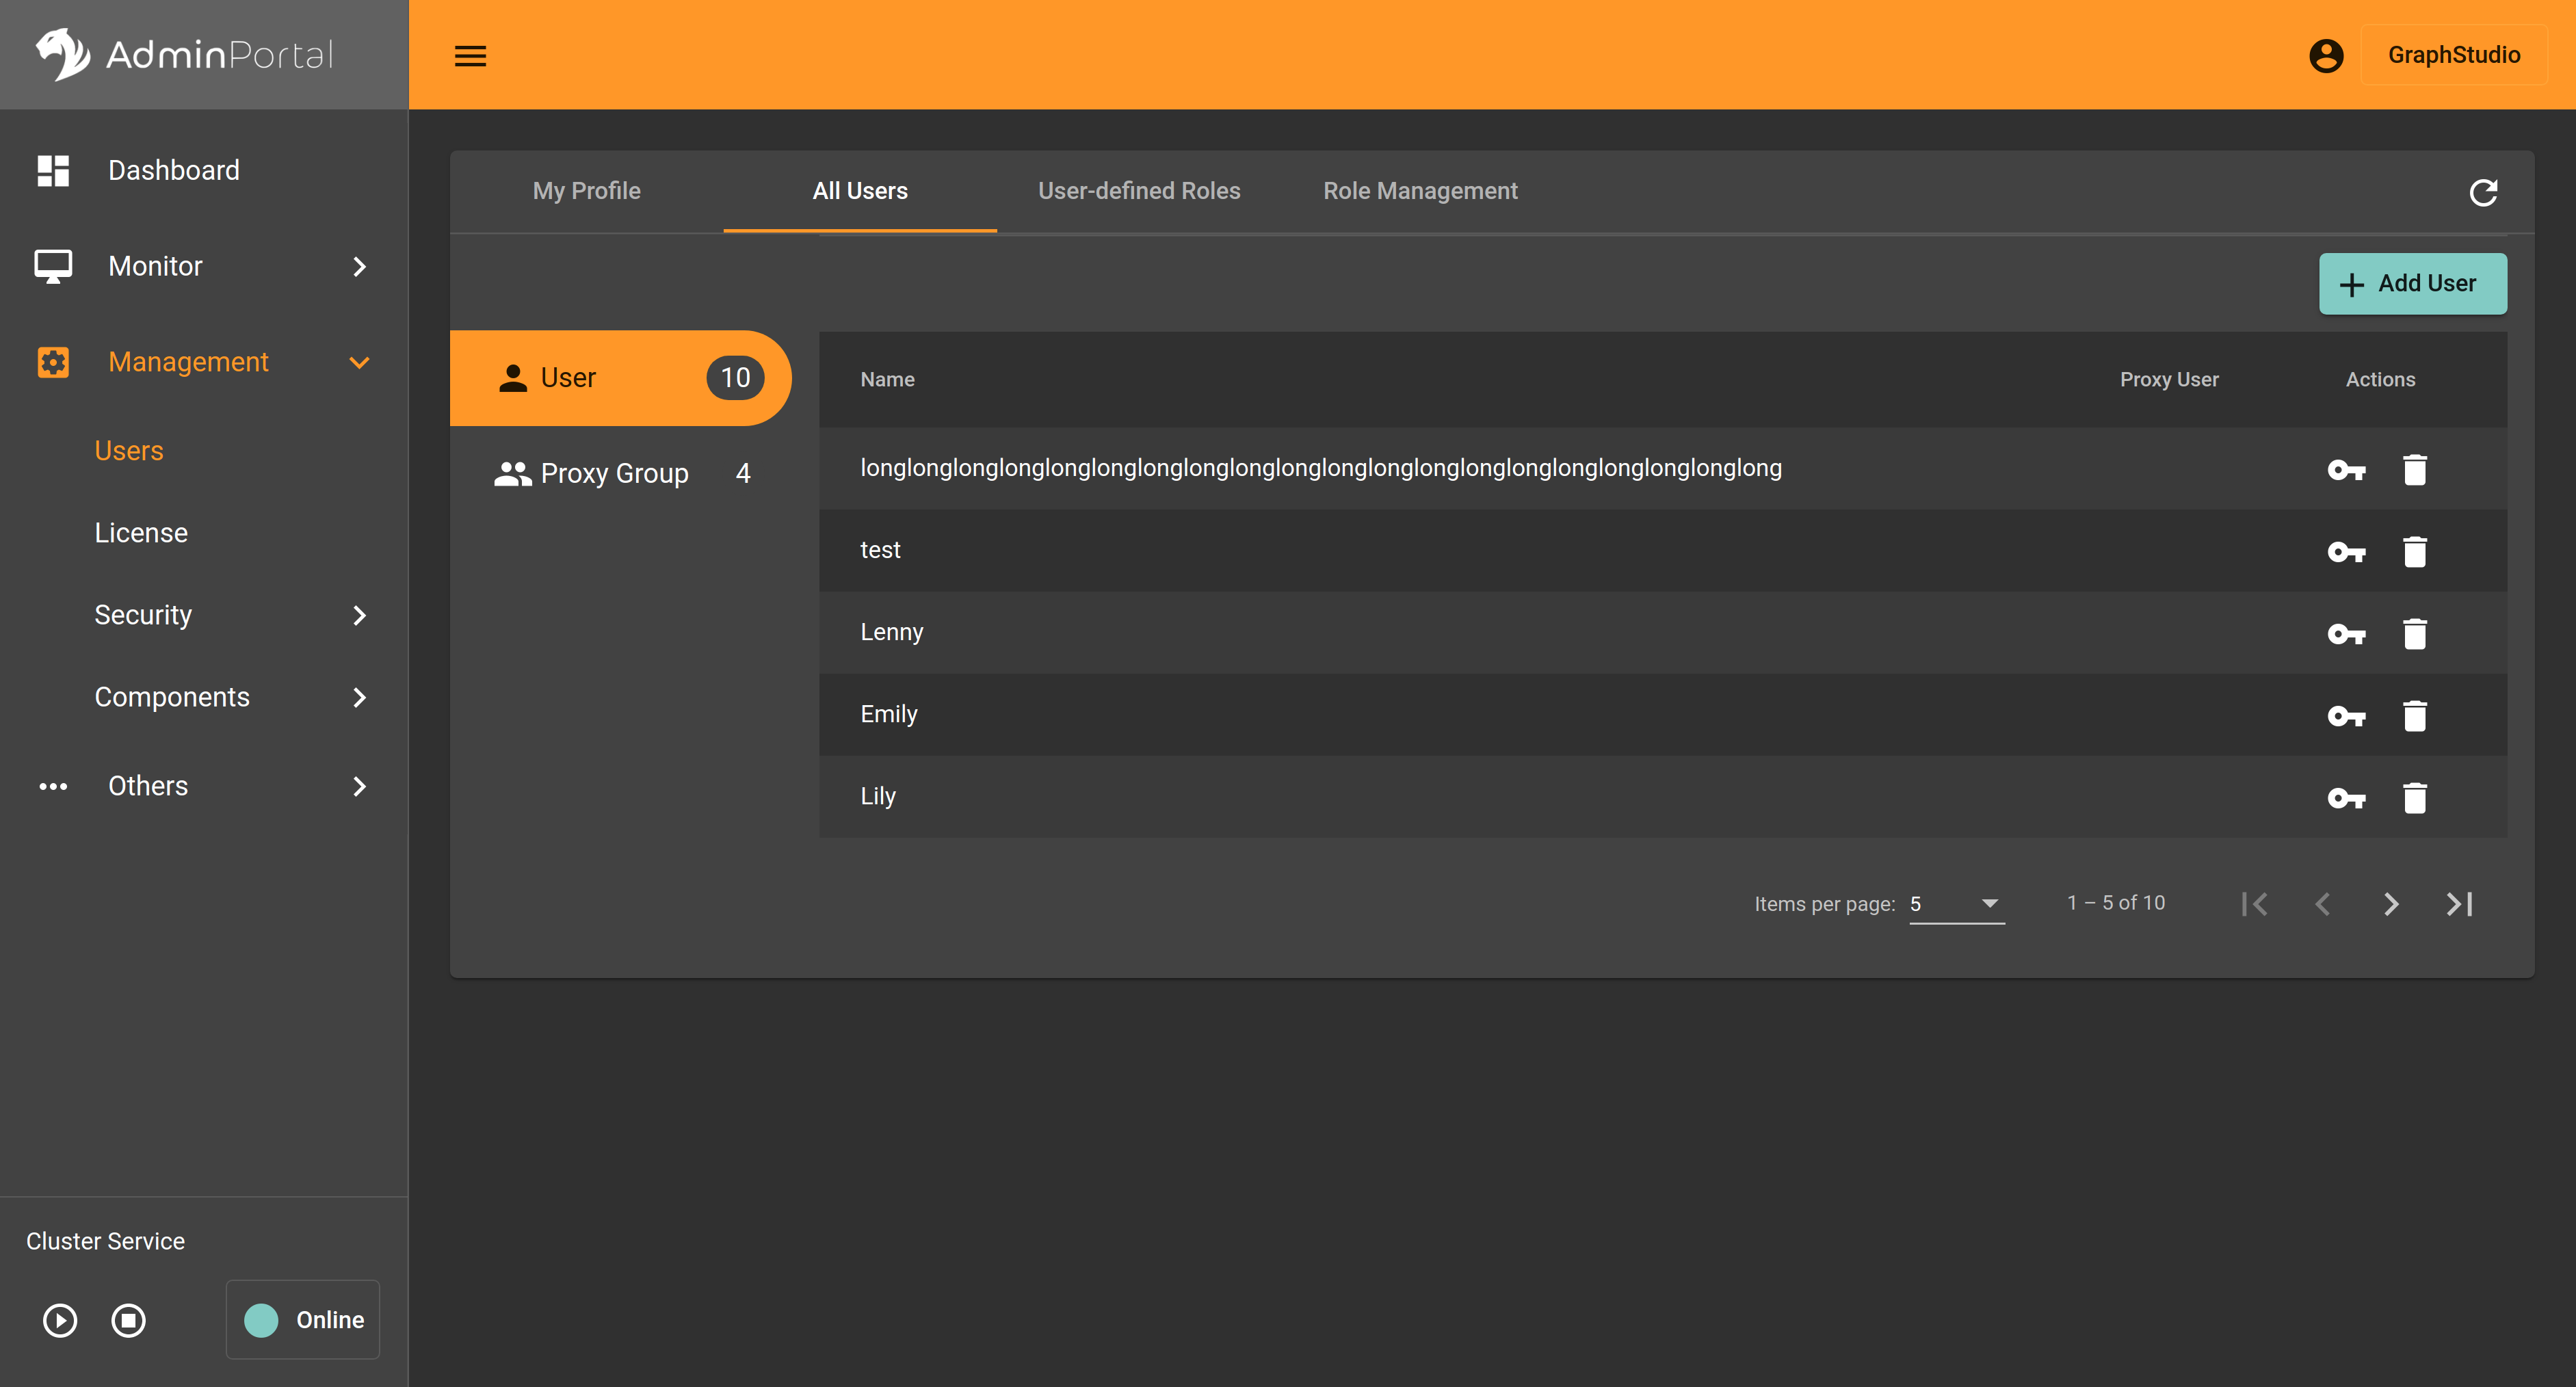
All Users
The All Users tab displays information on all users. Only users with user or proxy groups management permission can access this tab.
Users with user management permission(READ_USER, WRITE_USER privileges) can add new users, change other users' password, delete users.
Users with proxy groups management permission(READ_PROXYGROUP, WRITE_PROXYGROUP privileges) can create proxy groups, change proxy rules of the groups, and delete proxy groups.
To see a list of all privileges, see List of Privileges
|
Both native users and proxy users are displayed in the User section. However, you can only change password for native users. |
Click  to add new users:
.png)
Click  to change other users' password:
Click  to delete a user.
Click 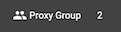 to see all proxy groups:
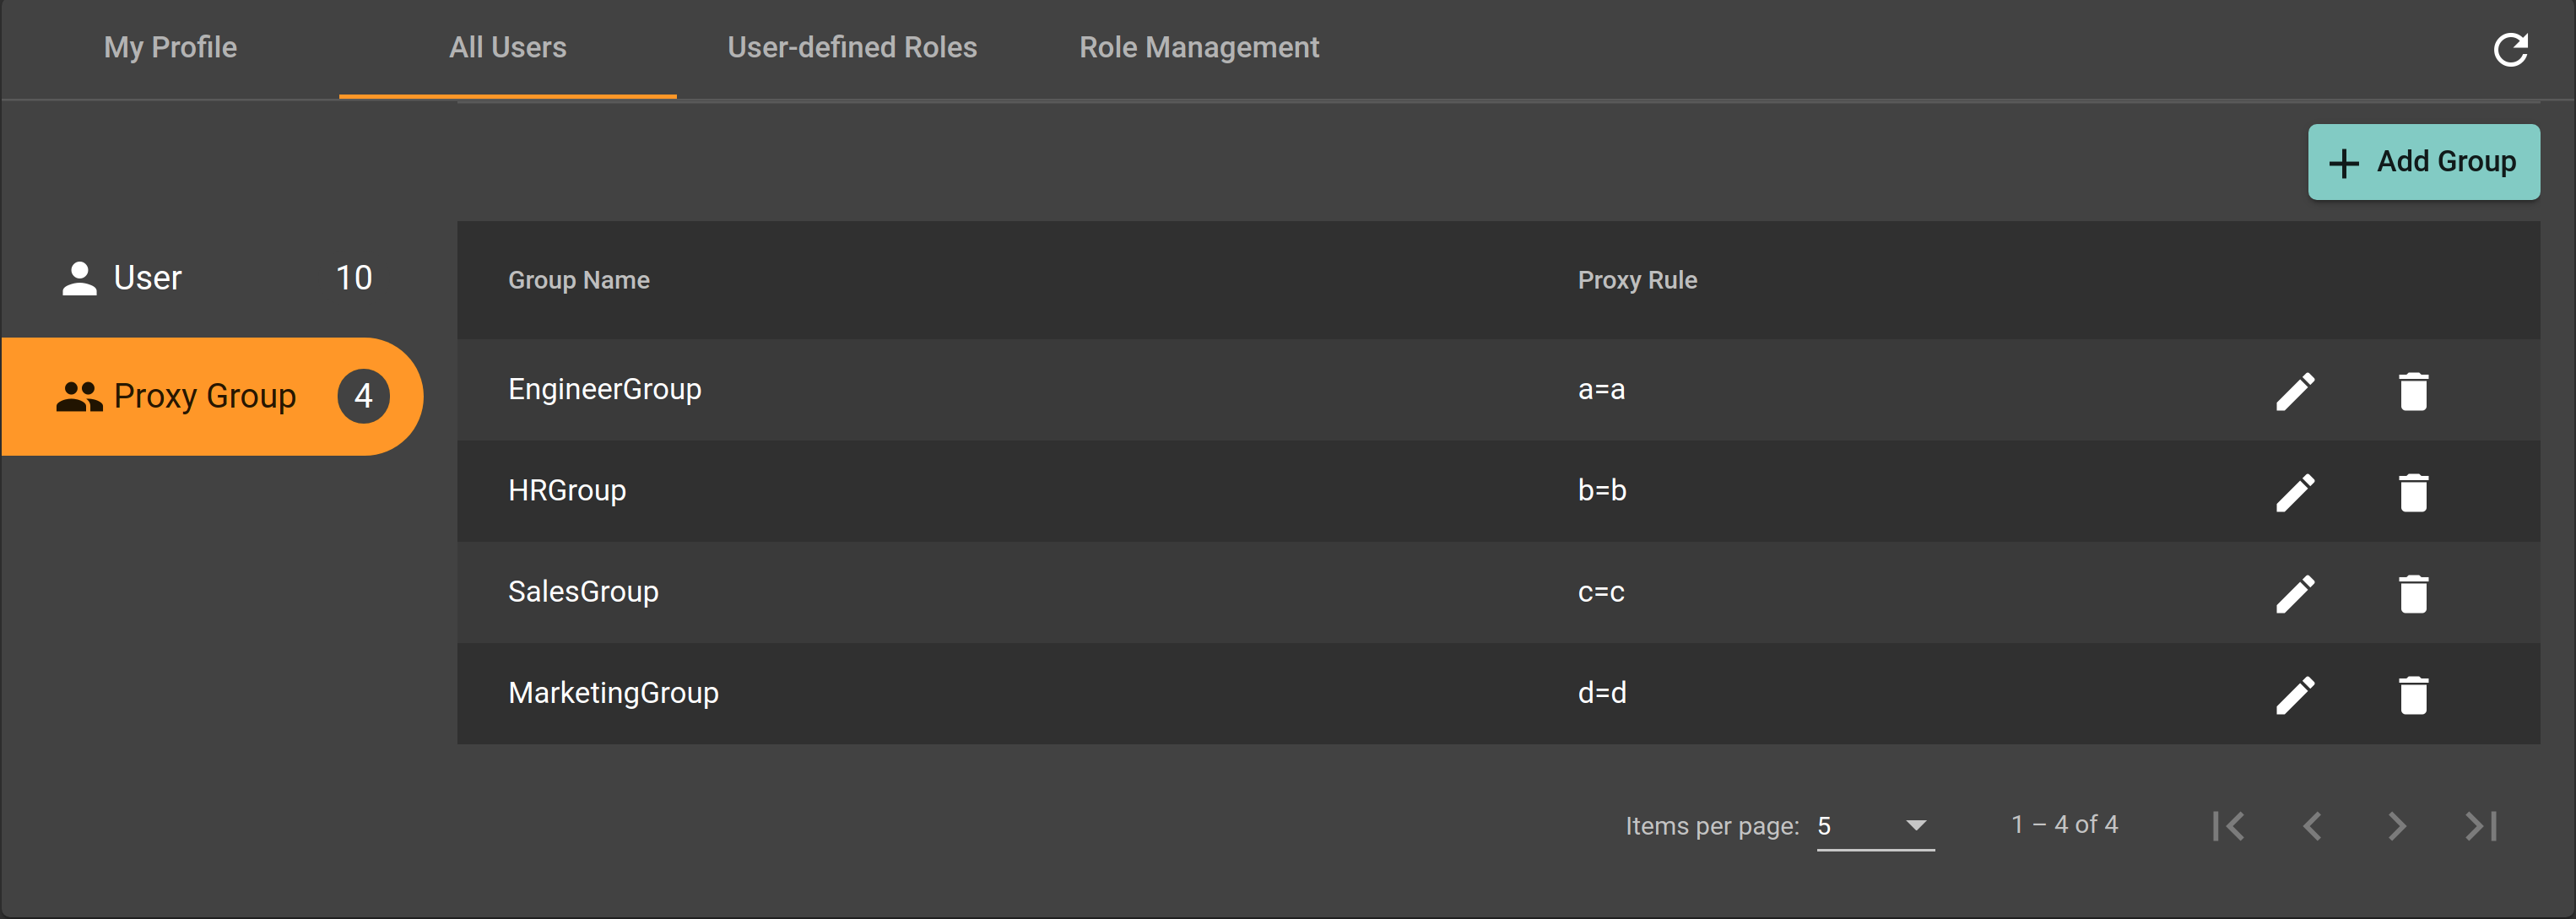
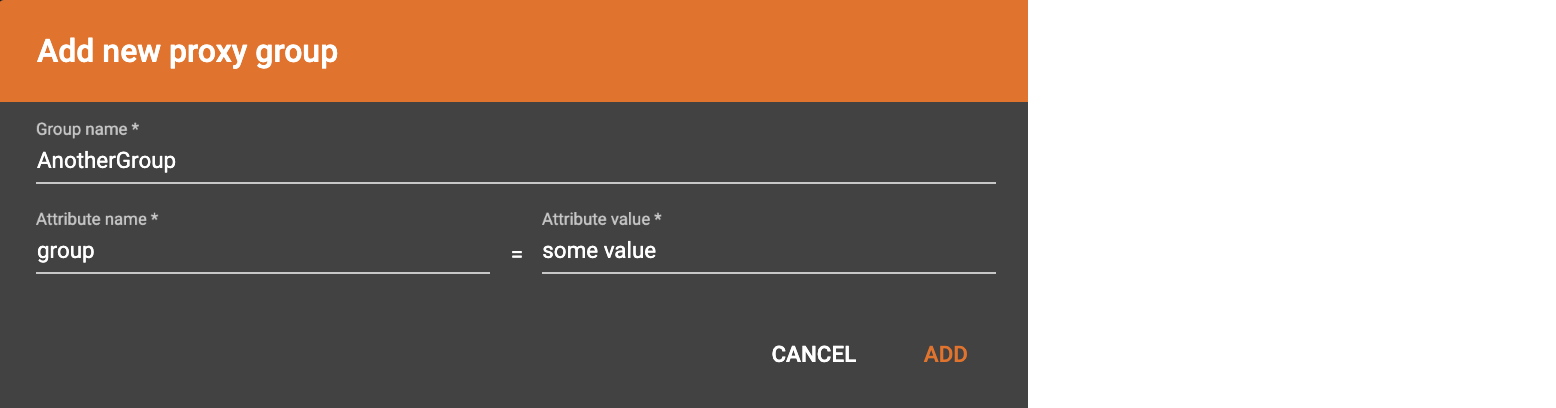
Click  to add new proxy groups:
Click  to edit the proxy rule of an existing proxy group:

Click to delete a proxy group.
Read more about proxy group at User Access Management.
User-defined Roles
The User-defined roles tab lists all user-defined roles and allows users with sufficient privileges to create roles. Users must have the READ_ROLE privilege on at least one graph to access this tab. This section describes the procedures to create, edit, and drop roles, as well as assign roles to users in GraphStudio.
To learn more about roles and privileges in TigerGraph’s role-based access control system, see User Access Management.
To create/edit/delete a role, a user must also have WRITE_ROLE privilege on that graph. See more details in Roles and Privileges
At the right upper corner, there is a hint button  . Click the button and jump to the official roles and privileges documentation to read more about roles and privileges.
All user-defined roles that you can view will list in a table:
. Click the button and jump to the official roles and privileges documentation to read more about roles and privileges.
All user-defined roles that you can view will list in a table:
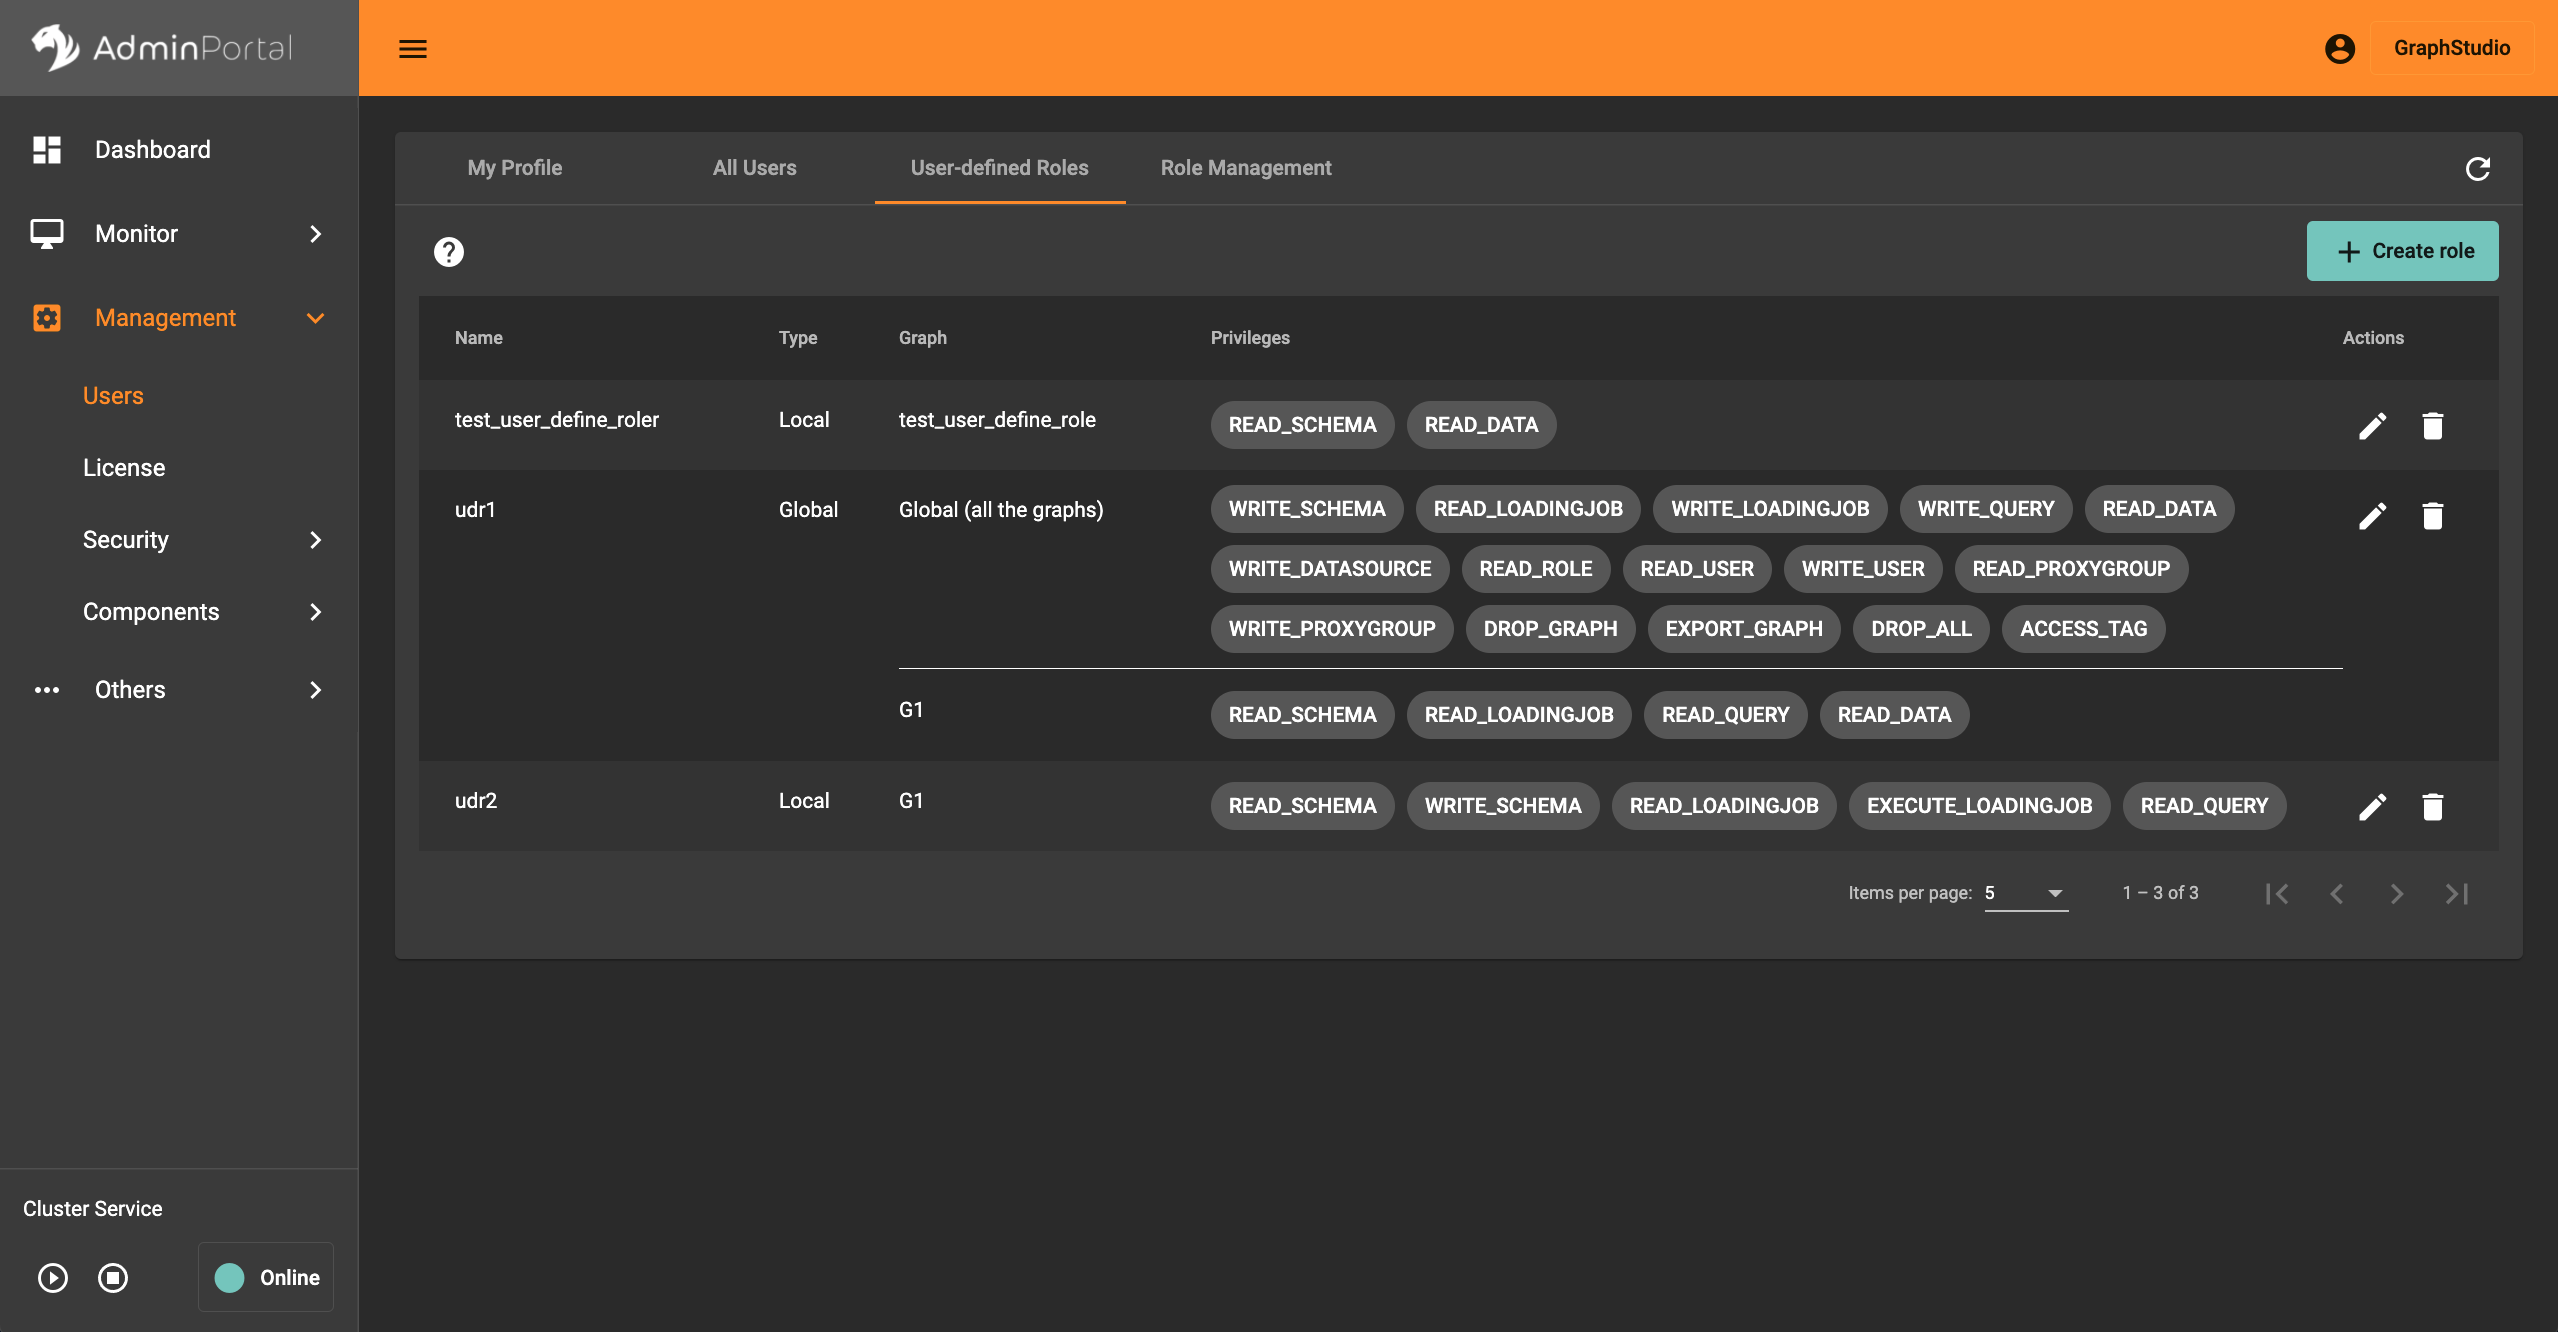
Each row shows one role along with the privileges it contains. For global roles, all privileges on either global level or a specific graph will be listed.
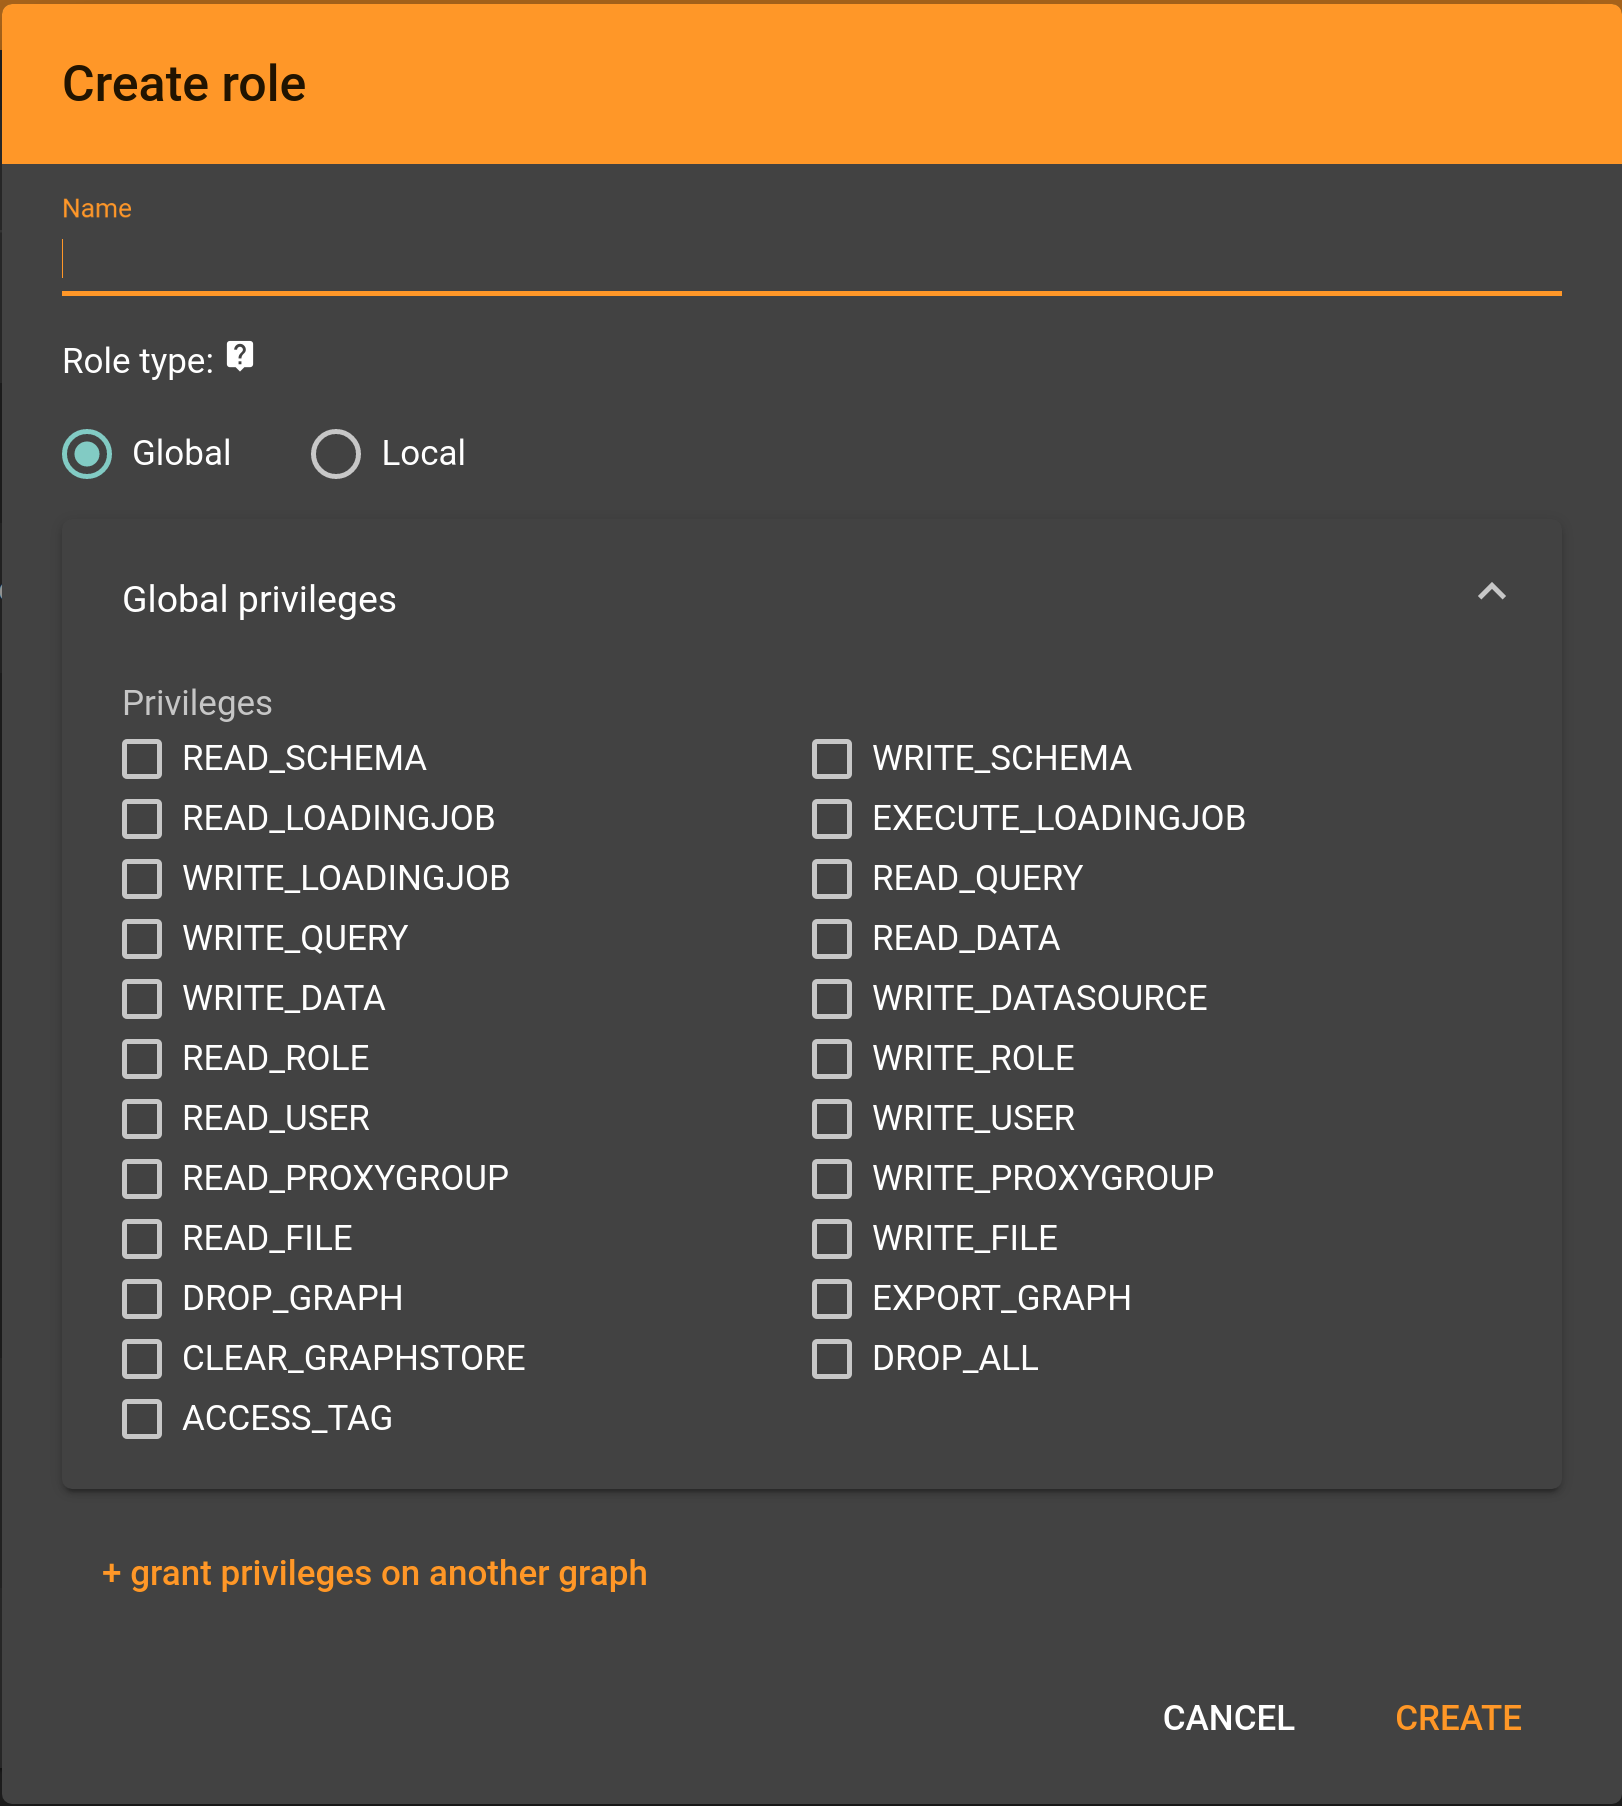
Create a user-defined role
Click  at the right upper corner to create a role.
You can either choose to create a global or a local role on a graph.
at the right upper corner to create a role.
You can either choose to create a global or a local role on a graph.
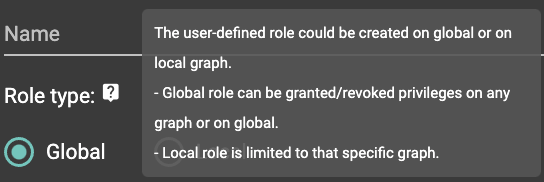
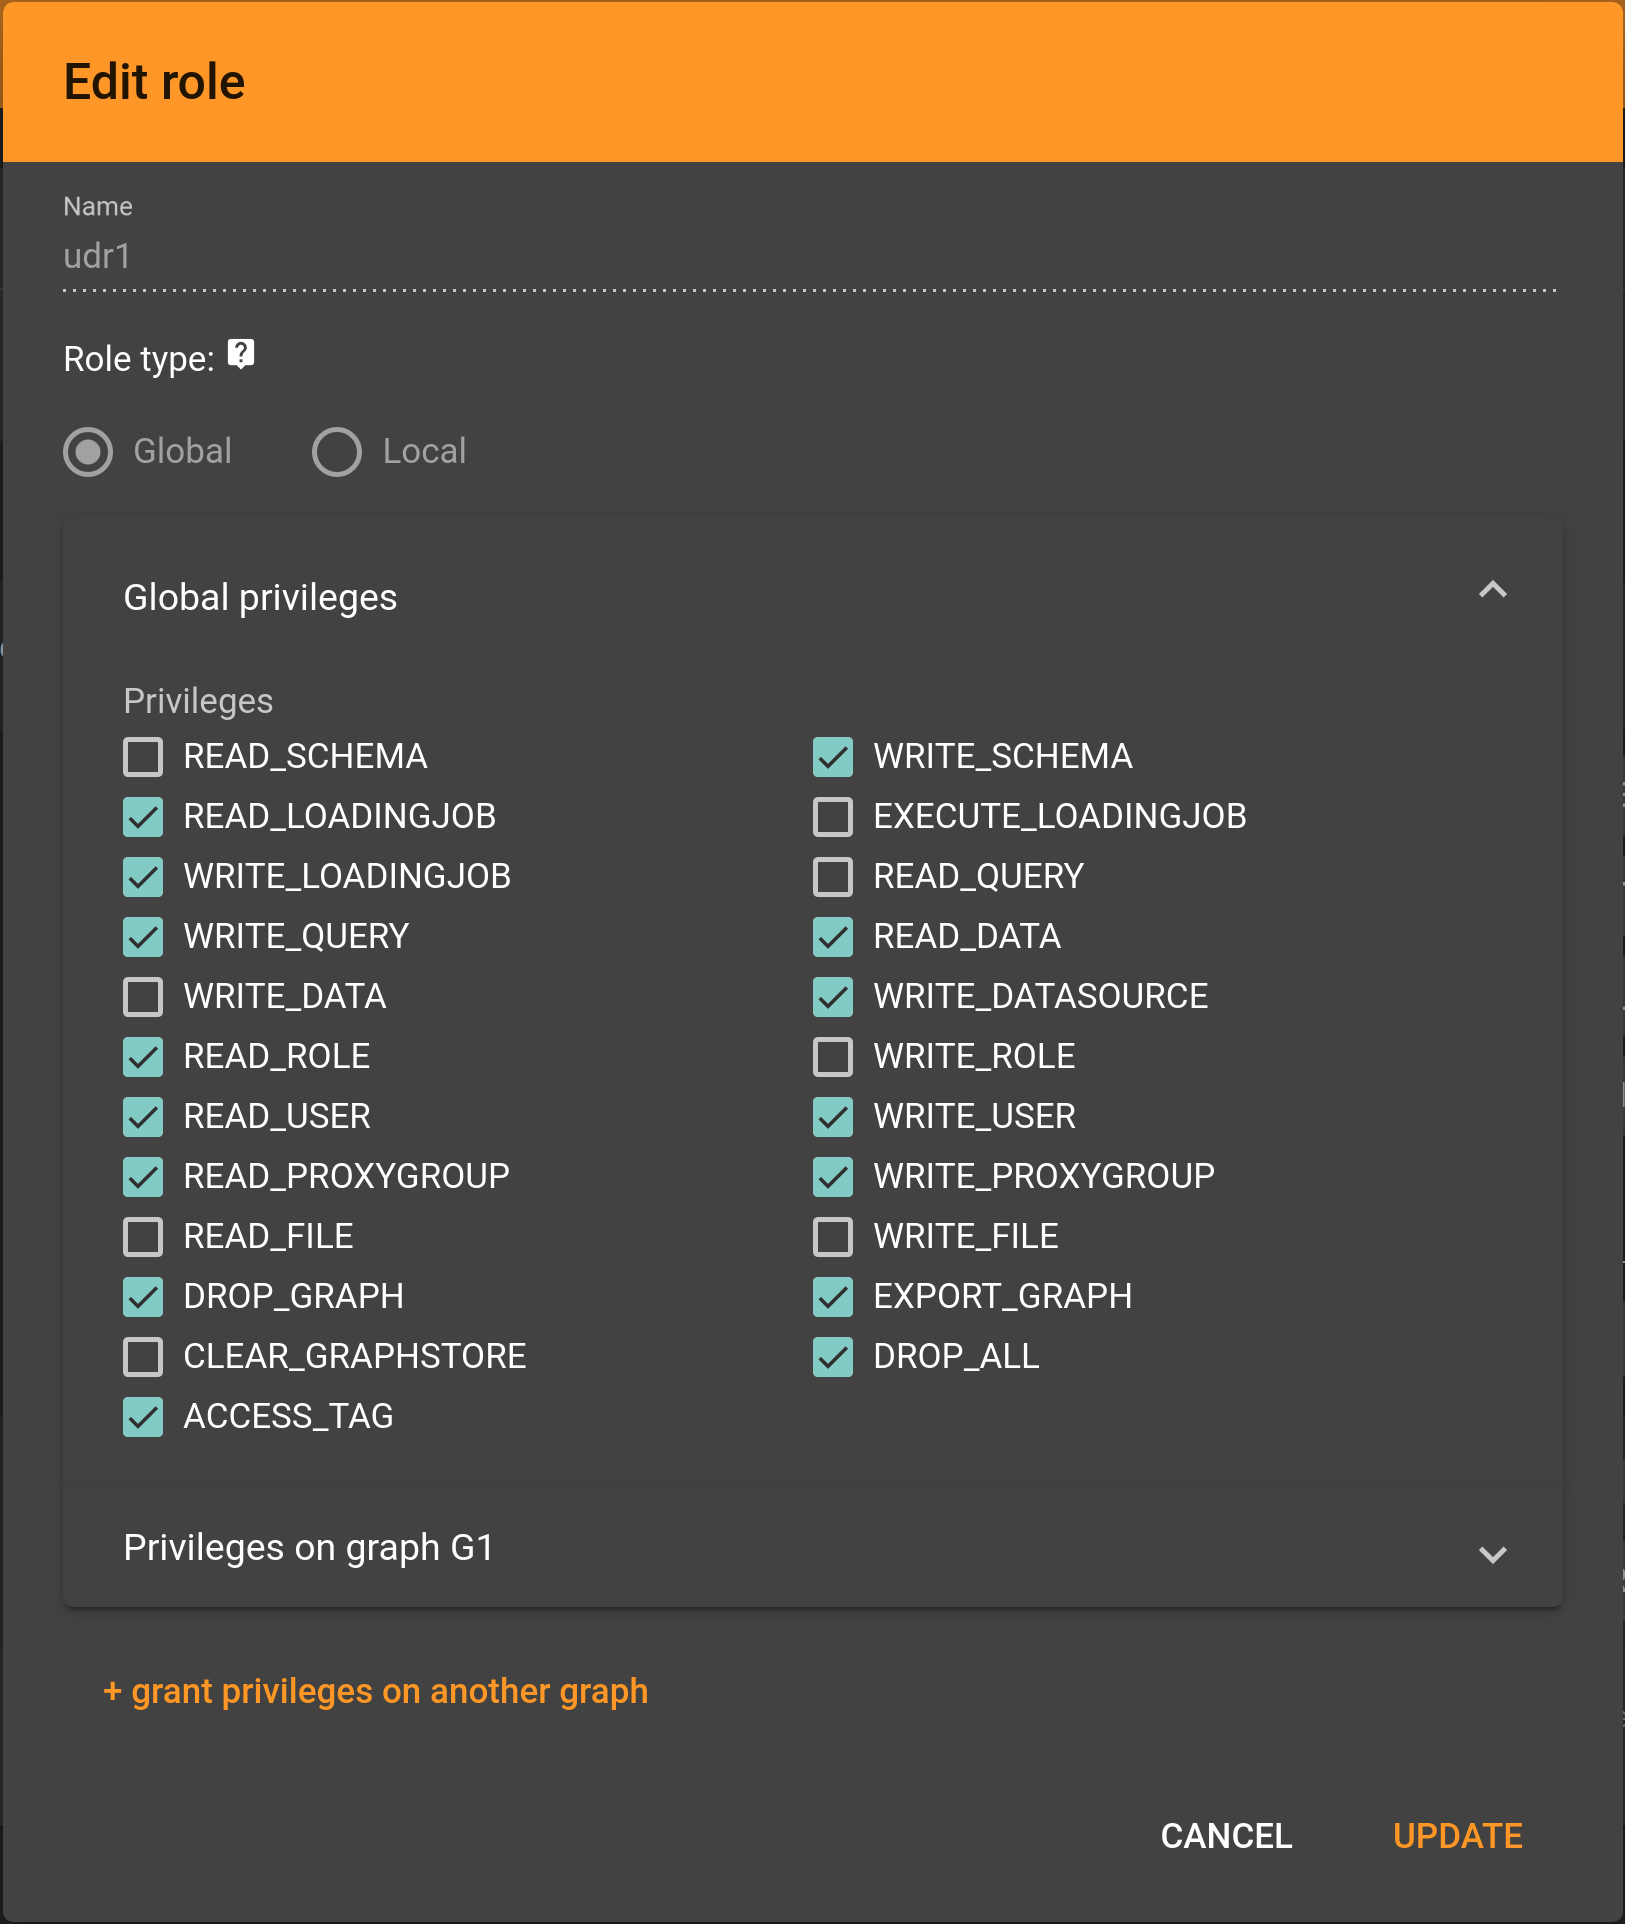
Create a global role
Select  to start creating a global role. The first panel is for the global privileges, where you can select global level privileges to assign to this role.
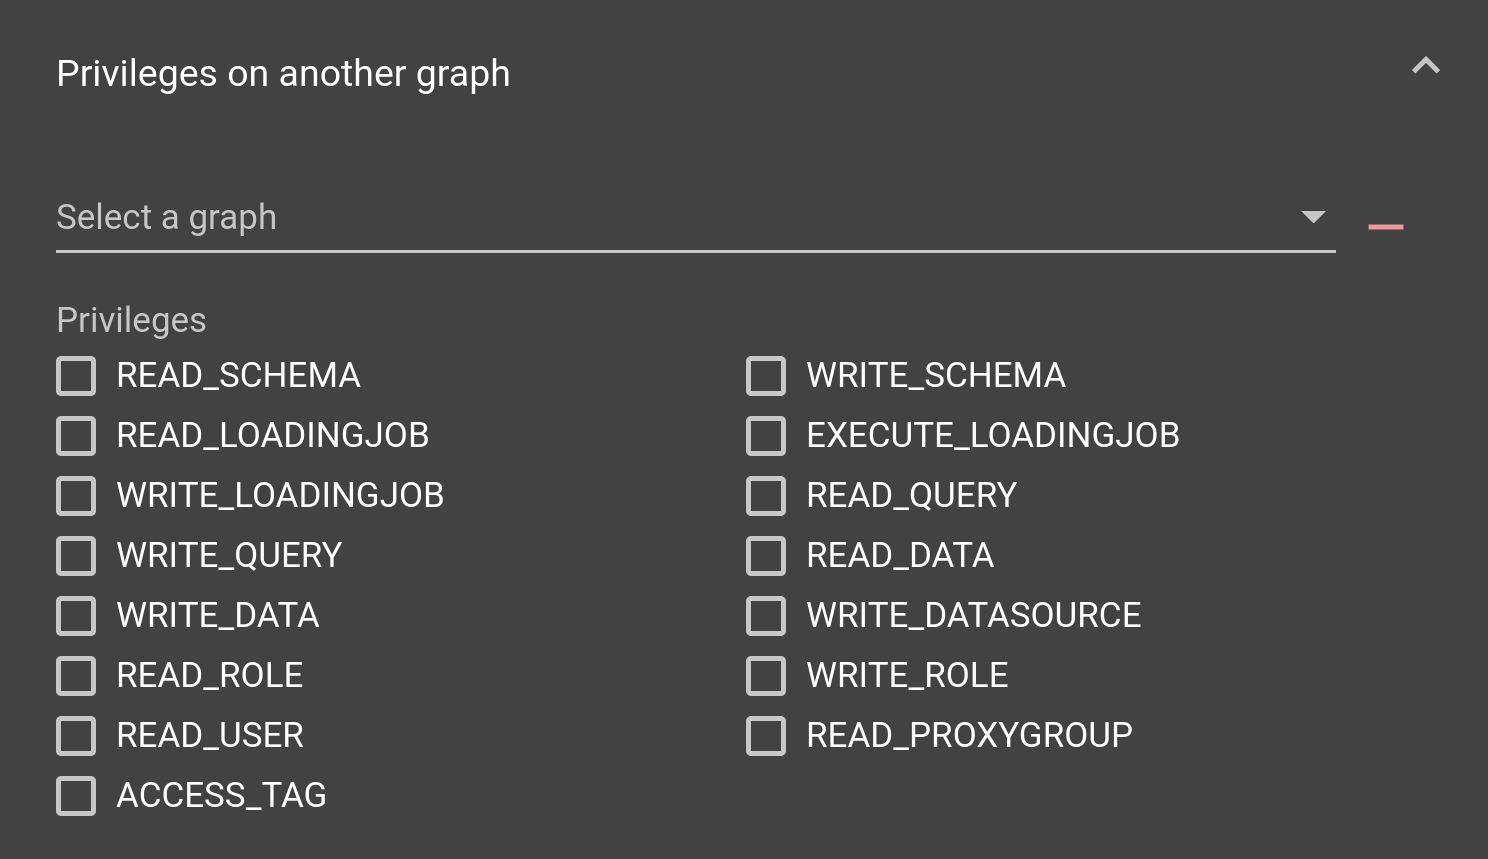
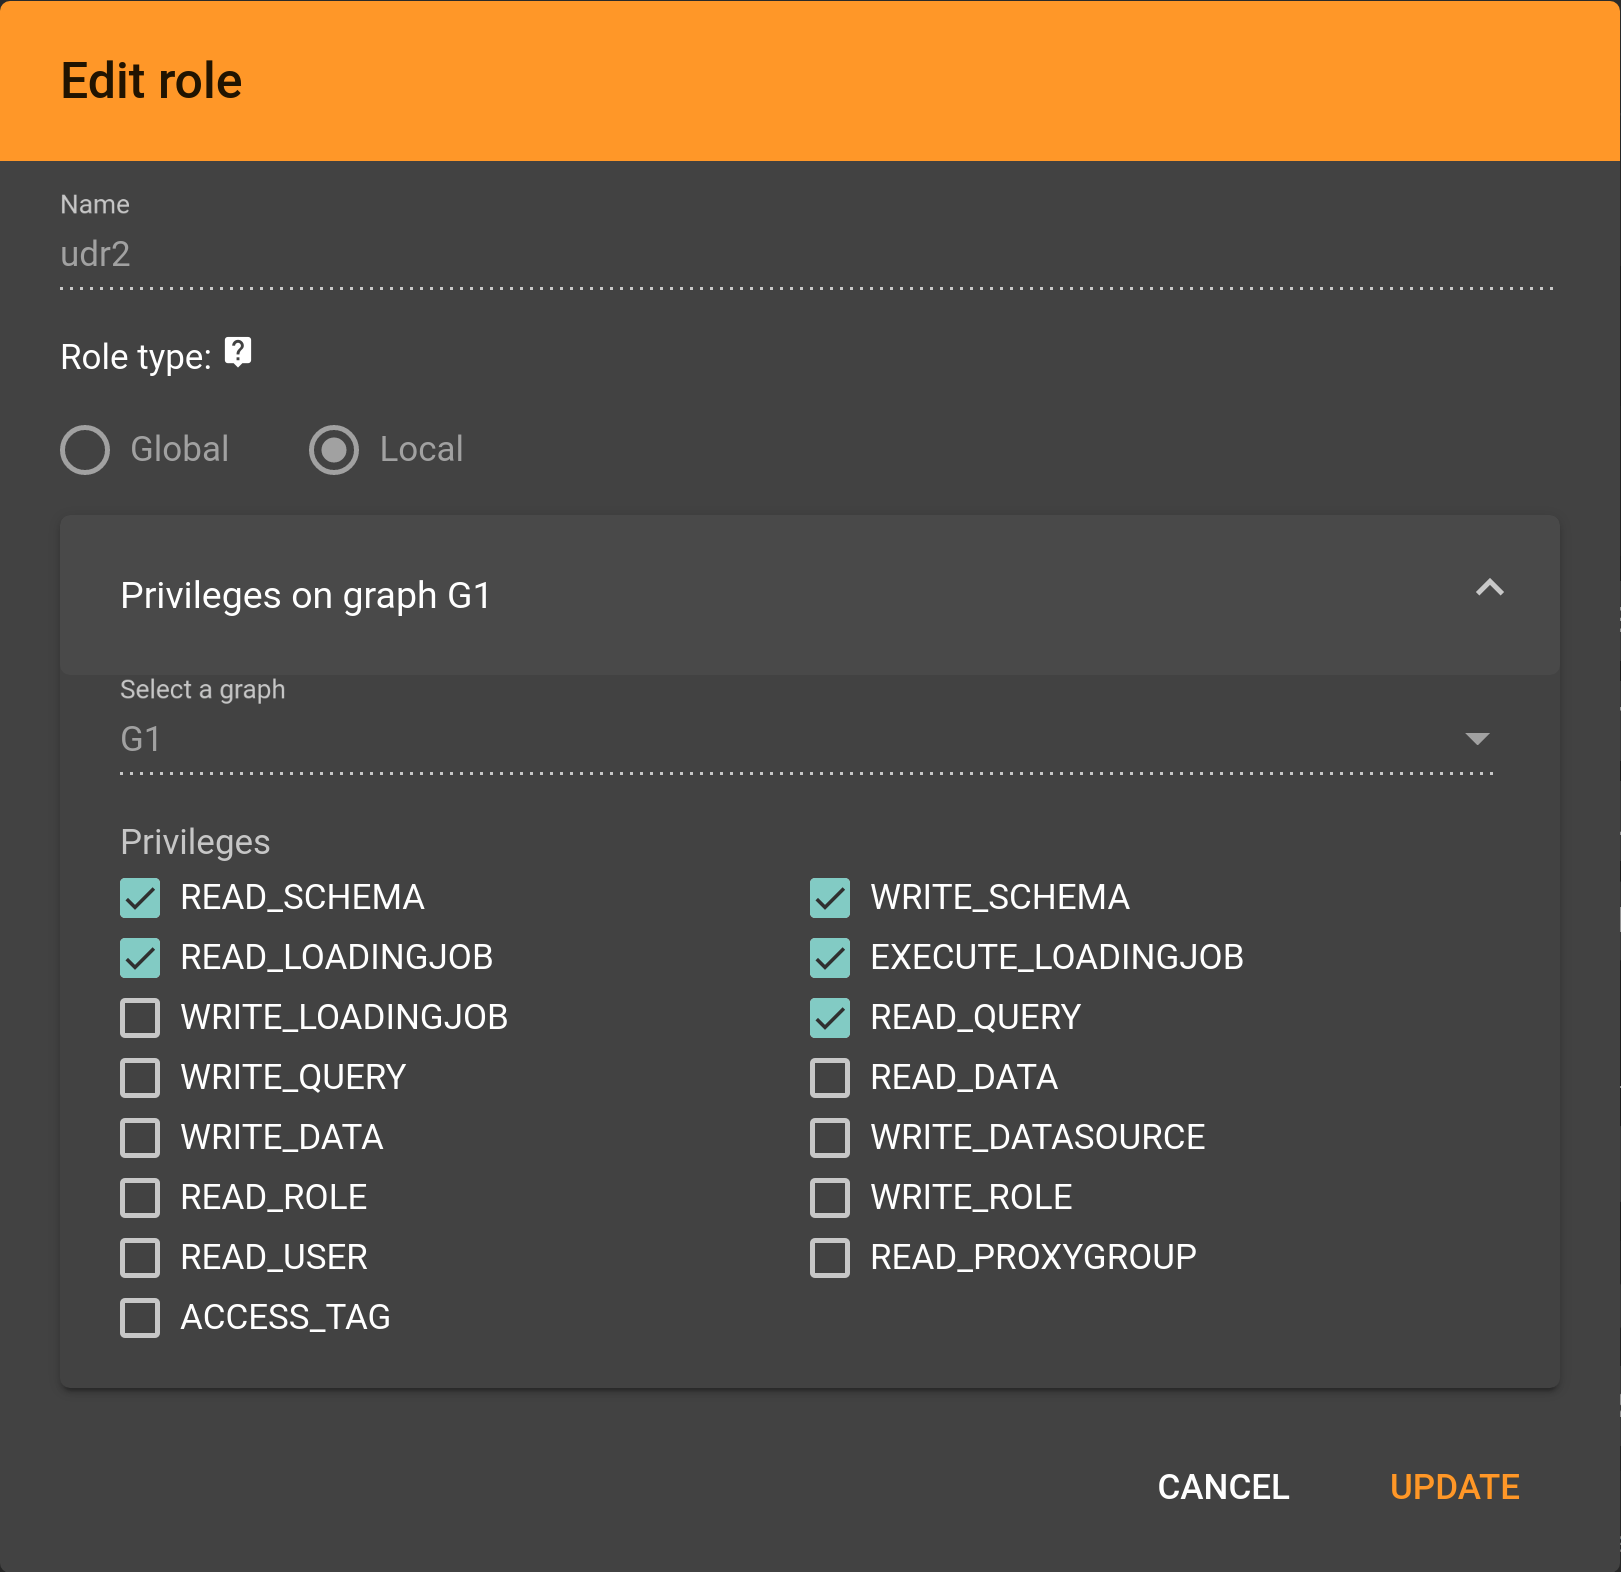
Click  at the bottom of the pop-up window to reveal the privileges panel for local privileges.
Select a graph first in the dropdown menu, then grant local privileges on that graph.
You can also click
at the bottom of the pop-up window to reveal the privileges panel for local privileges.
Select a graph first in the dropdown menu, then grant local privileges on that graph.
You can also click  to remove the graph that you want to add privileges on.


Role Management
In the Role Management tab, users can view the role assignment of users, assign roles to users, and revoke roles from users. Users must have the READ_ROLE privilege along with the READ_USER or READ_PROXYGROUP privilege on at least one graph to access this tab.
|
Admin Portal does not indicate whether a user belongs a proxy group. You can find out more from GSQL client. Admin Portal shows a combination of roles for proxy users. Proxy user which belongs to a proxy group inherits all the roles from the proxy group plus all the roles the proxy user has. Therefore, if you want to revoke a role from a proxy user, you need to revoke the role from the proxy group first. Then you might need to revoke the same role from the proxy user if the proxy user also has that role. |
To assign roles, users need to have WRITE_ROLE privilege.
If you only have READ_ROLE privilege, you can only view the current assignment but can not modify it.
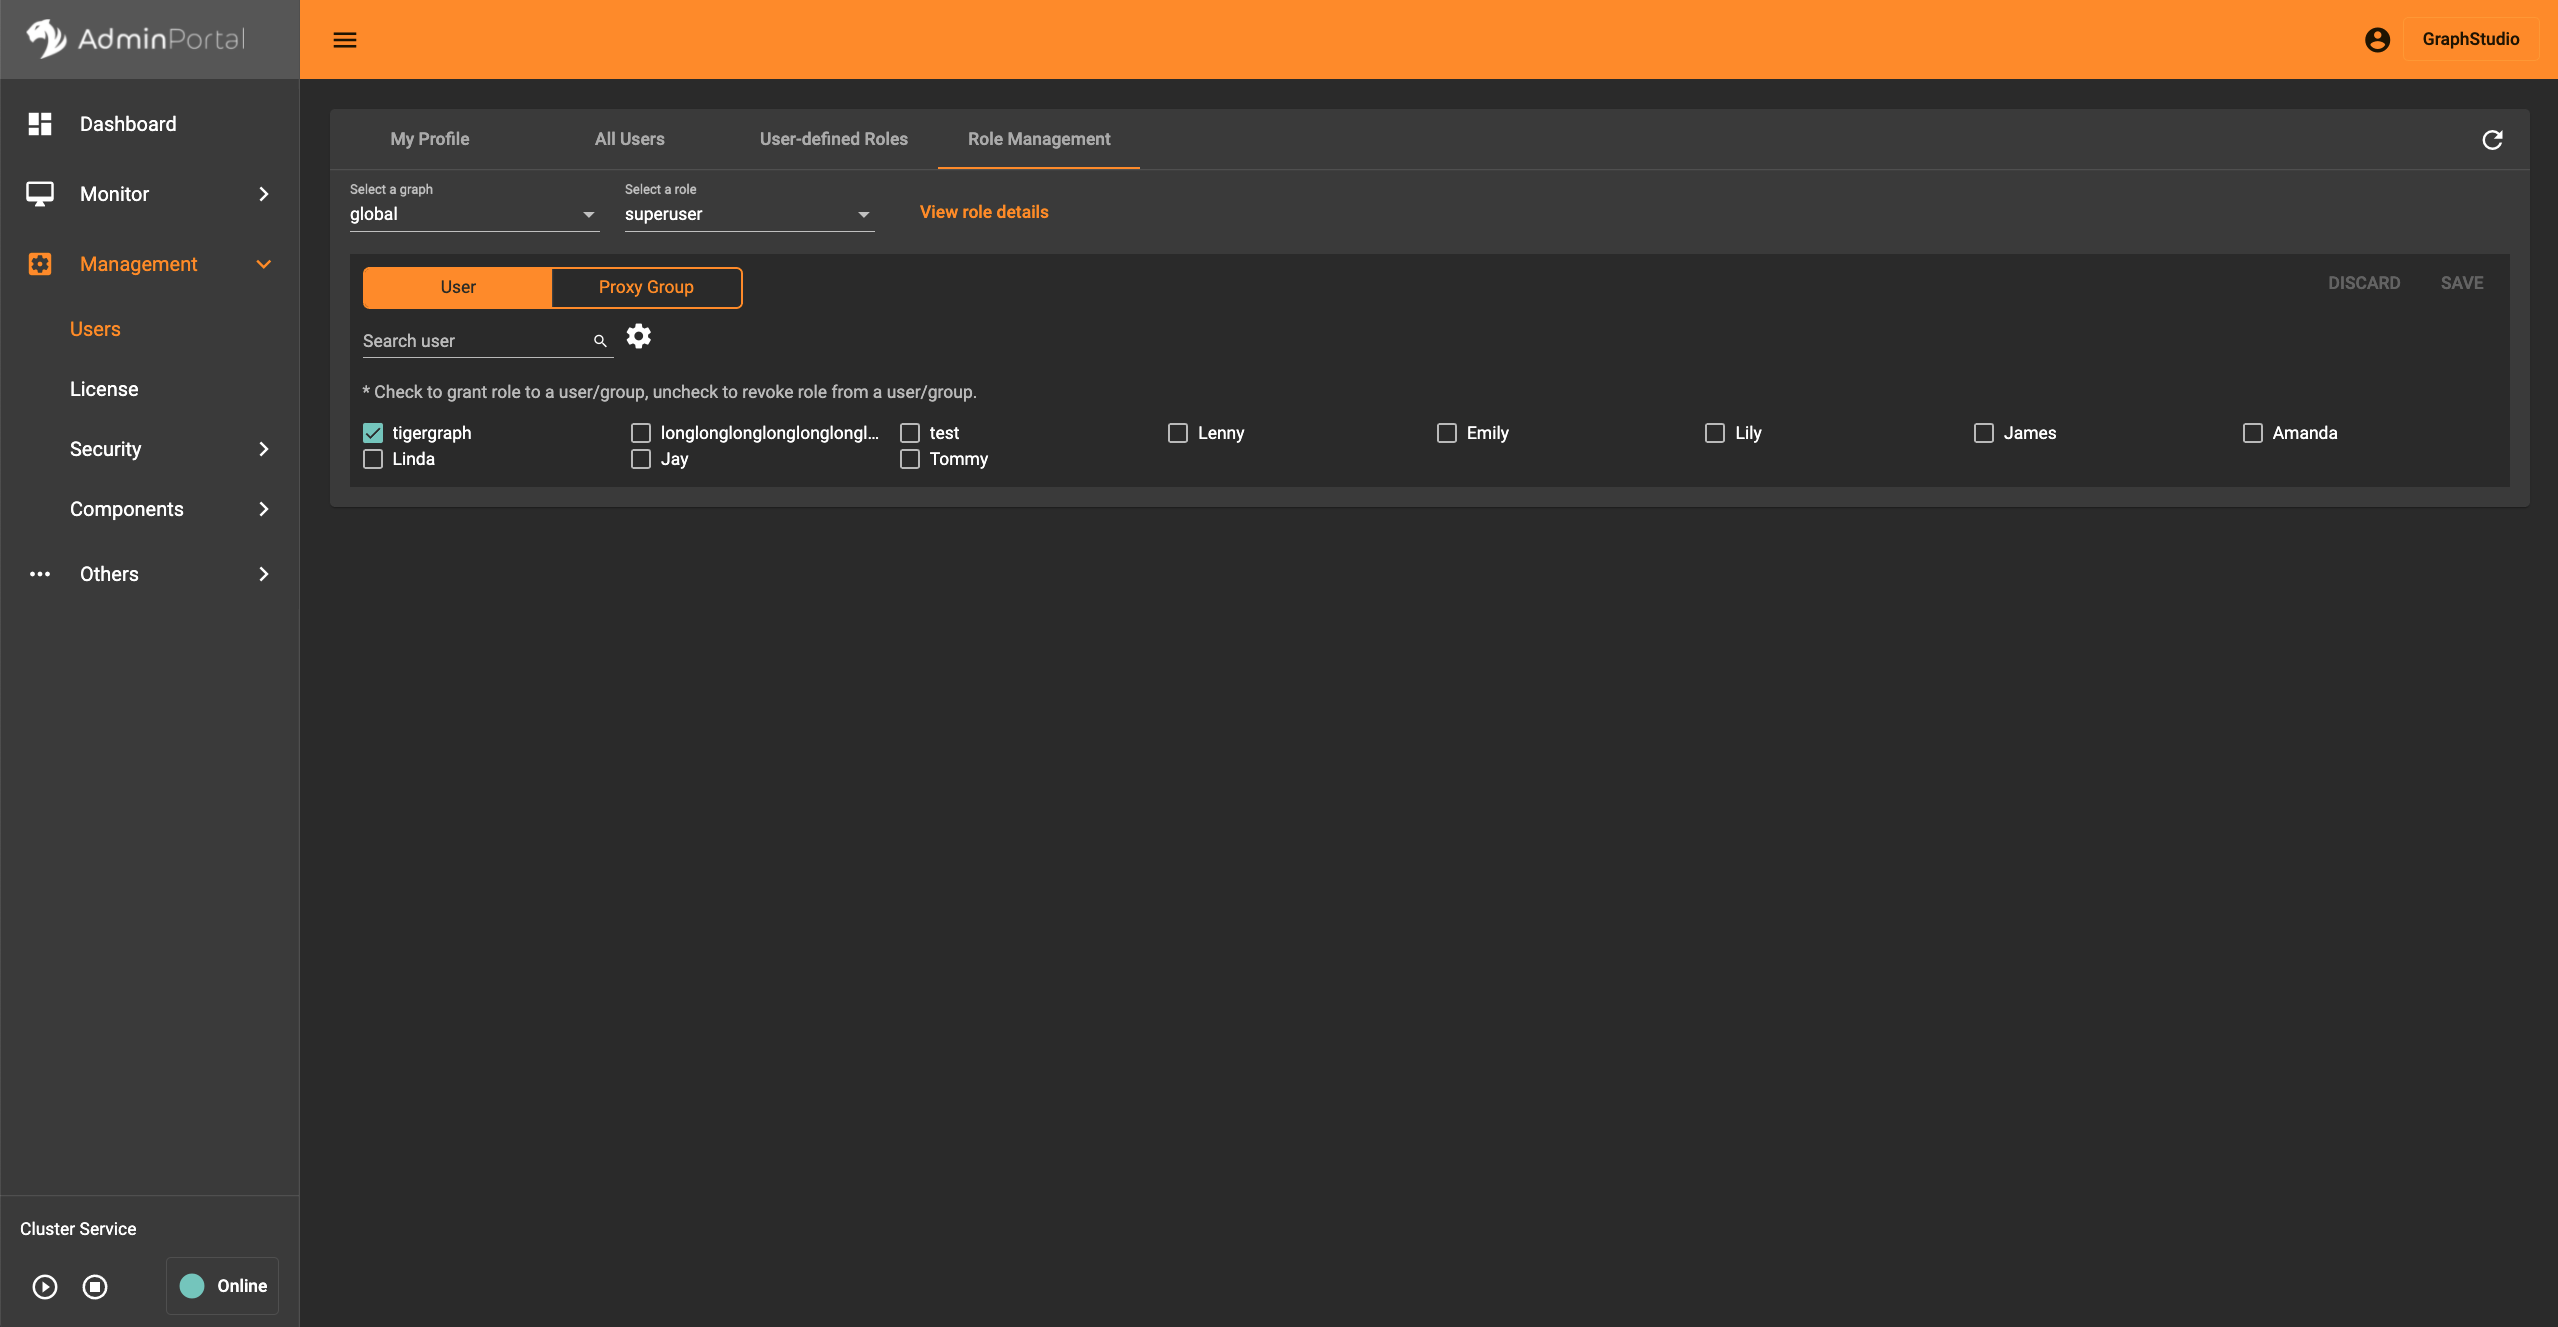
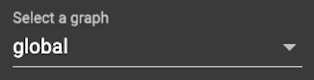
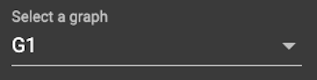
Select a graph
You can use the dropdown menu in the top left corner to select on which graph you want to assign different roles to different users, you can either choose global to assign global roles or a specific graph to assign local roles:
Select a role
You can use the second dropdown menu to select a role that you want to assign to different users:
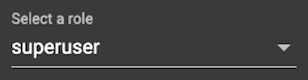
With global selected, you can assign all global built-in or user-defined roles.
With a specific graph selected, you can assign all local built-in roles or local user-defined roles within that graph.
|
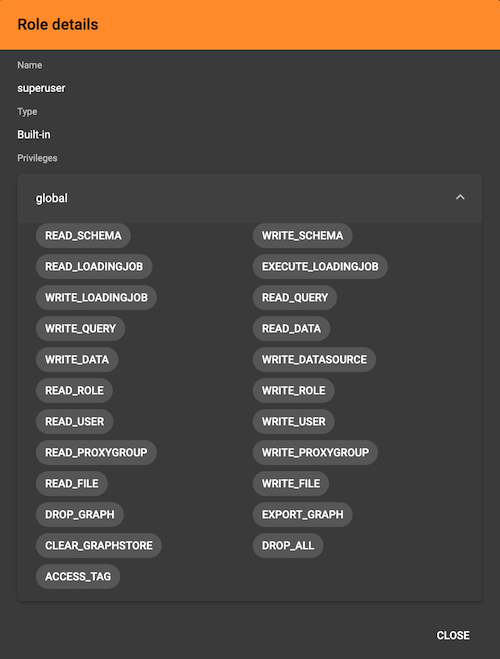
View role details
Next to the dropdowns, click the View role details button  to view the information on the selected role.

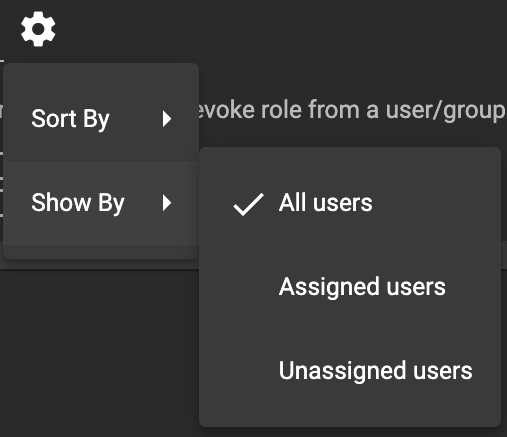
Settings for users
You can sort the users by alphabetic order or name length:
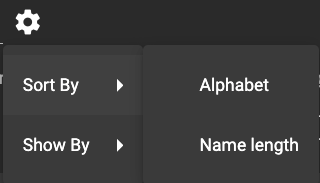
You can choose to show all users, show the users who have the role, or show the users who don’t have the role:
Grant/revoke a role
On a small screen, you need to click  to open the assignment panel. to open the assignment panel.
|
Once you’ve selected a graph and a role, all users will be listed with a checkbox. You can check the box next to the user to grant the role, or uncheck to revoke the role.

After modifying your assignment, click  to save your changes.
You can also discard your changes by clicking the discard button
to save your changes.
You can also discard your changes by clicking the discard button 

Similarly, you can also click the proxy group button .png) to switch to proxy groups and manage their roles.
to switch to proxy groups and manage their roles.

|
If you have made changes to users through GSQL after opening the user management page, click the refresh button in the top right corner to reflect the changes in Admin Portal. |