Set up VN Peering on Azure
This is a guide for setting up a Virtual Network (VN) peering connection between the TigerGraph Cloud VN and another Azure VN.
2. Procedure
2.1. Choose the Azure VN to initiate peering from
Log into the cloud portal and navigate to the Network tab on the left. Click Initiate VPC peering.
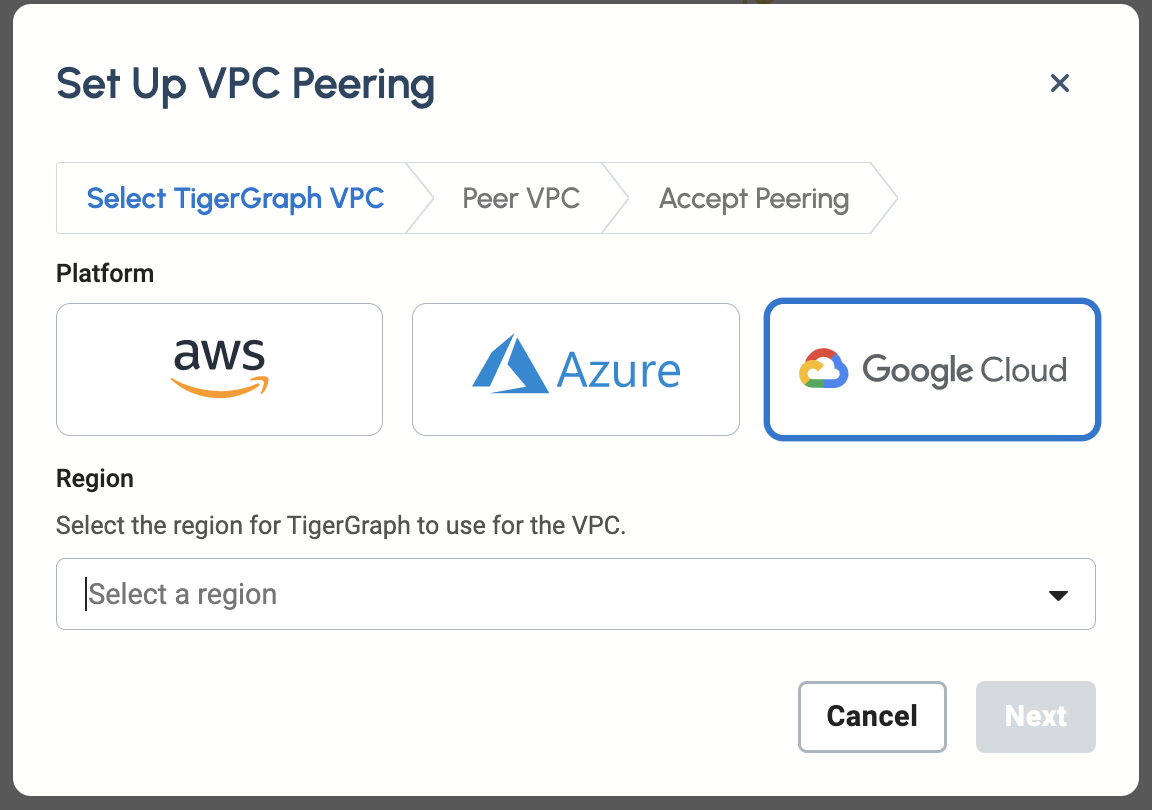
Choose Azure as your network platform. Then choose the region of the platform you want to initiate the peering connection from. Click Next.
2.2. Add TigerGraph Cloud to your Azure tenant
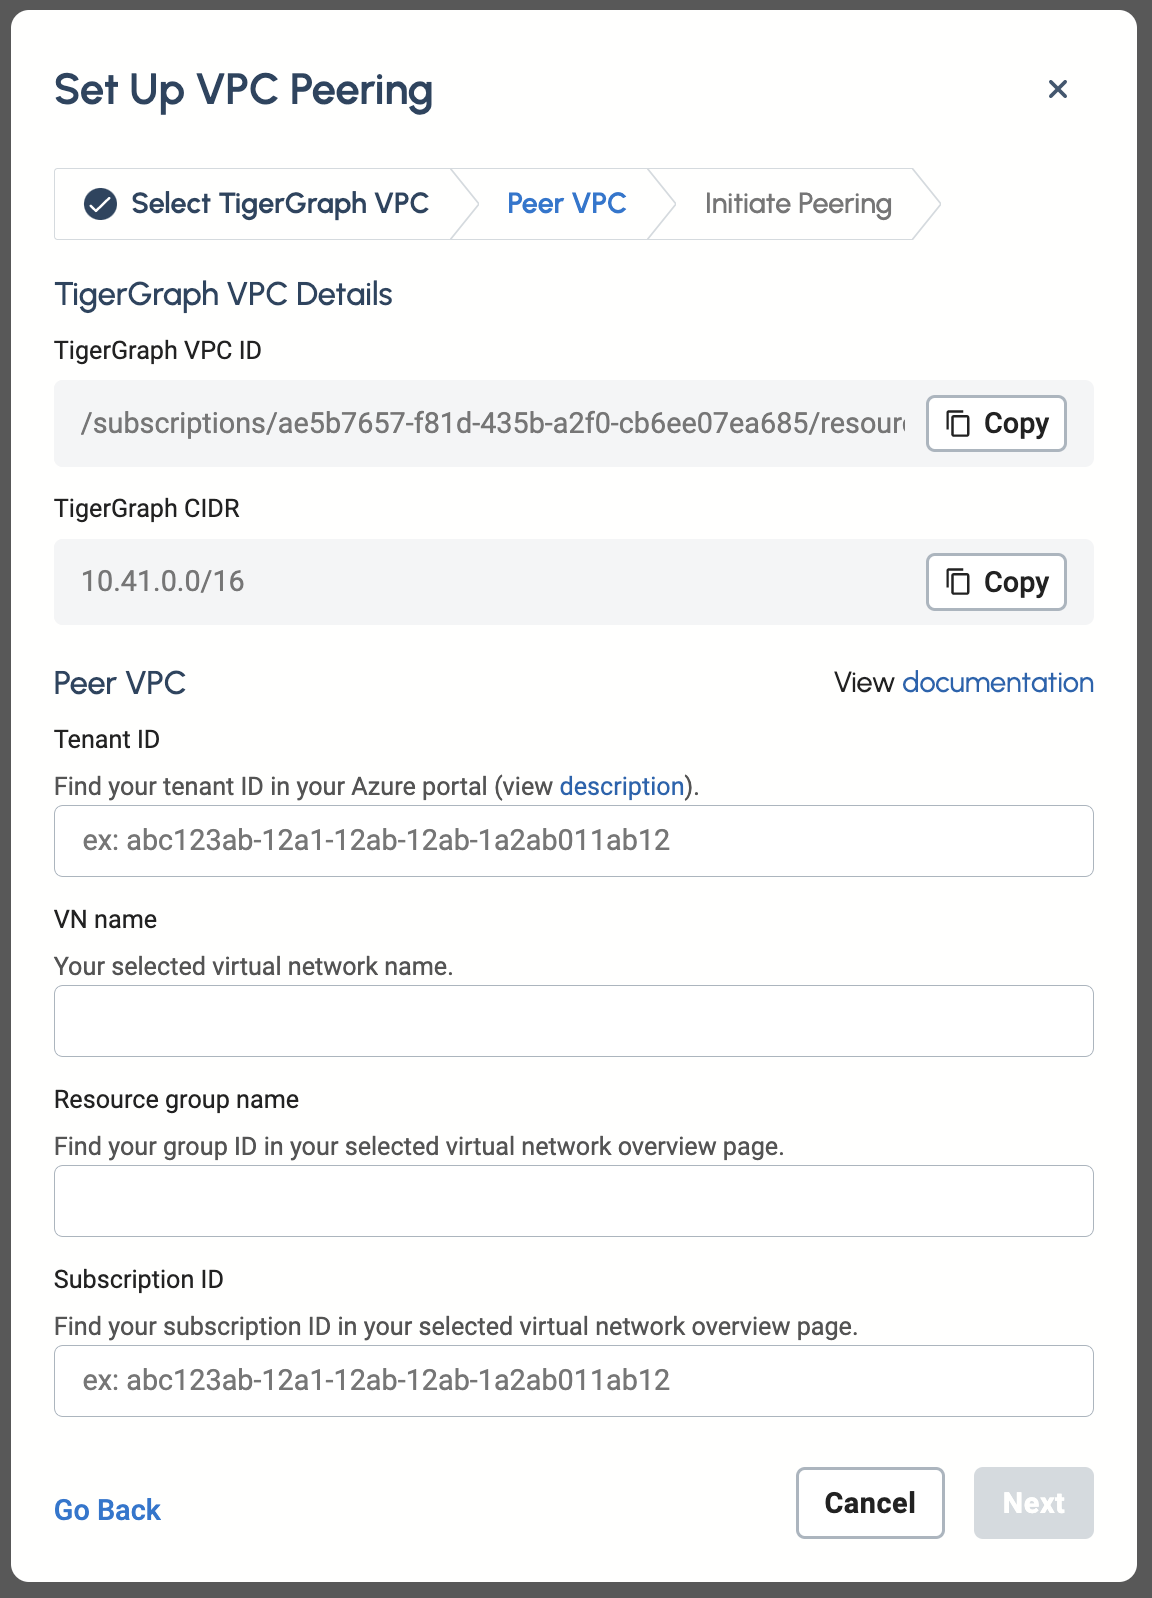
In the Peer VPC tab, fill in your Azure tenant ID, your VN name, your resource group ID, and your Subscription ID as well. Click Next.
Click on the link in the instructions to add TigerGraph Cloud to your tenant. Doing so opens a new tab, and if authorization is successful, it will redirect you back to the cloud portal. You can now safely close this tab.
2.3. Assign Network Contributor role to TigerGraph Cloud VN Peerer
From the Azure portal, navigate to Virtual Networks and choose the network you are peering with. Then navigate to .
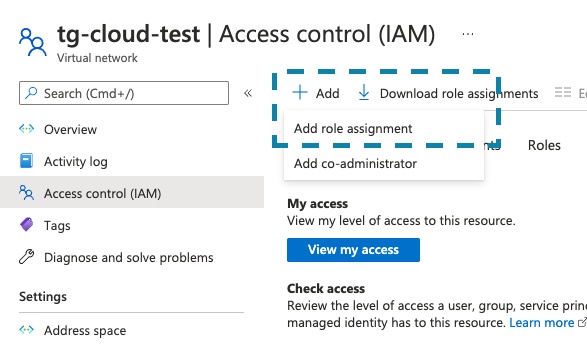
From the list of roles, choose Network Contributor. Click Next.
Click Select Members and search for TigerGraph VN Peerer. Select and click Review + assign. You’ll see a notification if the role assignment is successful.