Azure Private Link
This page describes the setup process for Azure Private Link, a Microsoft service that securely connects a Virtual Network (VN) to Azure APIs without creating an external IP address. You need an Azure account to use this feature.
Azure General Workflow
-
Begin creating a paid-tier TigerGraph Cloud cluster in a region that supports private access.
-
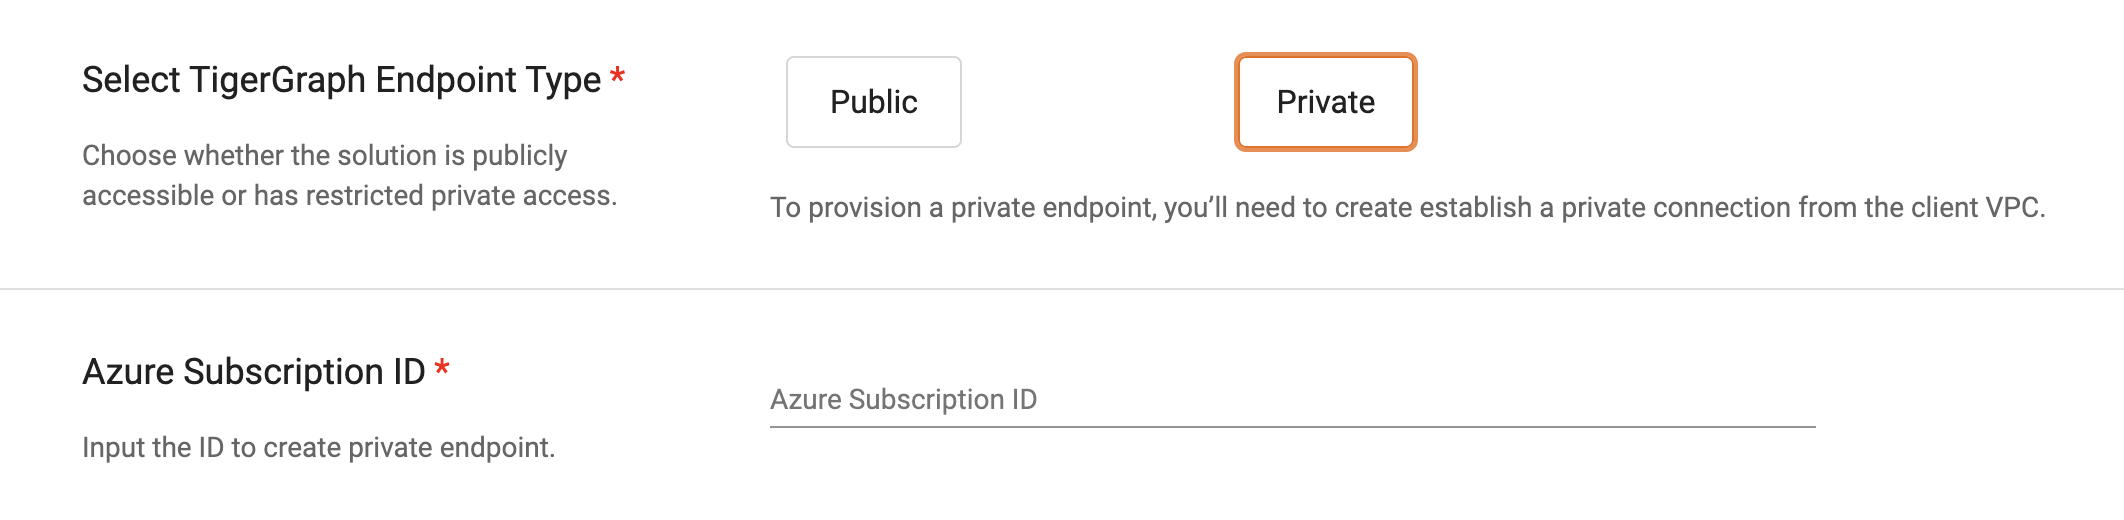
Select “Private“ for the TigerGraph Endpoint Type.
-
Fill in your Azure subscription ID. Behind the scenes, TigerGraph will provision a PrivateLink Service and provide you with the PrivateLink Service Name. The subscription ID that you provided will be added to the auto-approval allow list.
-
In your Azure account, create an endpoint or private endpoint using the PrivateLink Service Name that TigerGraph provided.
-
Confirm on the TGCloud Portal that the endpoint has been created and TigerGraph will automatically approve it.
Instructions
Private endpoint via Azure portal
Verify that a dedicated subnet exists to contain the private endpoint and that network policies are disabled. For more information, see Microsoft’s article titled Disable network policies for private endpoints.
-
Navigate to the Azure portal.
-
Search for and click on Private Link.
-
Click Private endpoints and then click Add.
-
In the Resource section, select Connect to an Azure resource by resource ID or alias for Connection Method, and fill in the Resource ID or Alias Field fields. The Request message value is optional.
-
Return to the Private endpoints section and allow a few minutes for processing. On approval, the Private Endpoint displays a CONNECTION STATE value of Approved.
Private endpoint via CLI
Make sure you have the latest Azure CLI tools from this link: How to install the Azure CLI
Replace the values in angle brackets <> with the relevant information for your cluster.
az network private-endpoint \
create -g resource-group \
-n private-endpoint \
--vnet-name <vnet> \
--subnet <subnet> \
--private-connection-resource-id <d26eb624-5dfe-4188-91e4-075891834eda-private-link-service--a399431deb702616.5c02aae8-aac9-4453-8485-2930a3fee4f1.westus.azure.privatelinkservice> \
--connection-name <private-endpoint-connection> \
--location <westus> \
--manual-request true
Private DNS
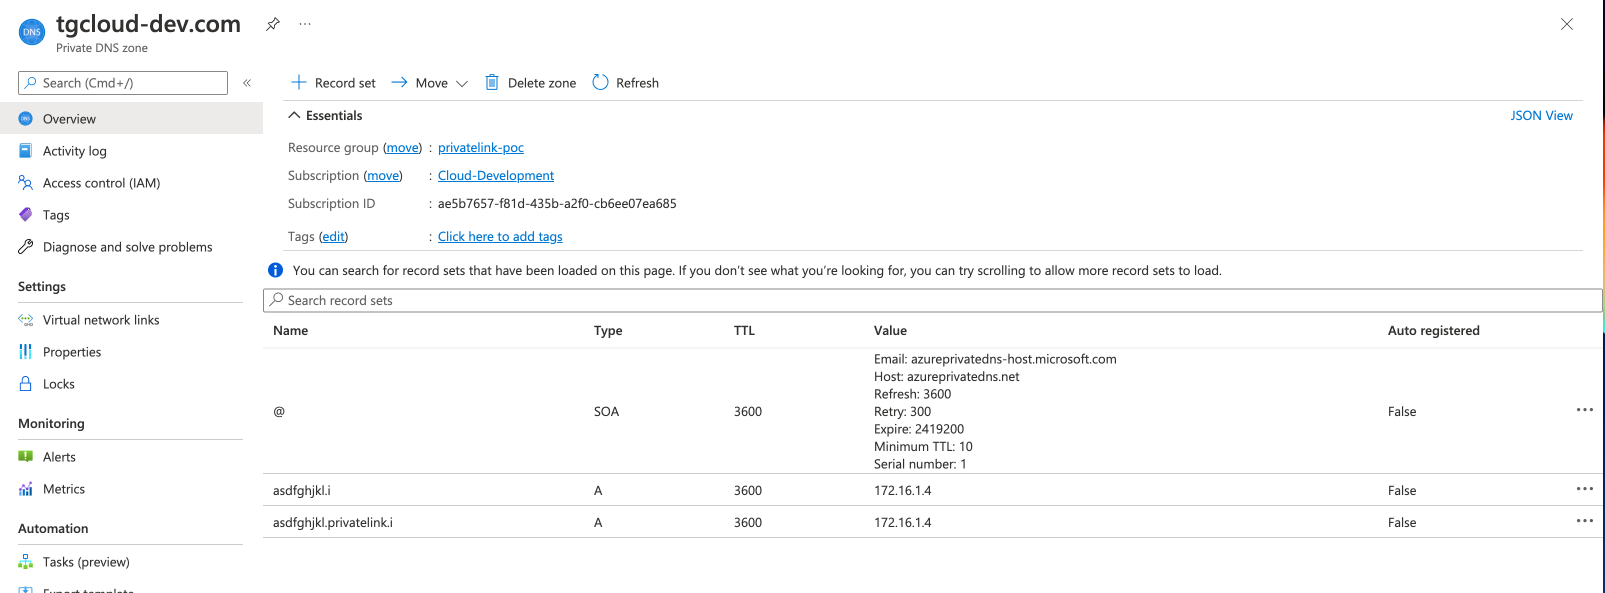
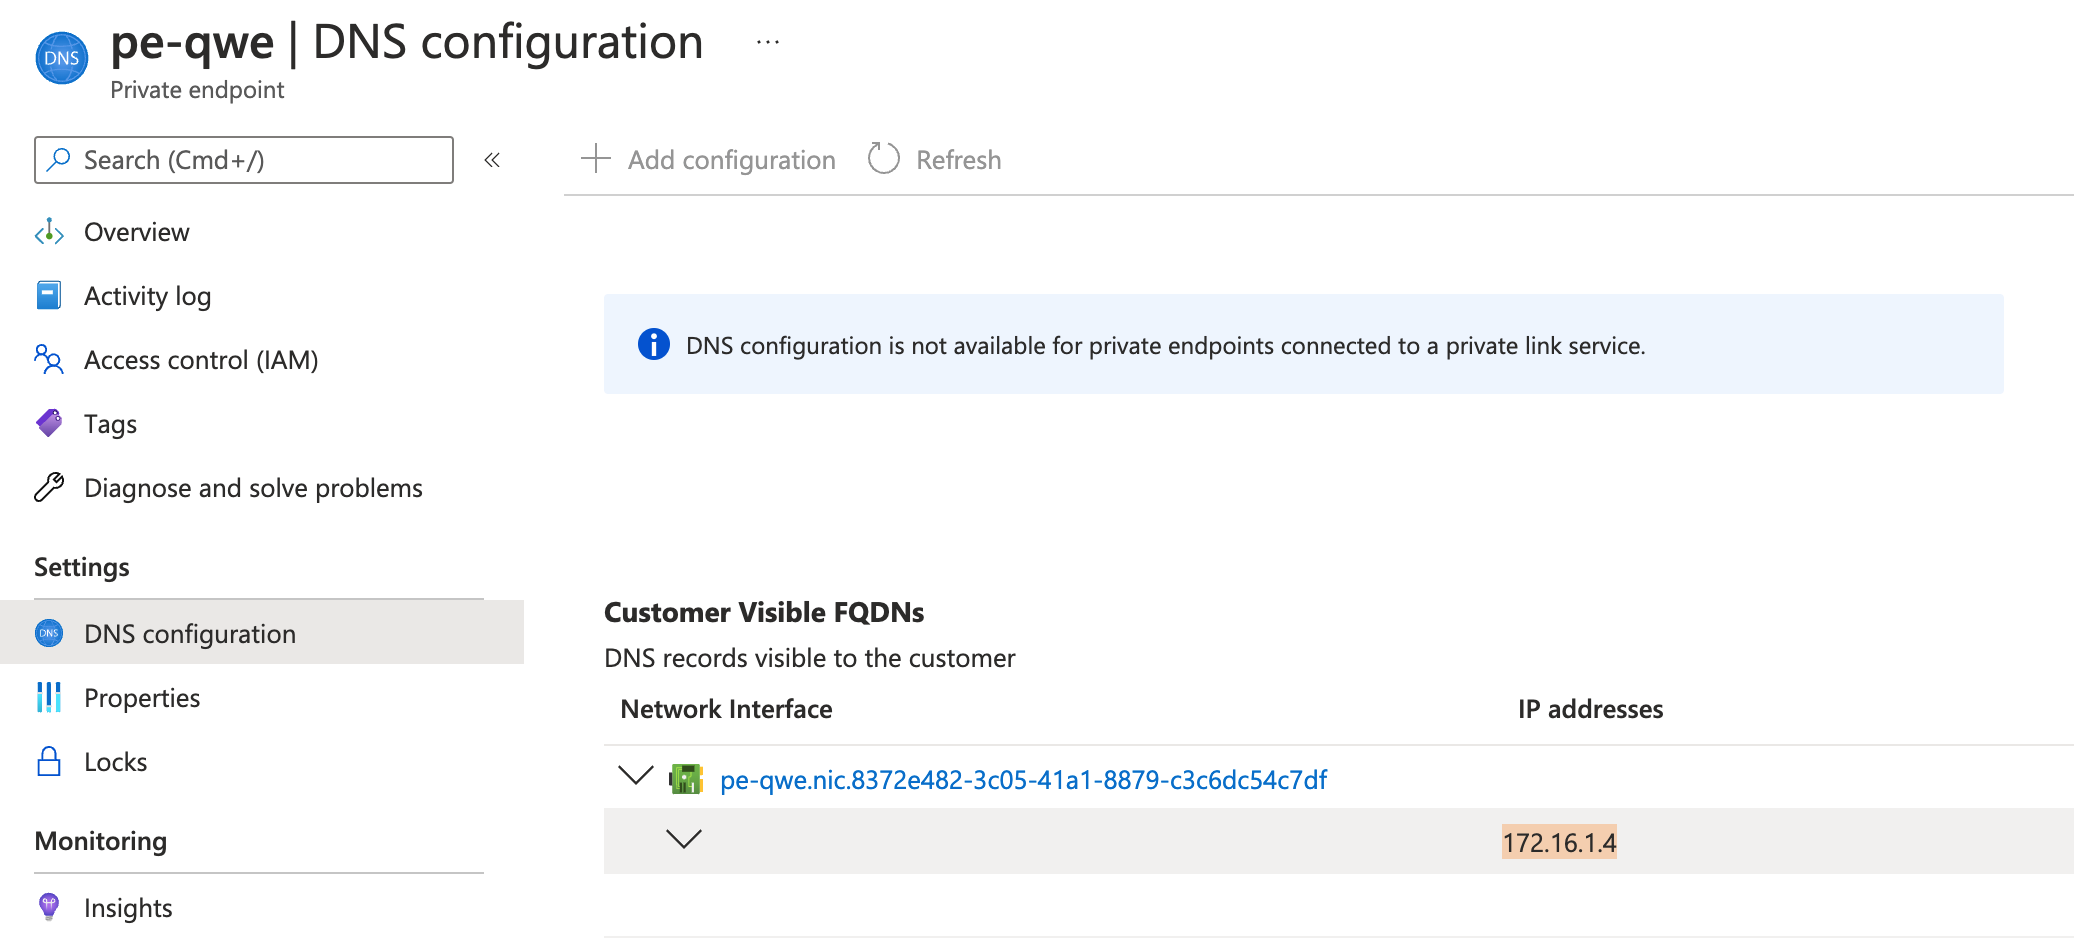
To get the endpoint IP address, navigate to the Private Endpoint.
Locate the Network Interface and copy the value for the Private IP address (i.e. 172.16.1.4).
-
Create a Private DNS Zone named
tgcloud.io -
Select “Virtual Network Link” on the left, click Add, and select the VNet that the Private Endpoint resides.
-
Add an A record named
{clusterdomain}.privatelink(example:test-cluster.privatelink). The value is the private IP address from step 1.