How to Create a Workspace
To learn more about workspaces see Workspace Overview. To create a workspace in TigerGraph Savanna follow the steps below:
Create a Workspace
-
Log in to your TigerGraph Savanna account.

-
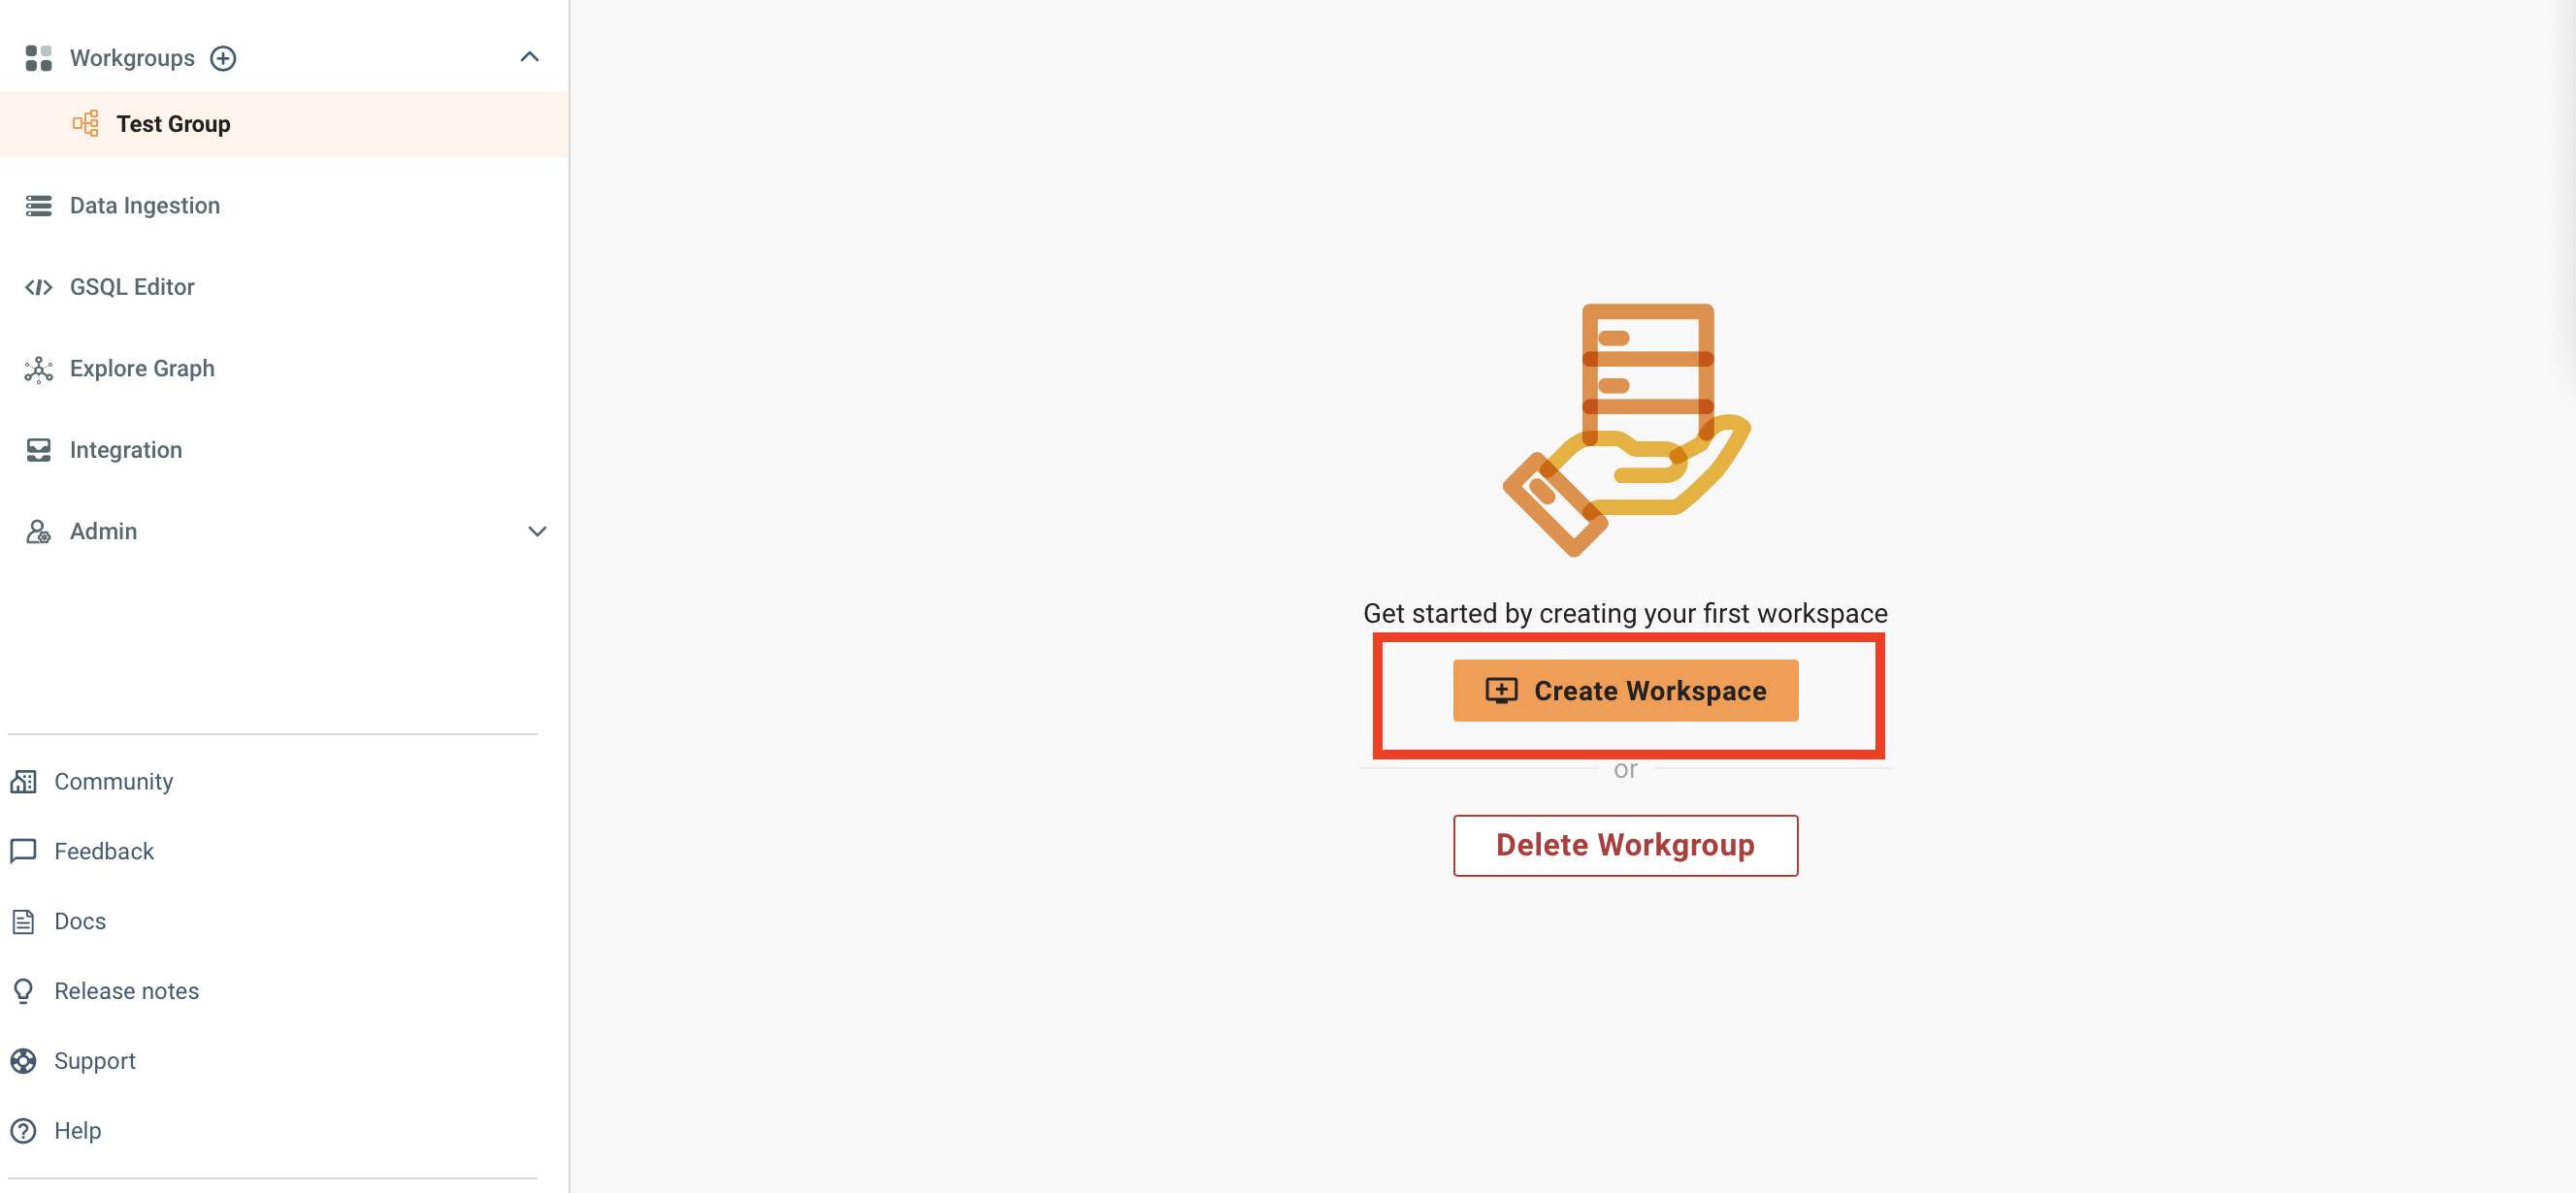
From the dashboard, navigate to the Workgroups section Click on the Create Workspace button.

-
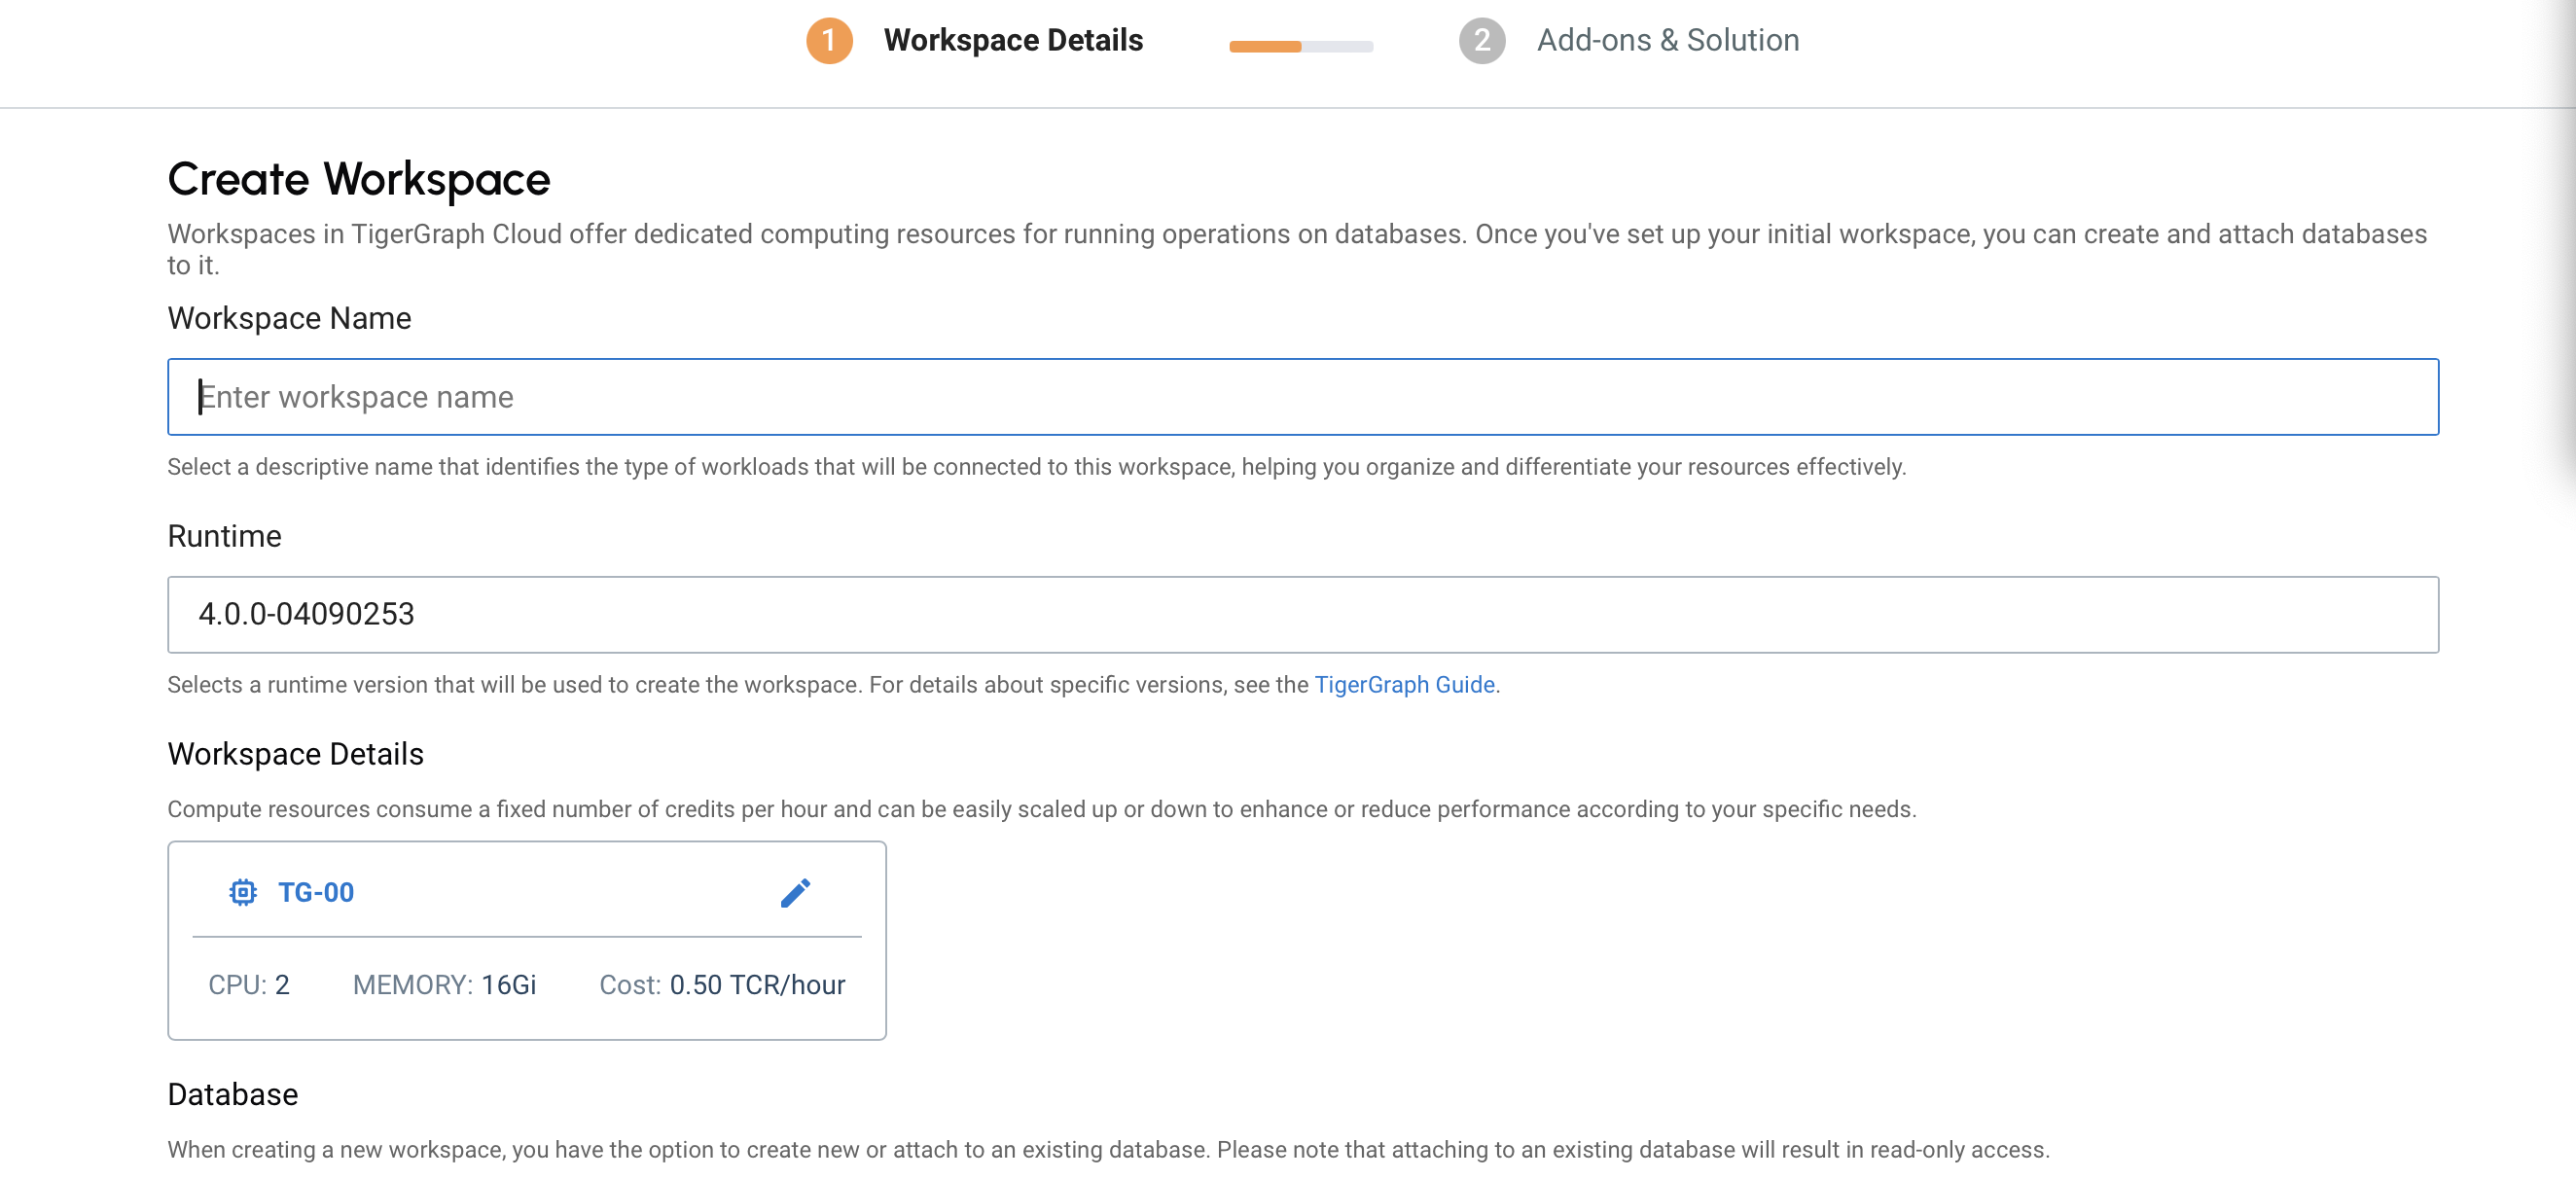
Provide a name for the workspace.
Choose a name that reflects the purpose of your workspace.

-
Select a TigerGraph workspace runtime.
-
Specify workspace size and advanced settings.

-
For supported workspace sizes, please go to the Workspace Size page.
-
For advanced settings please refer to Workspace Settings page.
-
Specify database name or attach to an existing database.
-
This allows you to create Read-Write (RW) workspace or Read-Only (RO) workspace. For more details, please refer to Read/Write and Read Only Workspaces.
-
-
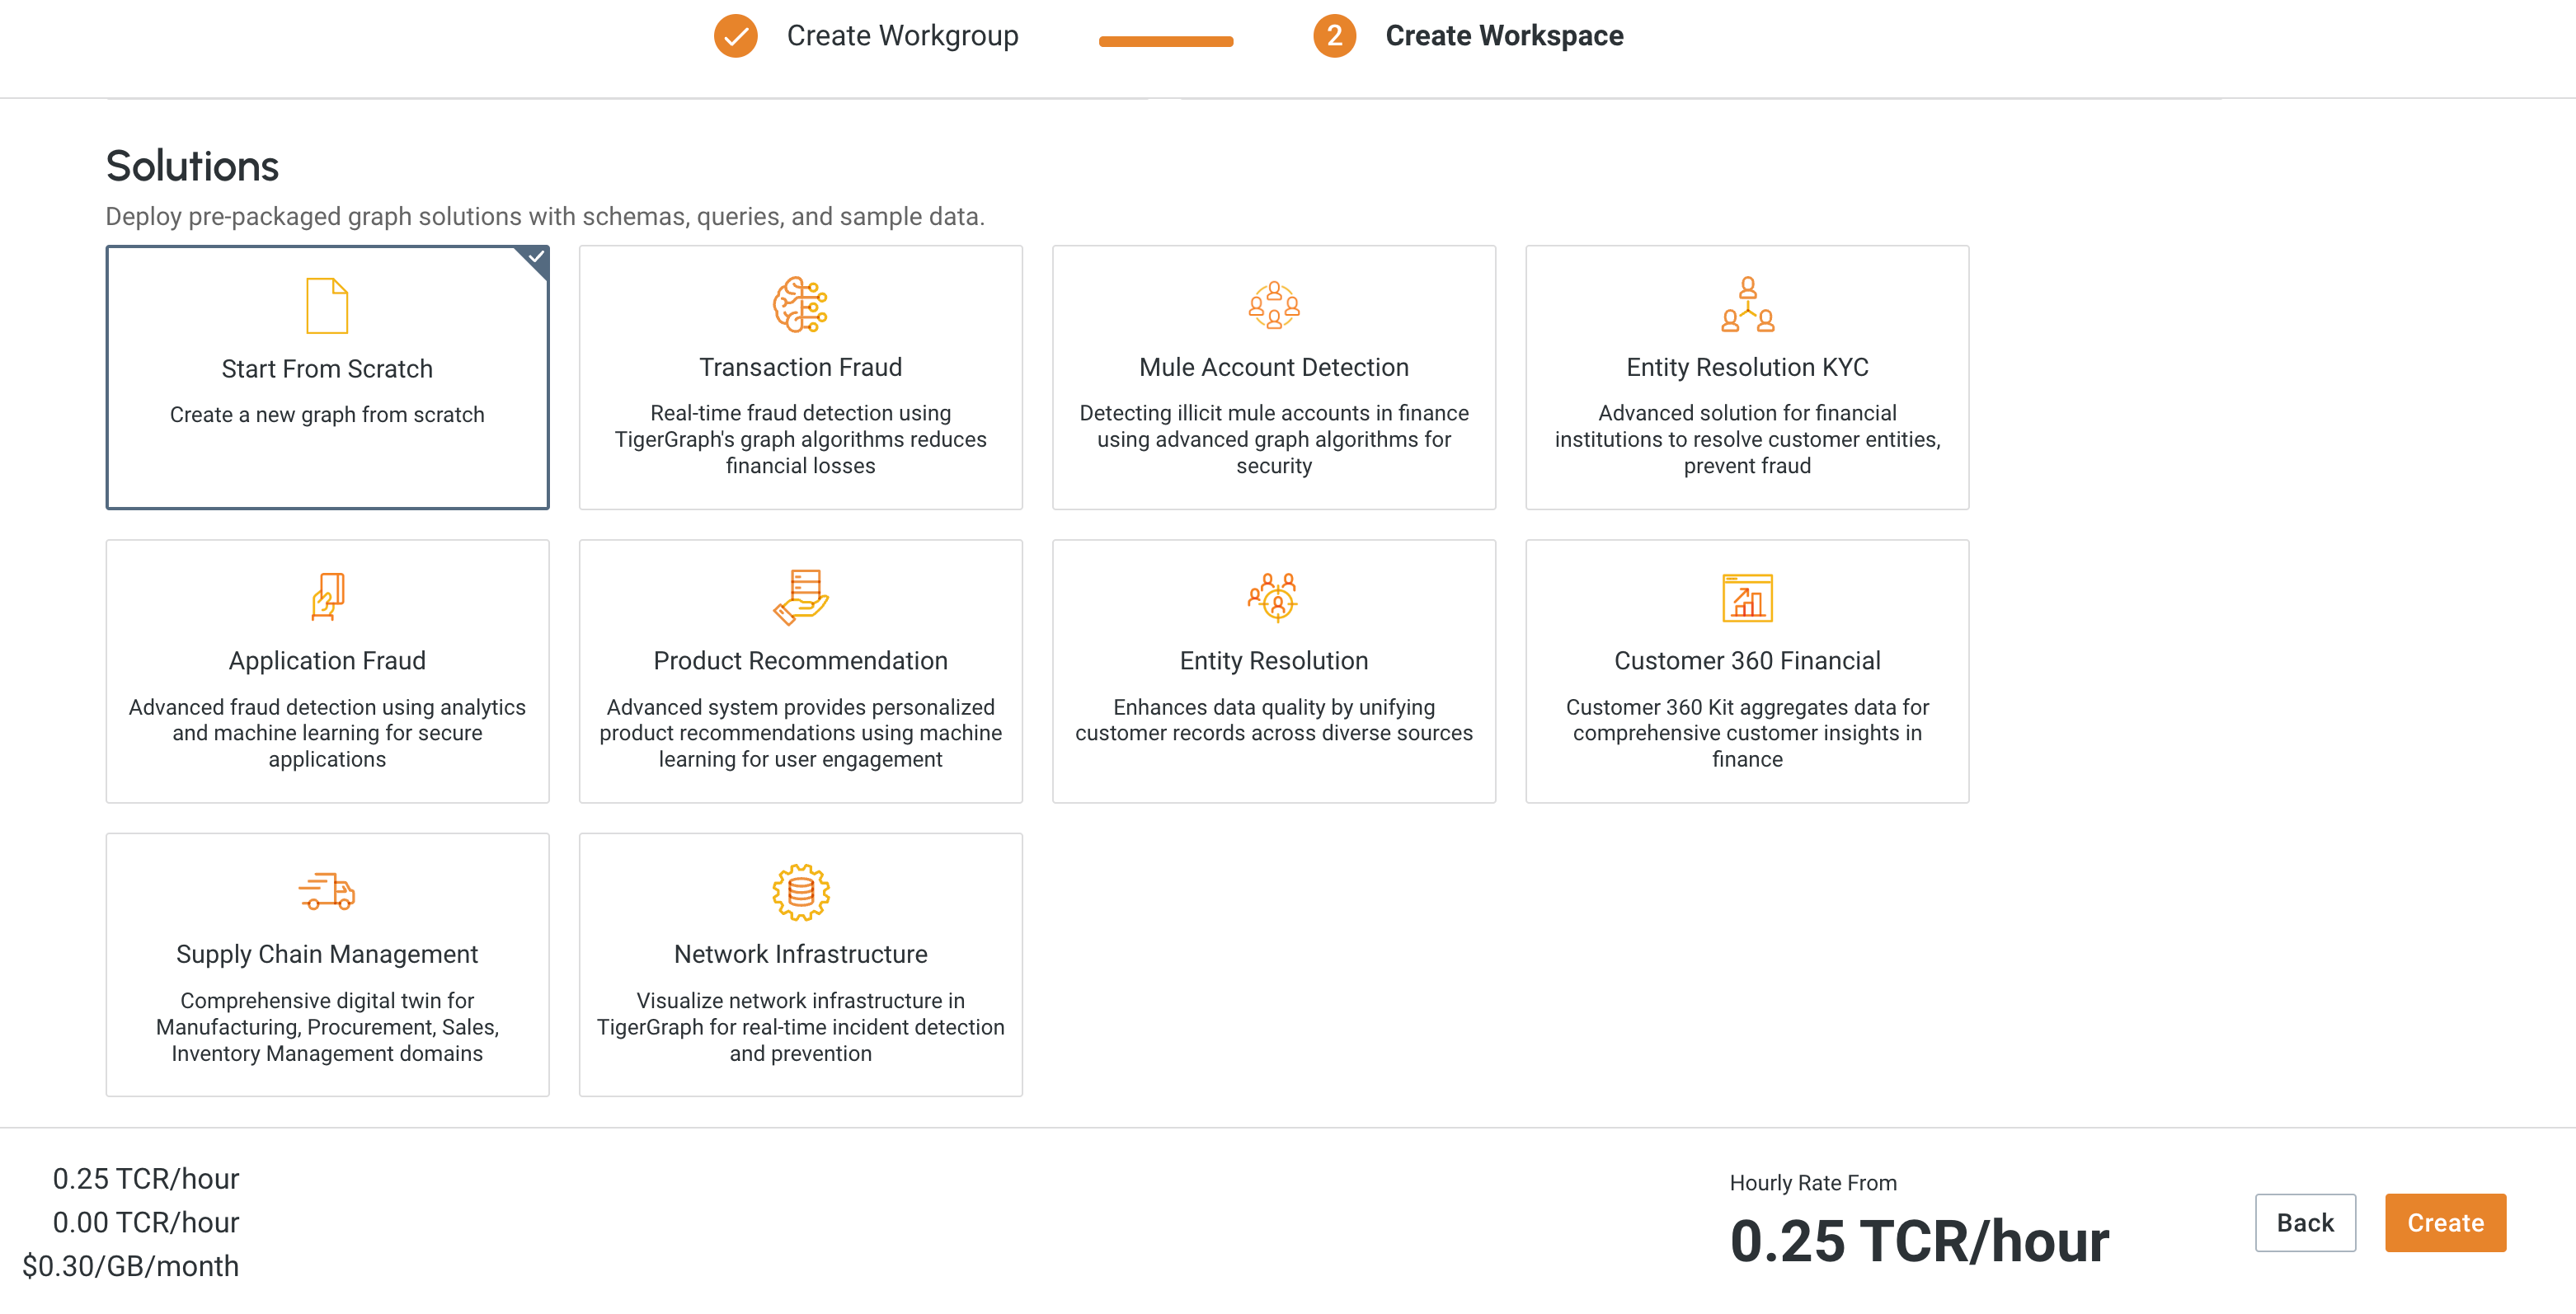
Specify Solutions for your workspace, for more details please visit Solutions page.

-
Specify Add-ons to your workspace, for more details please visit Add-Ons page.

-
Click on the Create button to create the workspace.
Currently, only one Read-Write workspace can be created for any given database. This means that multiple simultaneous Read-Write workspaces cannot be created, potentially limiting certain collaborative or concurrent development scenarios.
Users cannot re-create the Read-Write workspace once it has been terminated.
-
The workspace will then start to build. This progress can be monitored on the General Tab.

-
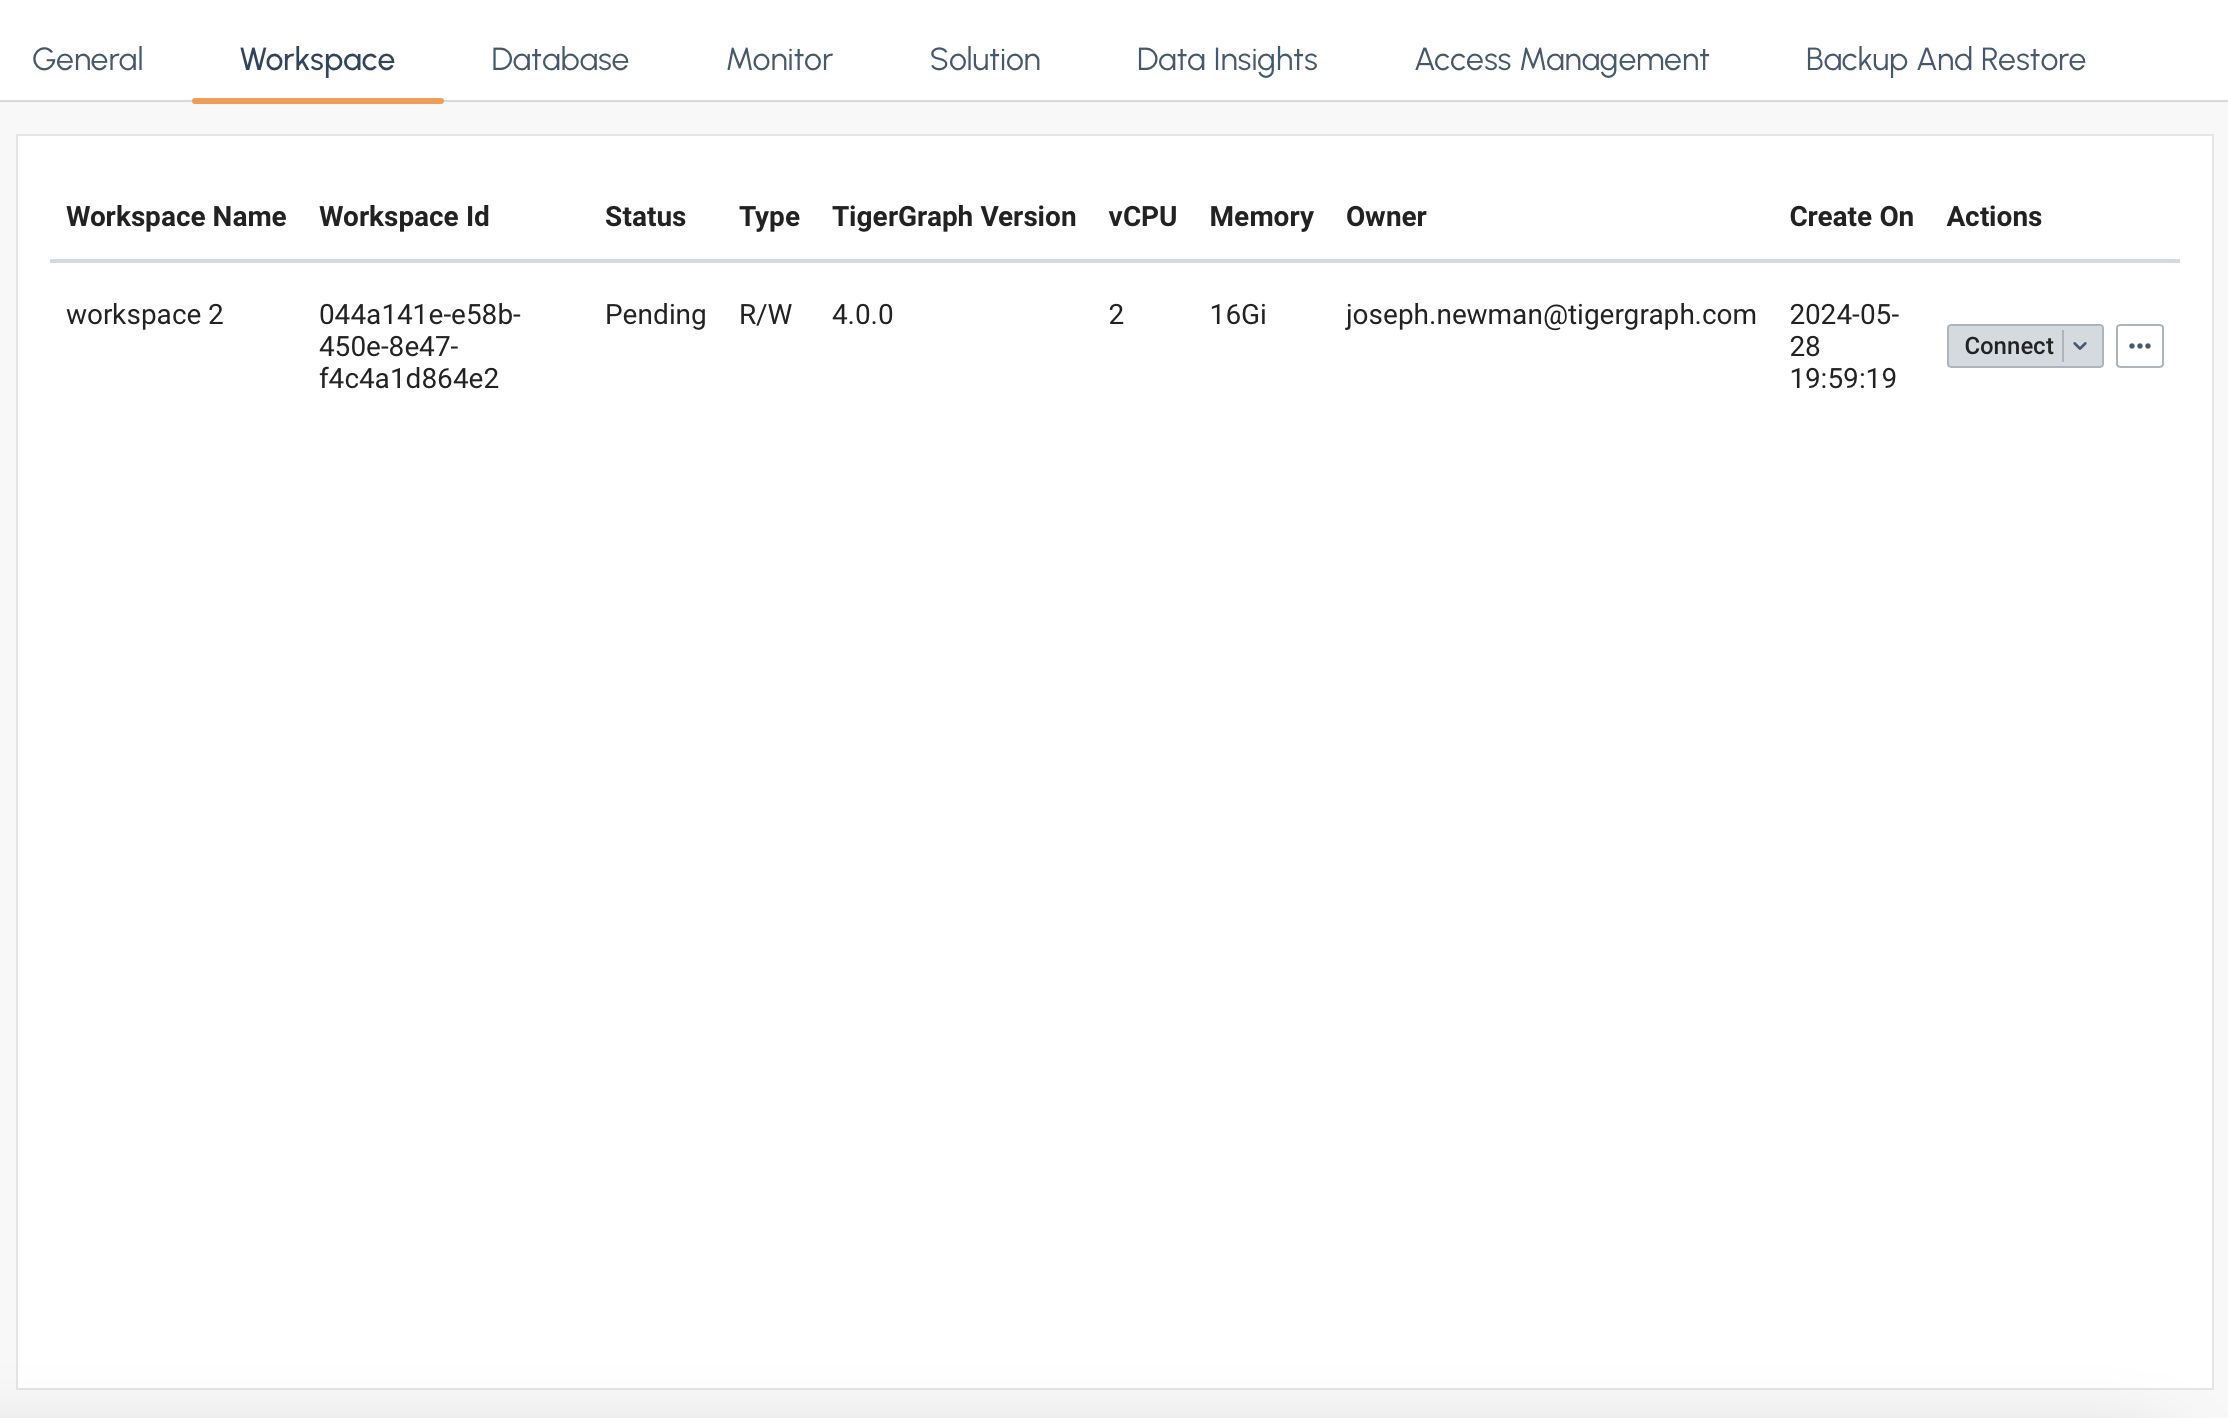
Once built you can view details about your workspace on the workspace tab. And you can view information about your database on the database tab.


Next Steps
Now, that you have a workspace created see Workspace Settings or learn more about Read/Write and Read Only Workspaces.
Return to the Workgroups and Workspaces page or Overview page for a different topic.