Load from Snowflake
TigerGraph Savanna allows you to load data directly from Snowflake. This guide will walk you through the steps to configure and load data from Snowflake into your TigerGraph workspace.
1) Select Source
Once you’ve selected Snowflake, you will be asked to configure the Snowflake data source.
-
Click on
 to add a new Snowflake data source.
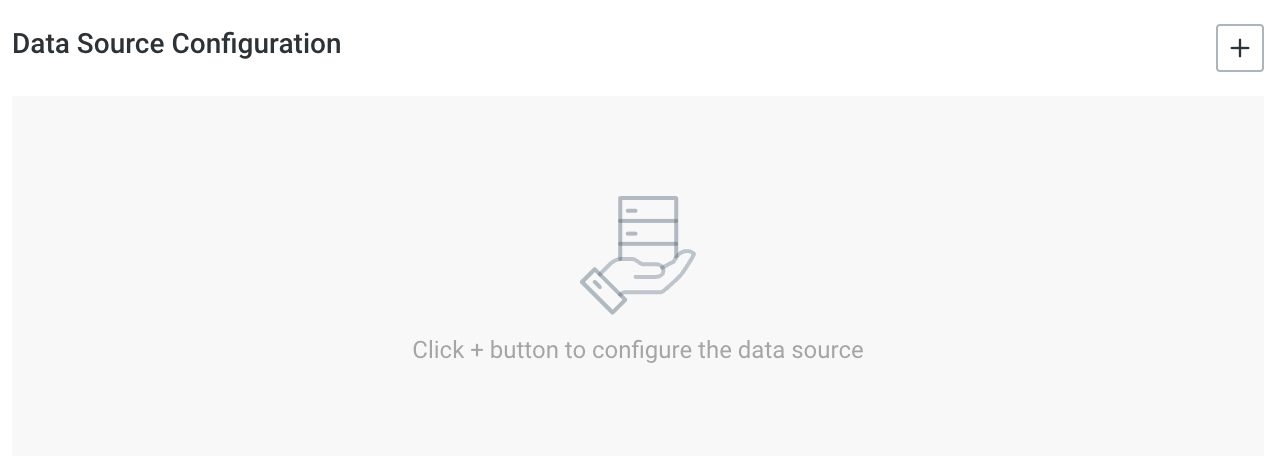
-
You will need to provide your
Snowflake username,Snowflake password, andSnowflake URL.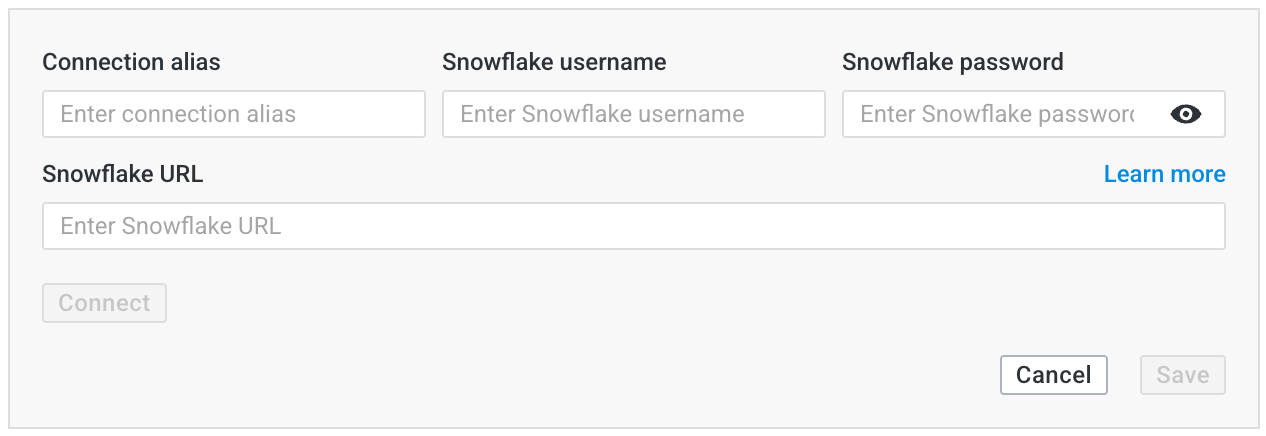
-
Once you have those configured, you can select one or more
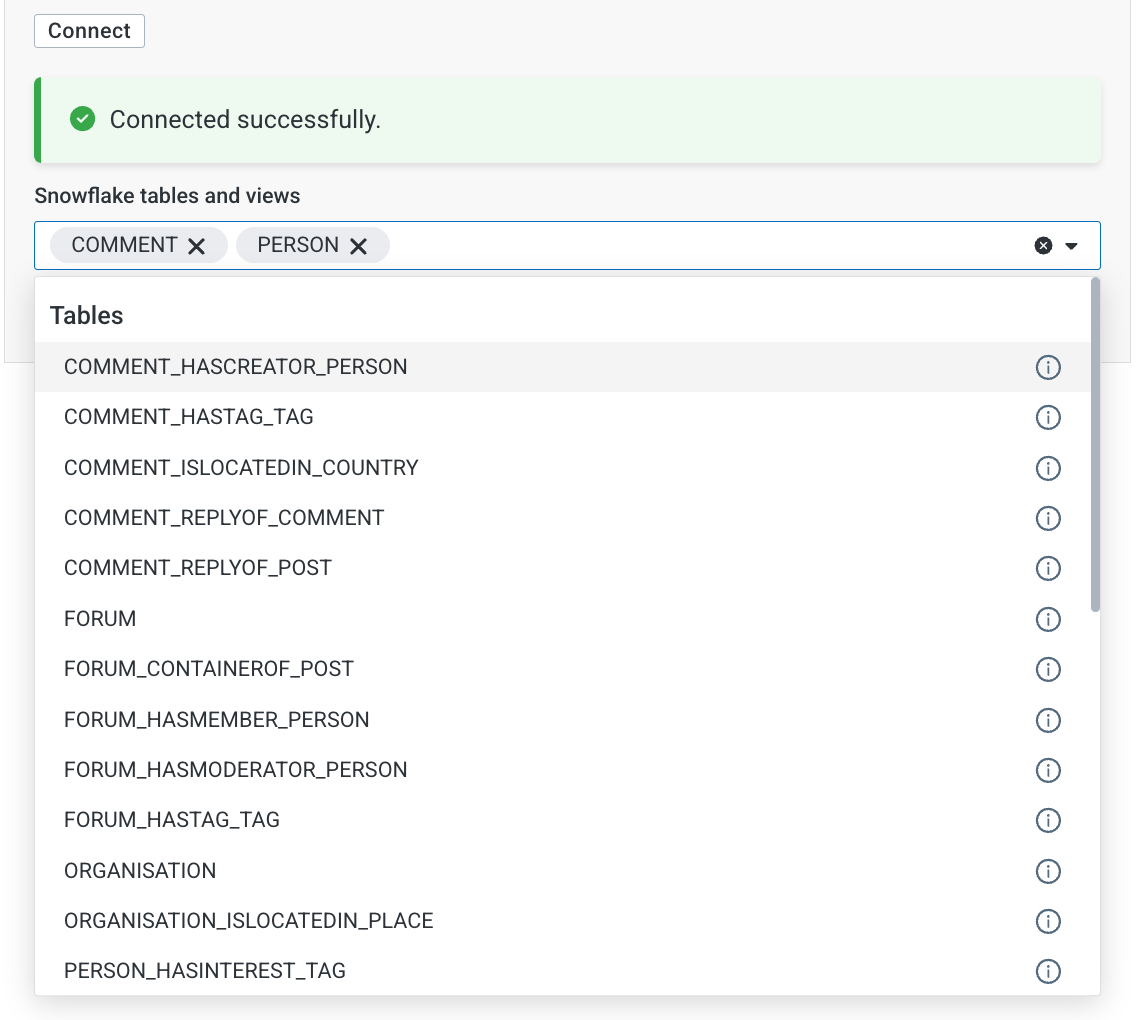
TableandViewwithin the Snowflake account. -
Click Connect to fetch the Table(s) and View(s).
-
Click Next to process the Table(s).
2) Configure File
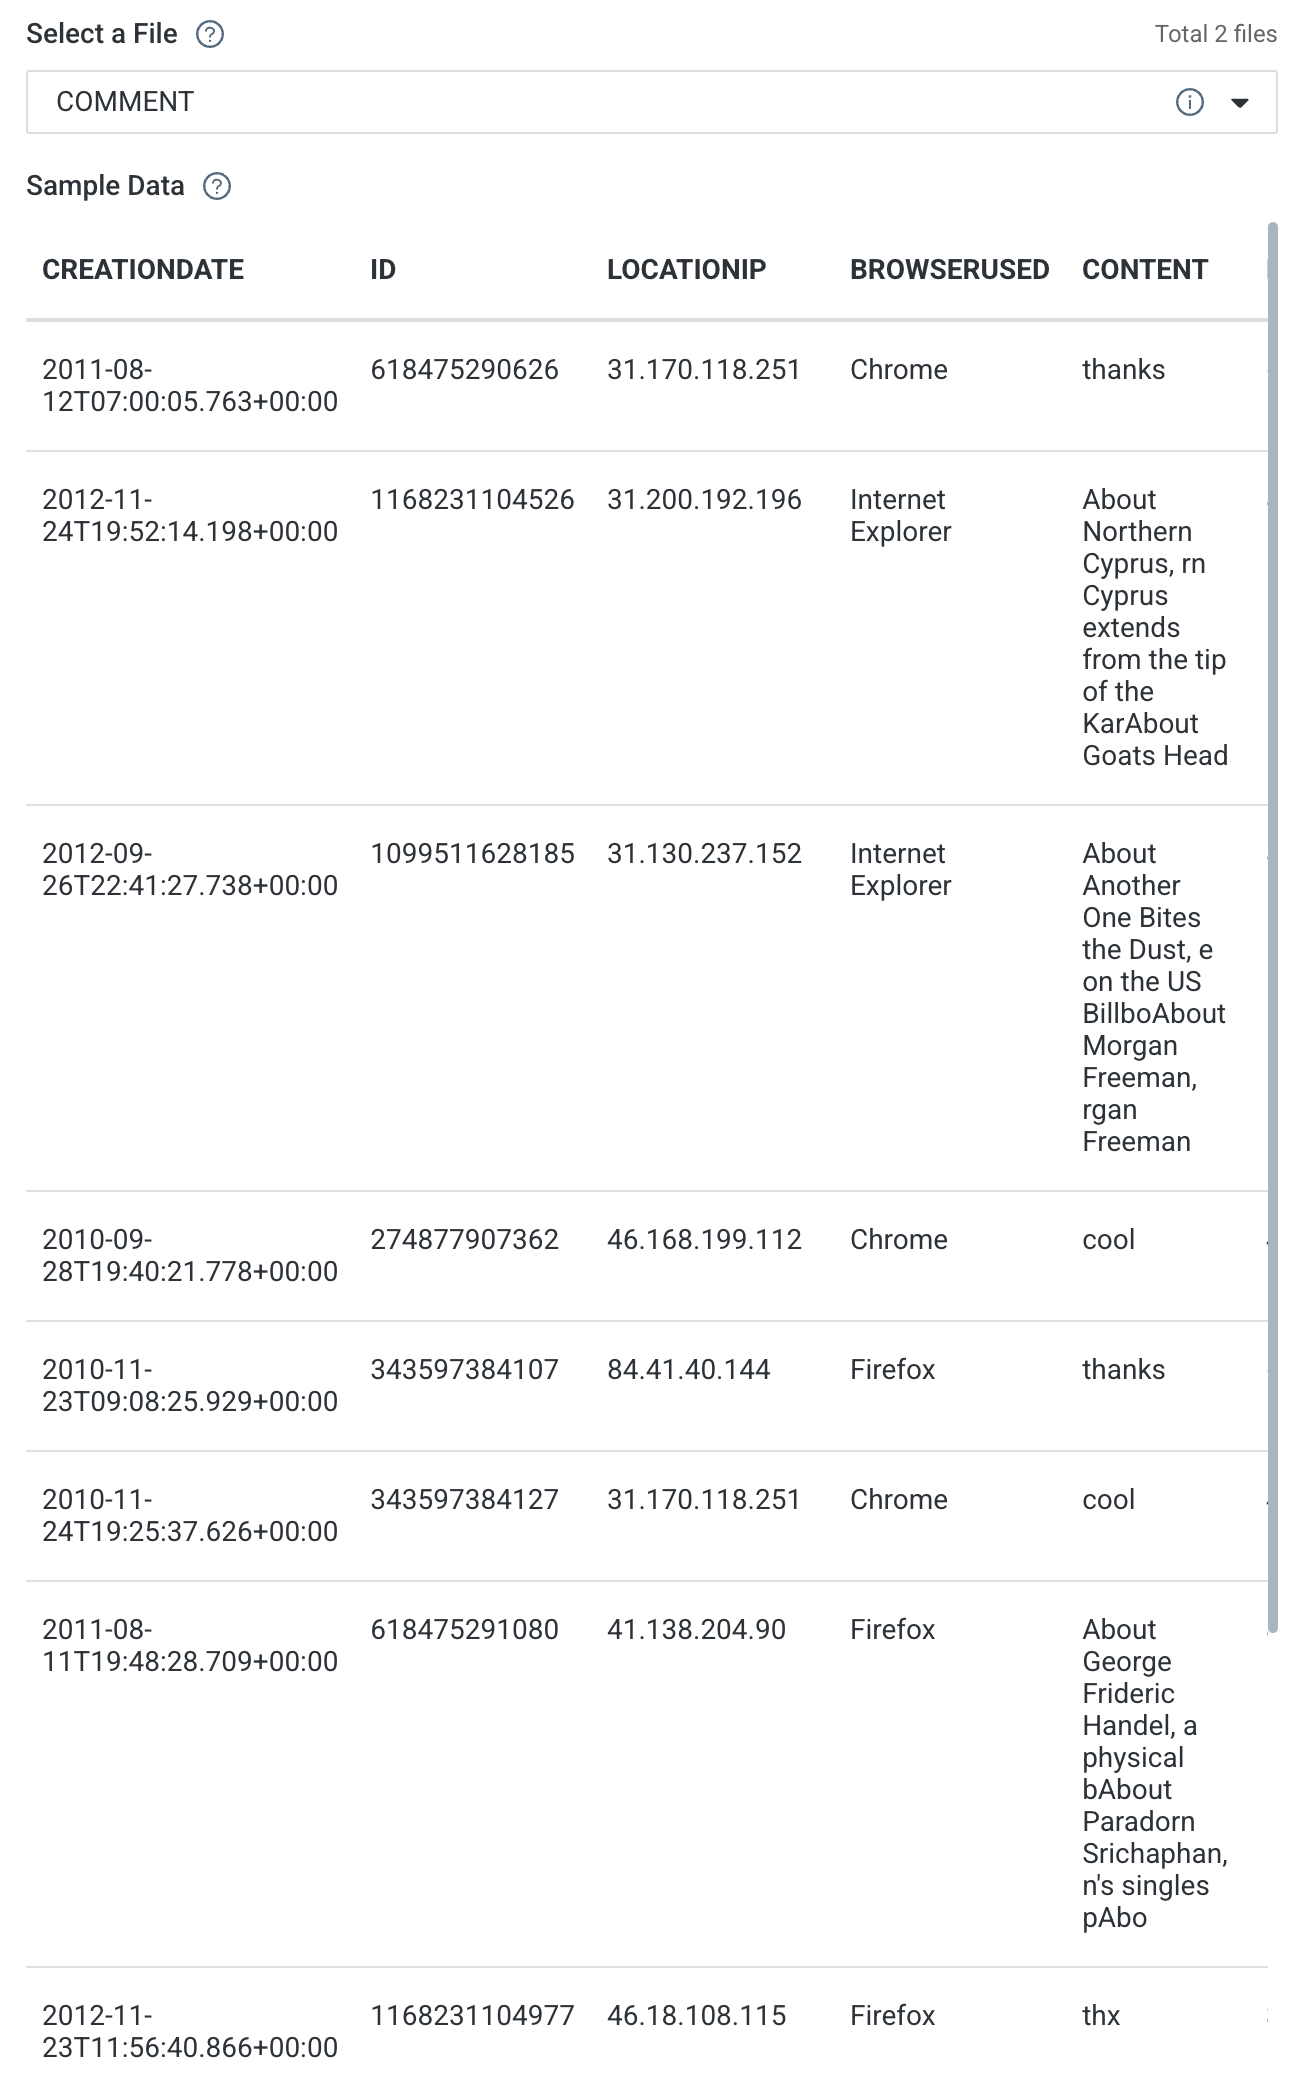
This step lets you view the source details.
-
The data loading tool will automatically fetch the sample data.
-
Once you are satisfied with the sample data, click Next to proceed.
3) Configure Map
If you are loading data into a brand new graph, you will be prompted to let our engine generate a schema and mapping for you. Or you can start from scratch. For more details of schema design please refer to Design Schema.
-
Select
Generate the schema onlyorGenerate the schema and data mapping.
The schema generation feature is still a preview feature. The correctness and efficiency of the resulting graph schema and mapping could vary.
-
In the
Sourcecolumn, you can choose the specific column from the data source that you want to map with the attribute.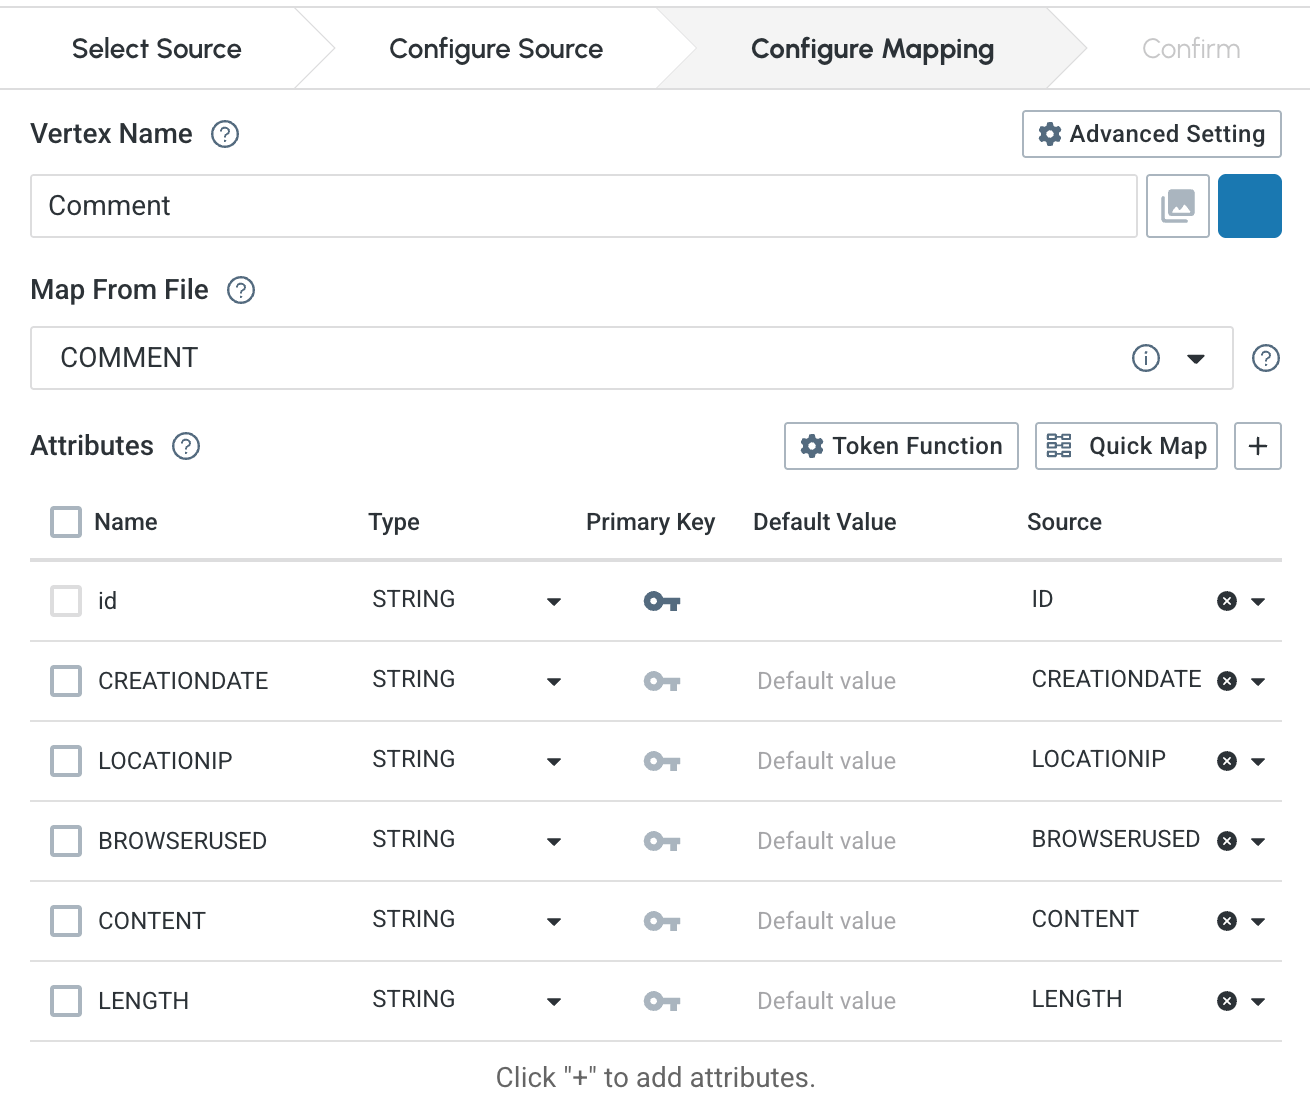
-
Use the
+button to create a new attribute of the target vertex or edge.
-
Click the Token Function button to configure token functions for the selected source. For more details of configuring token functions, please refer to Token Function.
-
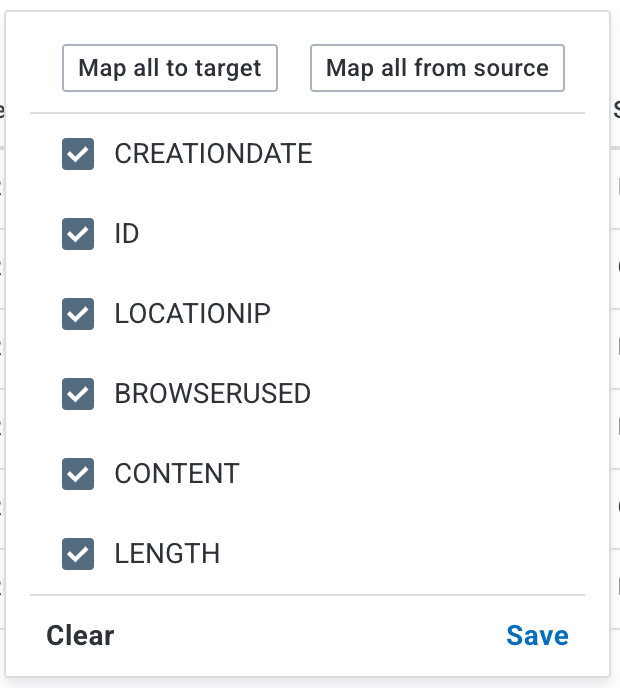
Click the Quick Map button to quickly map the data source headers to the existing schema attributes.
-
The Map all to target button aligns existing attribute names with the corresponding data source headers, it won’t introduce new attributes.
-
The Map all from source button not only aligns existing attribute names with the corresponding data asource headers, but also introduces new attributes based on unmatched data source headers.
-
The following list shows the mapping status of each attribute. You can manually adjust the mapping by checking the box next to the attribute name.
-
-
Click Next to proceed.
4) Confirm
This step will let you confirm the changes made to the schema and the data mapping you created to load the data.
-
Simply review the
Schema to be changedandData to be loadedlists.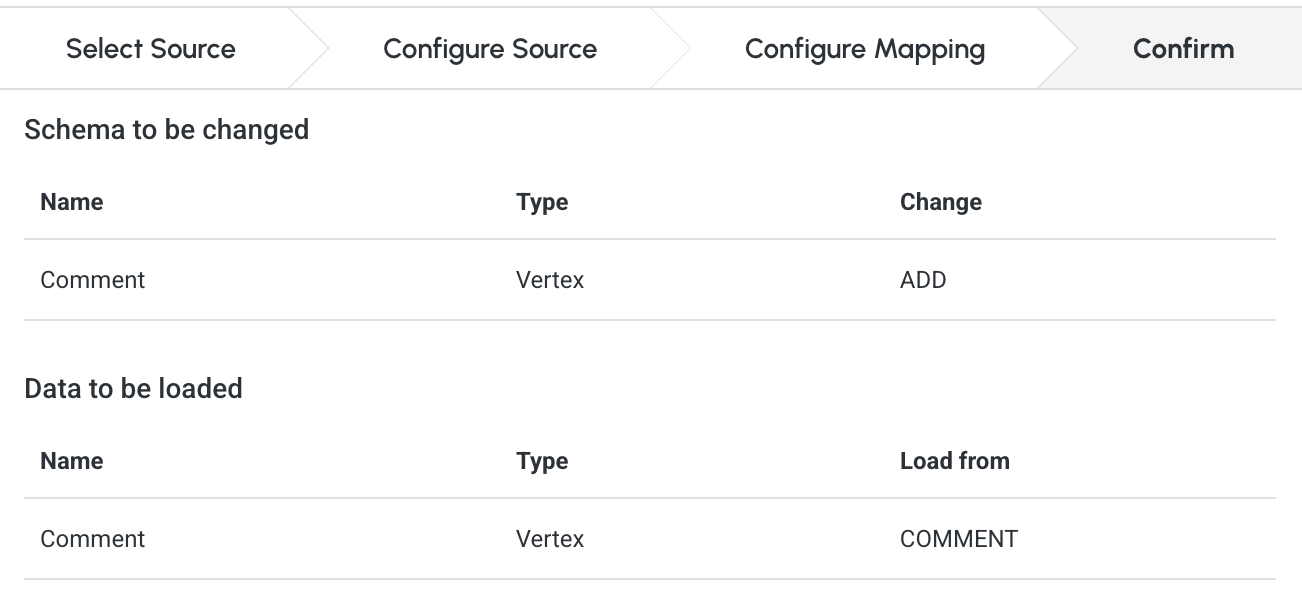
Please be aware that some schema changes will result in unintentional deletion of the data. Please carefully review the warning message before confirming the loading.
-
Click on the Confirm button to run the loading jobs and monitor their
Status.
Next Steps
Next, learn how to use Design Schema, GSQL Editor and Explore Graph in TigerGraph Savanna.
Or return to the Overview page for a different topic.