Spark Connection Via JDBC Driver (Deprecated)
|
Please see Load from Spark Dataframe for information on the Spark connector. |
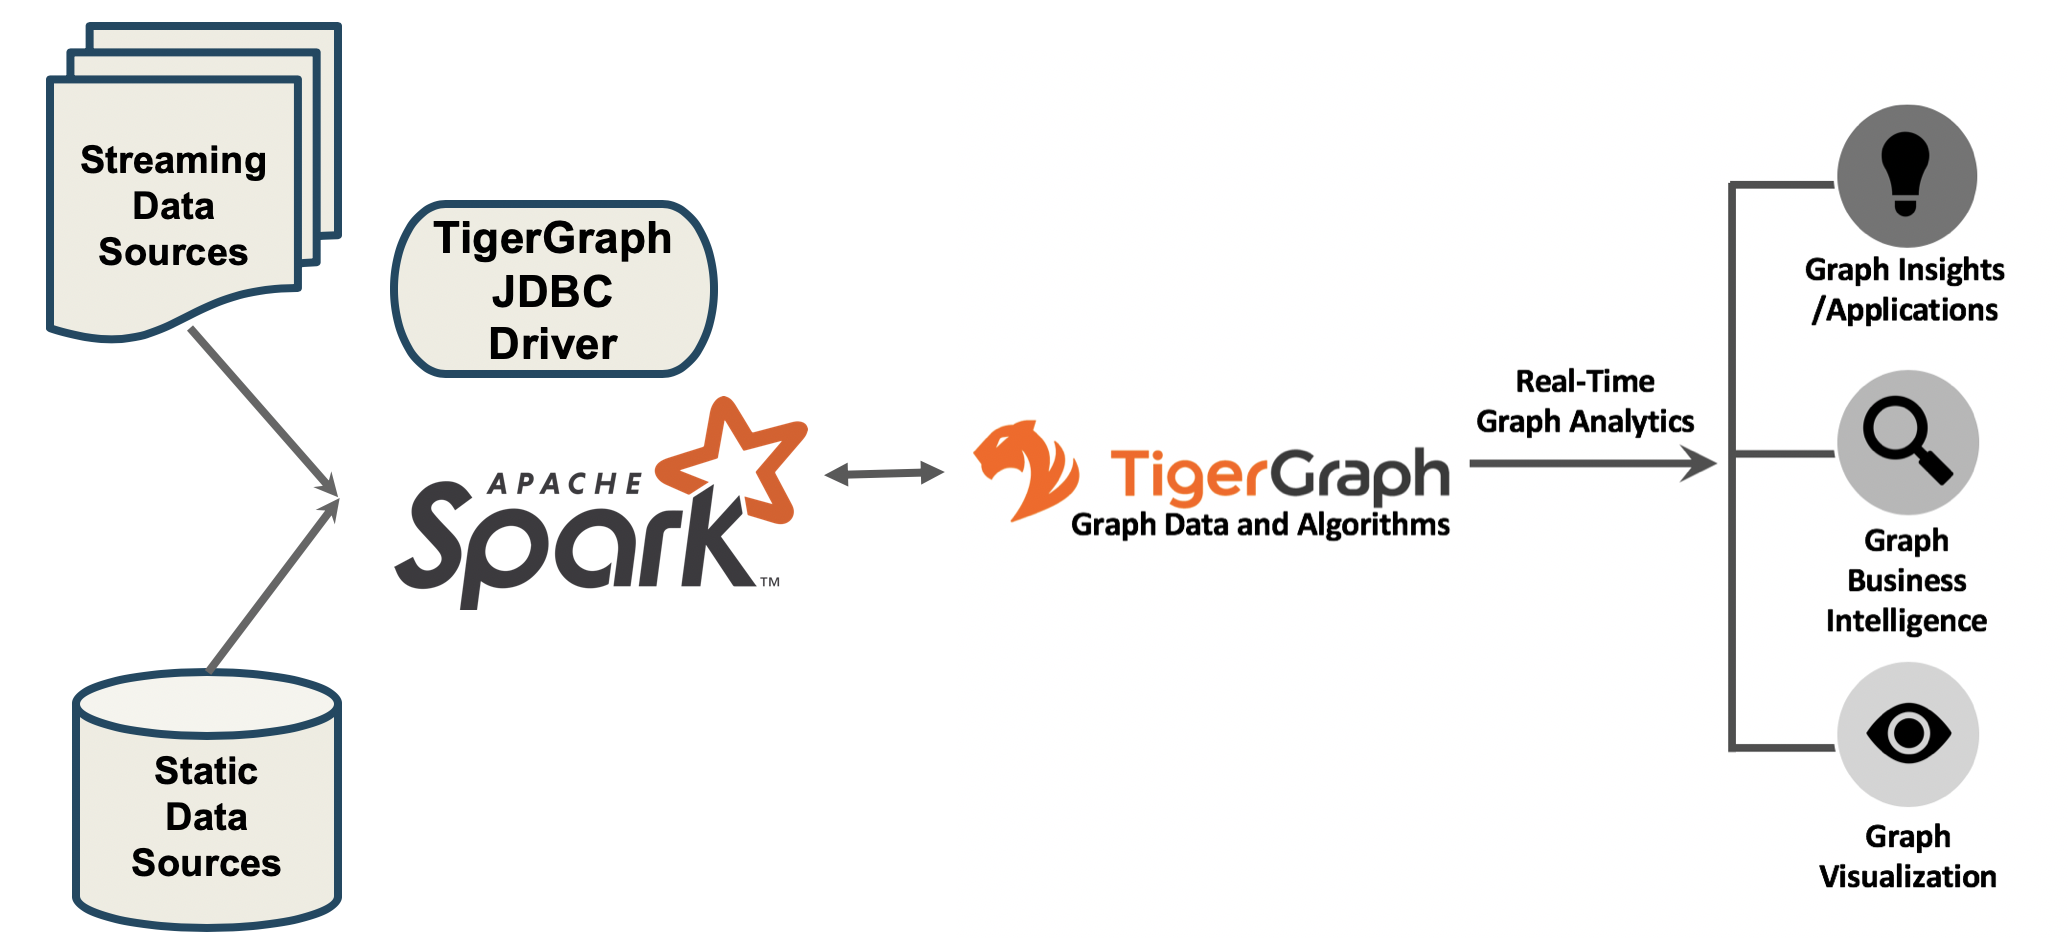
Apache Spark is a popular big data distributed processing system which is frequently used in data management ETL process and Machine Learning applications.
Using the open-source type 4 JDBC Driver for TigerGraph, you can read and write data between Spark and TigerGraph. This is a two-way data connection.
The GitHub Link to the JDBC Driver is https://github.com/tigergraph/ecosys/tree/master/tools/etl/tg-jdbc-driver
The README file there provides more details.
|
TigerGraph JDBC connector is streaming in data via REST endpoints. No data throttle mechanism is in place yet. When the incoming concurrent JDBC connection number exceeds the configured hardware capacity limit, the overload may cause the system to stop responding. If you use spark job to connect TigerGraph via JDBC, we recommend your concurrent spark loading jobs be capped at 10 with the following per job configuration. This limits the concurrent JDBC connections to 40. —-num-executors 2 /* 2 executors per job */ —-executor-cores 2 /* 1 executor take 2 cores */ |
Load from a Data Lake via Spark
1) Write a Spark DataFrameWriter
Spark DataFrame write method with TigerGraph JDBC connector supports writing data from arbitrary data sources to pre-defined TigerGraph GSQL loading jobs, through a /ddl endpoint.
The DataFrame will be converted to delimited data and sent to TigerGraph by micro batches.
| You need to choose names for a GSQL loading job and its data files that you will be using in Step 2. |
DataFrameWriter as "df"df.write.mode("overwrite").format("jdbc").options(
Map(
"driver" -> "com.tigergraph.jdbc.Driver",
"url" -> "jdbc:tg:http://host:port",
"username" -> "tigergraph",
"password" -> "tigergraph",
"token" -> "token",
"graph" -> "Social", // graph name
"dbtable" -> "job load_Social", // loading job name, "job" is required
"filename" -> "file1", // filename defined in the loading job
"sep" -> ",", // separator between columns
"eol" -> "\n", // end of line
"batchsize" -> "10000"))
.save()The sep and eol will be used to convert the DataFrame to delimited data and that will be sent to the filename defined by the loading job.
> DataFrame
+-----+---+------+
|  _c0|_c1|   _c2|
+-----+---+------+
|  Tom| 23|  male|
|Jerry| 45|  male|
|Jenny| 33|female|
|Lizzy| 19|female|
+-----+---+------+Tom,23,male
Jerry,45,male
Jenny,33,female
Lizzy,19,female2) Create a Loading Job
Write a GSQL loading job, using the job and file names that you used in step 1, to map data from the CSV file(s) to TigerGraph vertices and edges.
CREATE LOADING JOB load_Social FOR GRAPH Social {
    DEFINE FILENAME file1;
    DEFINE FILENAME file2;
    LOAD file1 TO VERTEX Person VALUES ($0, $1, $2);
    LOAD file2 TO EDGE Friendship VALUES ($0, $1);
}
The loading job above, load_Social loads the 1st, 2nd, and 3rd columns of source file, file1, to the 1st, 2nd, and 3rd attributes of the vertex Person.
See the pages Creating a Loading Job, Running a Loading Job and Loading Jobs as a REST Endpoint for more information about loading jobs in TigerGraph.
Advanced Usages with Spark
Enable SSL with Spark
Add the following options to your scala script:
    "trustStore" -> "trust.jks",
    "trustStorePassword" -> "password",
    "trustStoreType" -> "JKS",
And run it with --files option like this:
/path/to/spark/bin/spark-shell --jars /path/to/tigergraph-jdbc-driver-${VERSION}.jar --files /path/to/trust.jks -i test.scalaThe --files should be provided the JKS file path, while the "trustStore" → "trust.jks" should be the JKS filename only.
Load Statistics
|
TigerGraph JDBC connector is streaming in data via REST endpoints. No data throttle mechanism is in place yet. When the incoming concurrent JDBC connection number exceeds the configured hardware capacity limit, the overload may cause the system to stop responding. If you use a Spark job to connect TigerGraph via JDBC, we recommend your concurrent Spark loading jobs be capped at 10 with the following per job configuration. This limits the concurrent JDBC connections to 40. |
To load data from files:
/path/to/spark/bin/spark-shell --jars /path/to/tigergraph-jdbc-driver-${VERSION}.jar -—num-executors 2 —-executor-cores 2 -i test.scalaval df = sc.textFile("/path/to/your_file", 100).toDF()
df.write.mode("append").format("jdbc").options(
Map(
"driver" -> "com.tigergraph.jdbc.Driver",
"url" -> "jdbc:tg:http://127.0.0.1:14240",
"username" -> "tigergraph",
"password" -> "tigergraph",
"graph" -> "ldbc_snb",
"dbtable" -> "job load_ldbc_snb", // loading job name
"filename" -> "v_comment_file", // filename defined in the loading job
"sep" -> "|", // separator between columns
"eol" -> "\n", // End Of Line
"batchsize" -> "10000",
"debug" -> "0",
"logFilePattern" -> "/tmp/jdbc.log")).save()If your TG version is 3.9.0 or higher, please use the following new features:
-
jobid: Since the Spark loading is sending data in multiple batches, it’s hard to collect the loading stats of all the batches. Thejobidis a new connection property that helps aggregate the stats of each batch loading, so the overall loading stats can be easily acquired. -
max_num_error: The threshold of the error objects count within thejobid. The loading job will be aborted when reaching the limit.jobidis required. -
max_percent_error: Is the threshold of the error objects percentage within thejobid. The loading job will be aborted when reaching the limit.jobidis required.
| For a more detailed example, please refer to the GitHub link. |
For the "batchsize" option:
-
If it is set too small, lots of time will be spent on setting up connections.
-
If it is too large, the http payload may exceed limit (the default TigerGraph Rest++ maximum payload size is 128MB). Furthermore, a large
"batchsize"may result in high jitter performance.
To bypass the disk IO limitation, it is better to put the raw data file on a different disk other than the one used by TigerGraph.
Configuration Options with Spark
Property Name |
Default |
Meaning |
Required |
|
(none) |
Fully qualified domain name(FQCN) of the JDBC driver: |
Yes |
|
(none) |
The JDBC URL to connect to: |
Yes |
|
(none) |
The graph name. |
Yes |
|
3.9.0 |
The TigerGraph version. |
Yes |
|
tigergraph |
TigerGraph username. |
If REST++ authentication is enabled, a username/password or token is required. |
|
tigergraph |
TigerGraph password. |
If REST++ authentication is enabled, a username/password or token is required. |
|
(none) |
A token used to authenticate RESTPP requests. Request a token |
If REST++ authentication is enabled, a username/password or token is required. |
|
(none) |
A unique ID for tracing aggregated loading statistics. |
No |
|
(none) |
The threshold of the error objects count within the |
No |
|
(none) |
The threshold of the error objects percentage within the |
No |
|
(none) |
The filename defined in the loading job. |
Yes |
|
(none) |
Column separator. E.g., ,. |
Yes |
|
(none) |
Line separator. E.g., \n. |
Yes |
|
(none) |
The specification of the operation of the form: |
Yes |
|
1000 |
Maximum number of lines per POST request. |
Yes |
|
2 |
Log level:0 → ERROR, 1 → WARN, 2 → INFO, 3 → DEBUG |
Yes |
|
(none) |
The log file name pattern, e.g., "/tmp/tigergraph-jdbc-driver.log", the log will be printed to stderr when it is not given |
all |
|
(none) |
A string that contains IP addresses of TigerGraph nodes separated by a comma, which can be used for load balancing. E.g., |
No |
|
(none) |
Filename of the truststore which stores the SSL certificate. Please add |
No |
|
(none) |
Password of the truststore. |
No |
|
(none) |
Truststore type, e.g., jks. |
No |
|
true |
Whether to verify the host name in the url matches the host name in the certificate. |
No |
|
RESTPP.Factory.DefaultQueryTimeoutSec |
The timeout (s) for REST++ request. |
No |
|
30 |
The connect timeout (s) for HTTP client. |
No |
Specific Usages for a Spark DataFrame in TigerGraph
Bulk Load
To read the full delta table as a Spark DataFrame and a bulk load to TigerGraph:
val df = spark.read.format("delta").load("/tmp/delta-table")
df.write.mode("overwrite").format("jdbc").options(
    Map(
        "driver" -> "com.tigergraph.jdbc.Driver",
        "url" -> "jdbc:tg:http://host:port",
        ...))
    .save()
Capture Changes in Batch Queries
-
Enable the change data feed option on the Delta table:
ALTER TABLE myDeltaTable SET TBLPROPERTIES (delta.enableChangeDataFeed = true) -
Capture the changes into a DataFrame:
Example 1: Version is typeintorlong:val df = spark.read.format("delta") .option("readChangeFeed", "true") .option("startingVersion", 0) .option("endingVersion", 10) .table("myDeltaTable")Example 2: Timestamps as formatted astimestamp:val df = spark.read.format("delta") .option("readChangeFeed", "true") .option("startingTimestamp", "2021-04-21 05:45:46") .option("endingTimestamp", "2021-05-21 12:00:00") .table("myDeltaTable")Example 3: Providing only the starting Version/timestamp:val df = spark.read.format("delta") .option("readChangeFeed", "true") .option("startingVersion", 0) .table("myDeltaTable")Example 4: Path to table:val df = spark.read.format("delta") .option("readChangeFeed", "true") .option("startingTimestamp", "2021-04-21 05:45:46") .load("pathToMyDeltaTable") -
Filter the changes:
The DataFrame containing the changes of the Delta table has 3 additional columns:
Column name
Type
Values
_change_typeString
insert, update_preimage , update_postimage, delete
_commit_versionLong
The Delta log or table version containing the change.
_commit_timestampTimestamp
The timestamp associated when the commit was created.
A TigerGraph GSQL loading job only supports an insertion or an updating type, so filtering of the result is needed:
df.filter($"_change_type" === "insert" || $"_change_type" === update_postimage) -
Select original data columns:
df.select("_c0", "_c1", "_c2") -
Write the DataFrame to TigerGraph:
df.write.mode("overwrite").format("jdbc").options( Map( "driver" -> "com.tigergraph.jdbc.Driver", "url" -> "jdbc:tg:http://host:port", ...)) .save()
Full Example
Below is a full example of the previous steps with more options.
val df = spark.read.format("delta")
    .option("readChangeFeed", "true")
    .option("startingVersion", 0)
    .option("endingVersion", 10)
    .table("myDeltaTable")
.filter($"_change_type" === "insert" || $"_change_type" === update_postimage)df.write.mode("overwrite").format("jdbc").options(
Map(
"driver" -> "com.tigergraph.jdbc.Driver",
"url" -> "jdbc:tg:http://host:port",
"username" -> "tigergraph",
"password" -> "tigergraph",
"token" -> "token",
"graph" -> "Social", // graph name
"dbtable" -> "job load_Social", // loading job name, "job" is required
"filename" -> "file1", // filename defined in the loading job
"sep" -> ",", // separator between columns
"eol" -> "\n", // end of line
"batchsize" -> "10000"))
.save()