Export Data to S3
Exporting data to Amazon S3 from TigerGraph Savanna allows you to export your graph data efficiently. This feature is particularly useful for backup, data sharing, and integration with other AWS services.
This documentation have been updated to include all three methods for writing data to S3, providing comprehensive guidance for users.
Prerequisites
Before you begin, ensure you have the following:
-
An active TigerGraph Savanna workspace.
-
An AWS account with access to S3.
-
Appropriate IAM permissions to write to the S3 bucket.
Methods to Export Data to S3
There are three main methods to write data to S3 from TigerGraph Savanna:
-
Using GSQL Editor
-
Via API
-
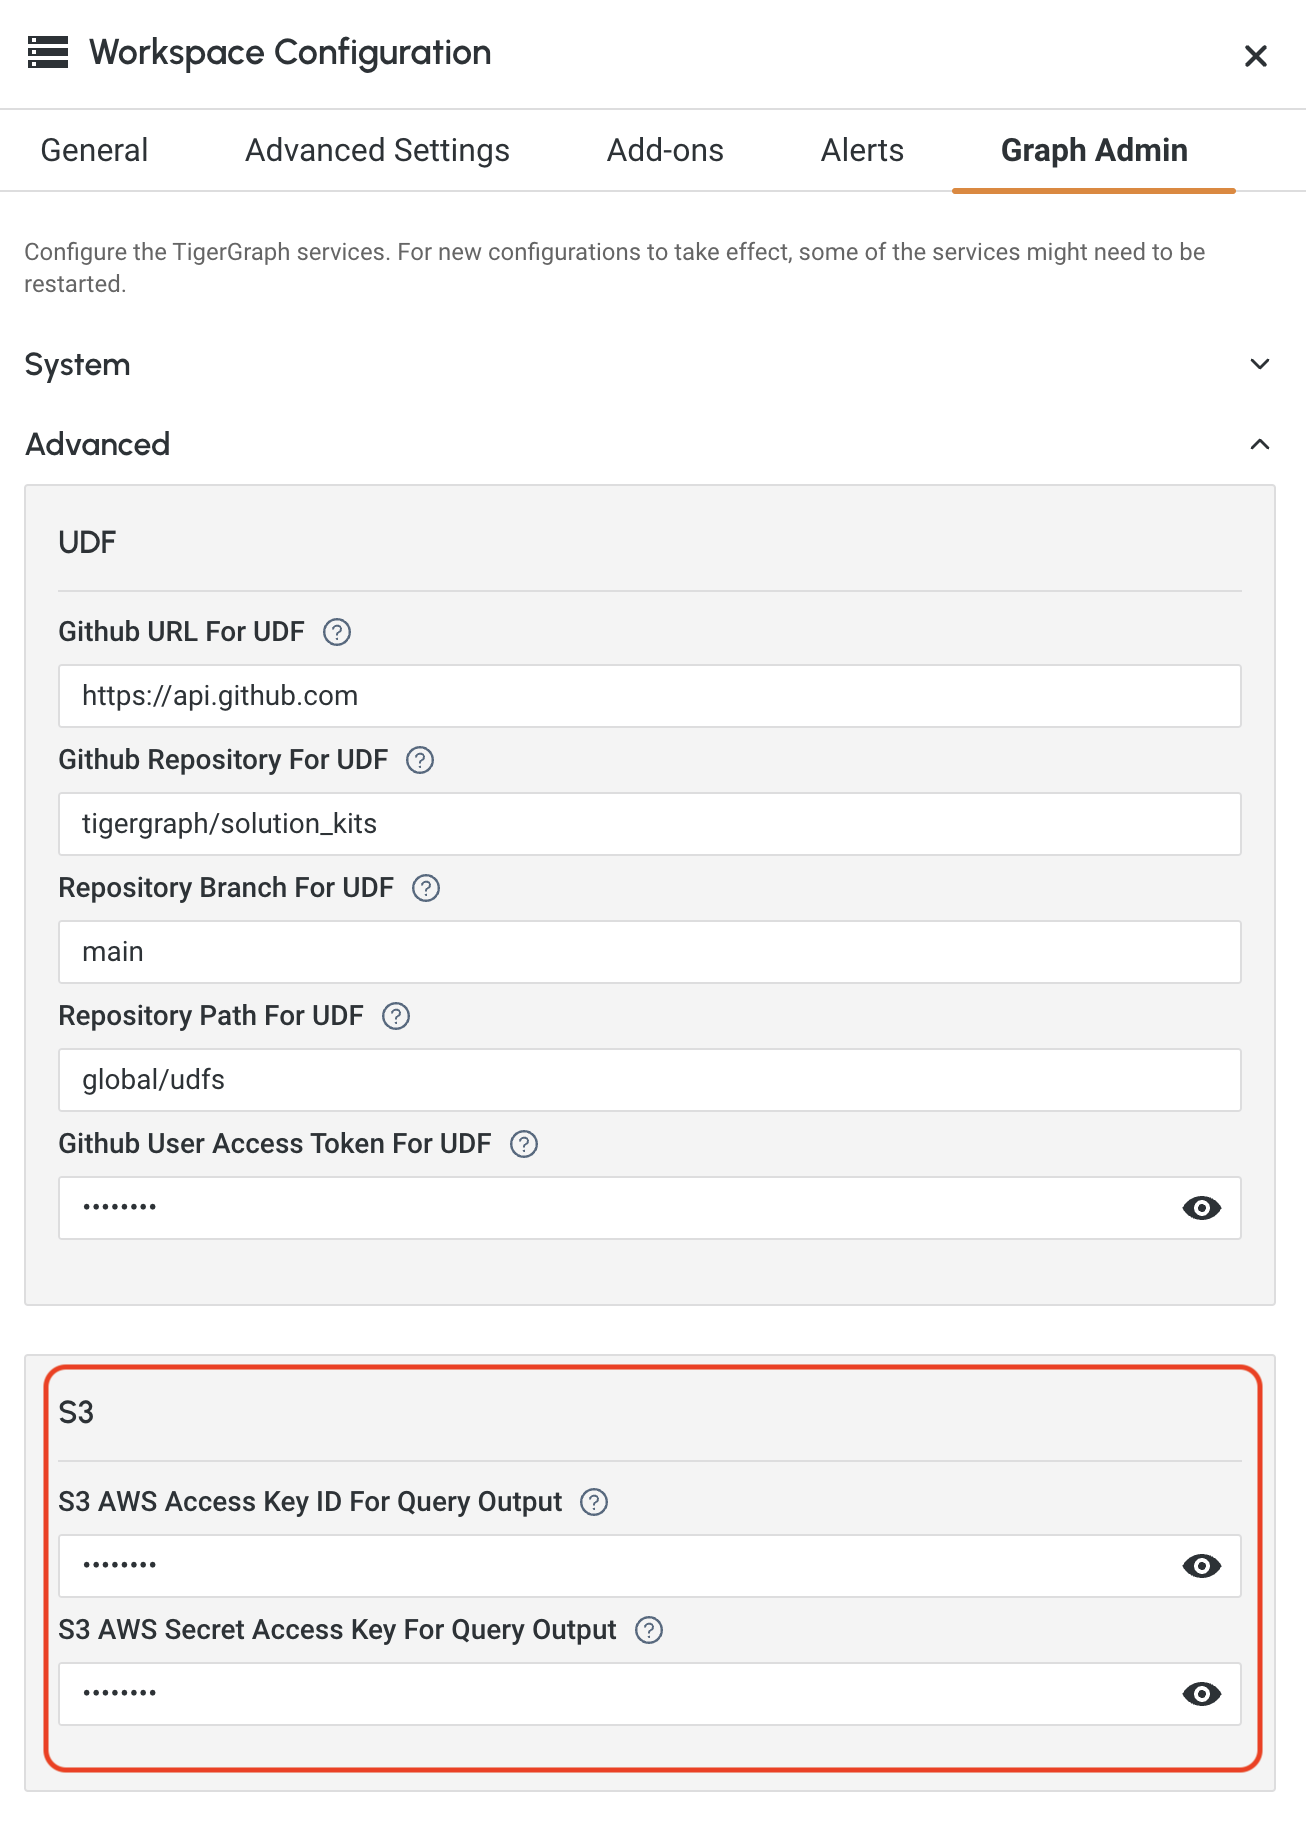
Using Graph Admin
Method 1: Using GSQL Editor
1) Set up the TigerGraph Savanna workspace and ensure it is running.
2) Open the GSQL Editor in TigerGraph Savanna.
3) Configure AWS Credentials:
Set your AWS credentials and query timeout in the GSQL Editor.
set query_timeout=7200000;
set s3_aws_access_key_id = <AWS_KEY_ID>;
set s3_aws_secret_access_key = <AWS_ACCESS_KEY>;
4) Create and Run the Query:
Create a query to write data to S3 and run it.
CREATE QUERY print_to_csv_s3() FOR GRAPH ldbc_snb {
  FILE f_hello ("s3://<s3_path>/" + "f_hello.csv");
  print "f_hello", "world\n" TO_CSV f_hello;
}

run query print_to_csv_s3();
Replace <AWS_KEY_ID>, <AWS_ACCESS_KEY>, and <s3_path> with your actual AWS credentials and S3 path.
Method 2: Via API
1) Set up the TigerGraph Savanna workspace and ensure it is running.
2) Send a GET Request:
Use the following curl command to run the query via API.
curl -X GET \
-H "GSQL-S3AWSAccessKeyId: $AWS_KEY_ID" \
-H "GSQL-S3AWSSecretAccessKey: $AWS_ACCESS_KEY" \
-H "GSQL-TIMEOUT: 7200000" \
https://$HOST_ID.i.tgcloud.io/query/$GRAPH_NAME/$QUERY_NAME
Replace $AWS_KEY_ID and $AWS_ACCESS_KEY with your actual AWS credentials, $HOST_ID with your TigerGraph Savanna host ID, $GRAPH_NAME with your graph name, and $QUERY_NAME with your query name.
Method 3: Using Graph Admin
1) Set up the TigerGraph Savanna workspace and ensure it is running.
2) Edit the workspace by clicking the … button of your selected workspace.
3) Navigate to the Graph Admin tab.
4) Select the GPE section, then configure the following entries:

-
S3 AWS Access Key ID For Query Output: Your AWS Access Key ID.
-
S3 AWS Secret Access Key For Query Output: Your AWS Secret Access Key.
5) Click Save to apply the changes.
|
It is recommended to always set up a default s3 access key ID and secret access key in the Graph Admin. This will be the fallback option in case the query does not have the s3 access key ID and secret access key set. |
|
Update Graph Admin configurations may require restart of certain services, which may impact the running queries/loading jobs/schema changes. Apply changes with caution. |
Example
Here’s an example of writing data to S3 using the GSQL Editor:
set query_timeout=7200000;
set s3_aws_access_key_id = "your_aws_access_key_id";
set s3_aws_secret_access_key = "your_aws_secret_access_key";

CREATE QUERY print_to_csv_s3() FOR GRAPH ldbc_snb {
    FILE f_hello ("s3://your_s3_bucket/your_path/" + "f_hello.csv");
    print "f_hello", "world\n" TO_CSV f_hello;
}

run query print_to_csv_s3();
Troubleshooting
-
Permission Issues: Ensure that the IAM role or user has the necessary permissions (
s3:PutObject,s3:ListBucket). -
Network Issues: Verify that your TigerGraph workspace can reach the S3 endpoint.
-
Credential Issues: Ensure that the correct credentials are provided either via GSQL Editor, API headers, or Graph Admin configurations.
For more detailed troubleshooting, refer to the [AWS S3 Documentation](https://docs.aws.amazon.com/s3/index.html).