ML Workbench on TigerGraph Cloud
ML Workbench is offered as a starter kit on TigerGraph Cloud when creating a new cluster.
This page explains how to set up a new cluster with ML Workbench enabled and access the starter kit.
Set up an ML Workbench-enabled cluster
Follow the instructions in Create a Cluster to log in to TigerGraph Cloud and begin setting up a new cluster.
At the bottom of the stage, under Advanced settings, click the switch labeled Enable Machine Learning Workbench.
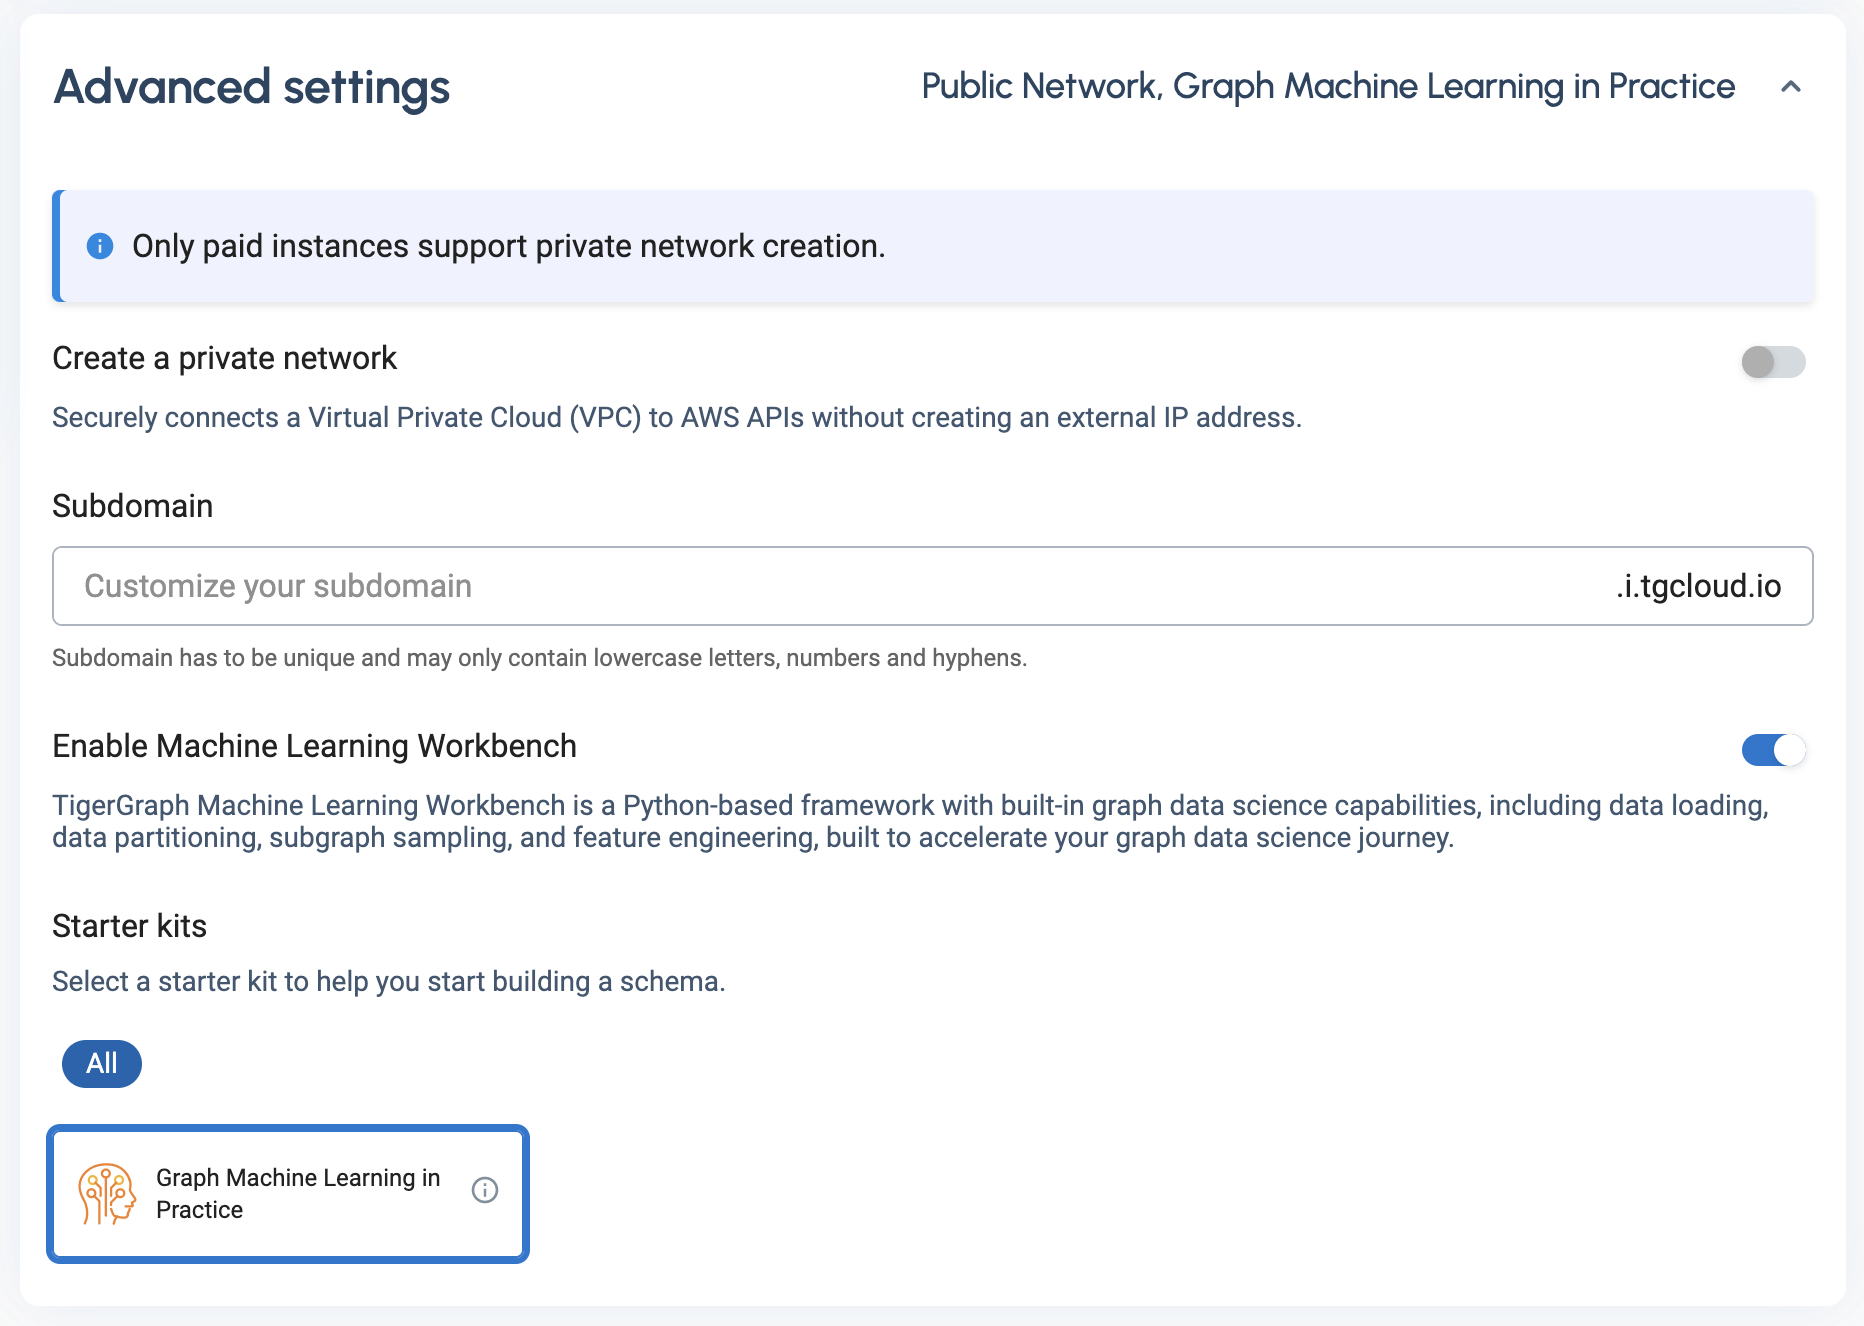
This limits the starter kits to just one, the Graph Machine Learning in Practice starter kit.
With this option selected, finish creating your cluster and wait for it to be provisioned.
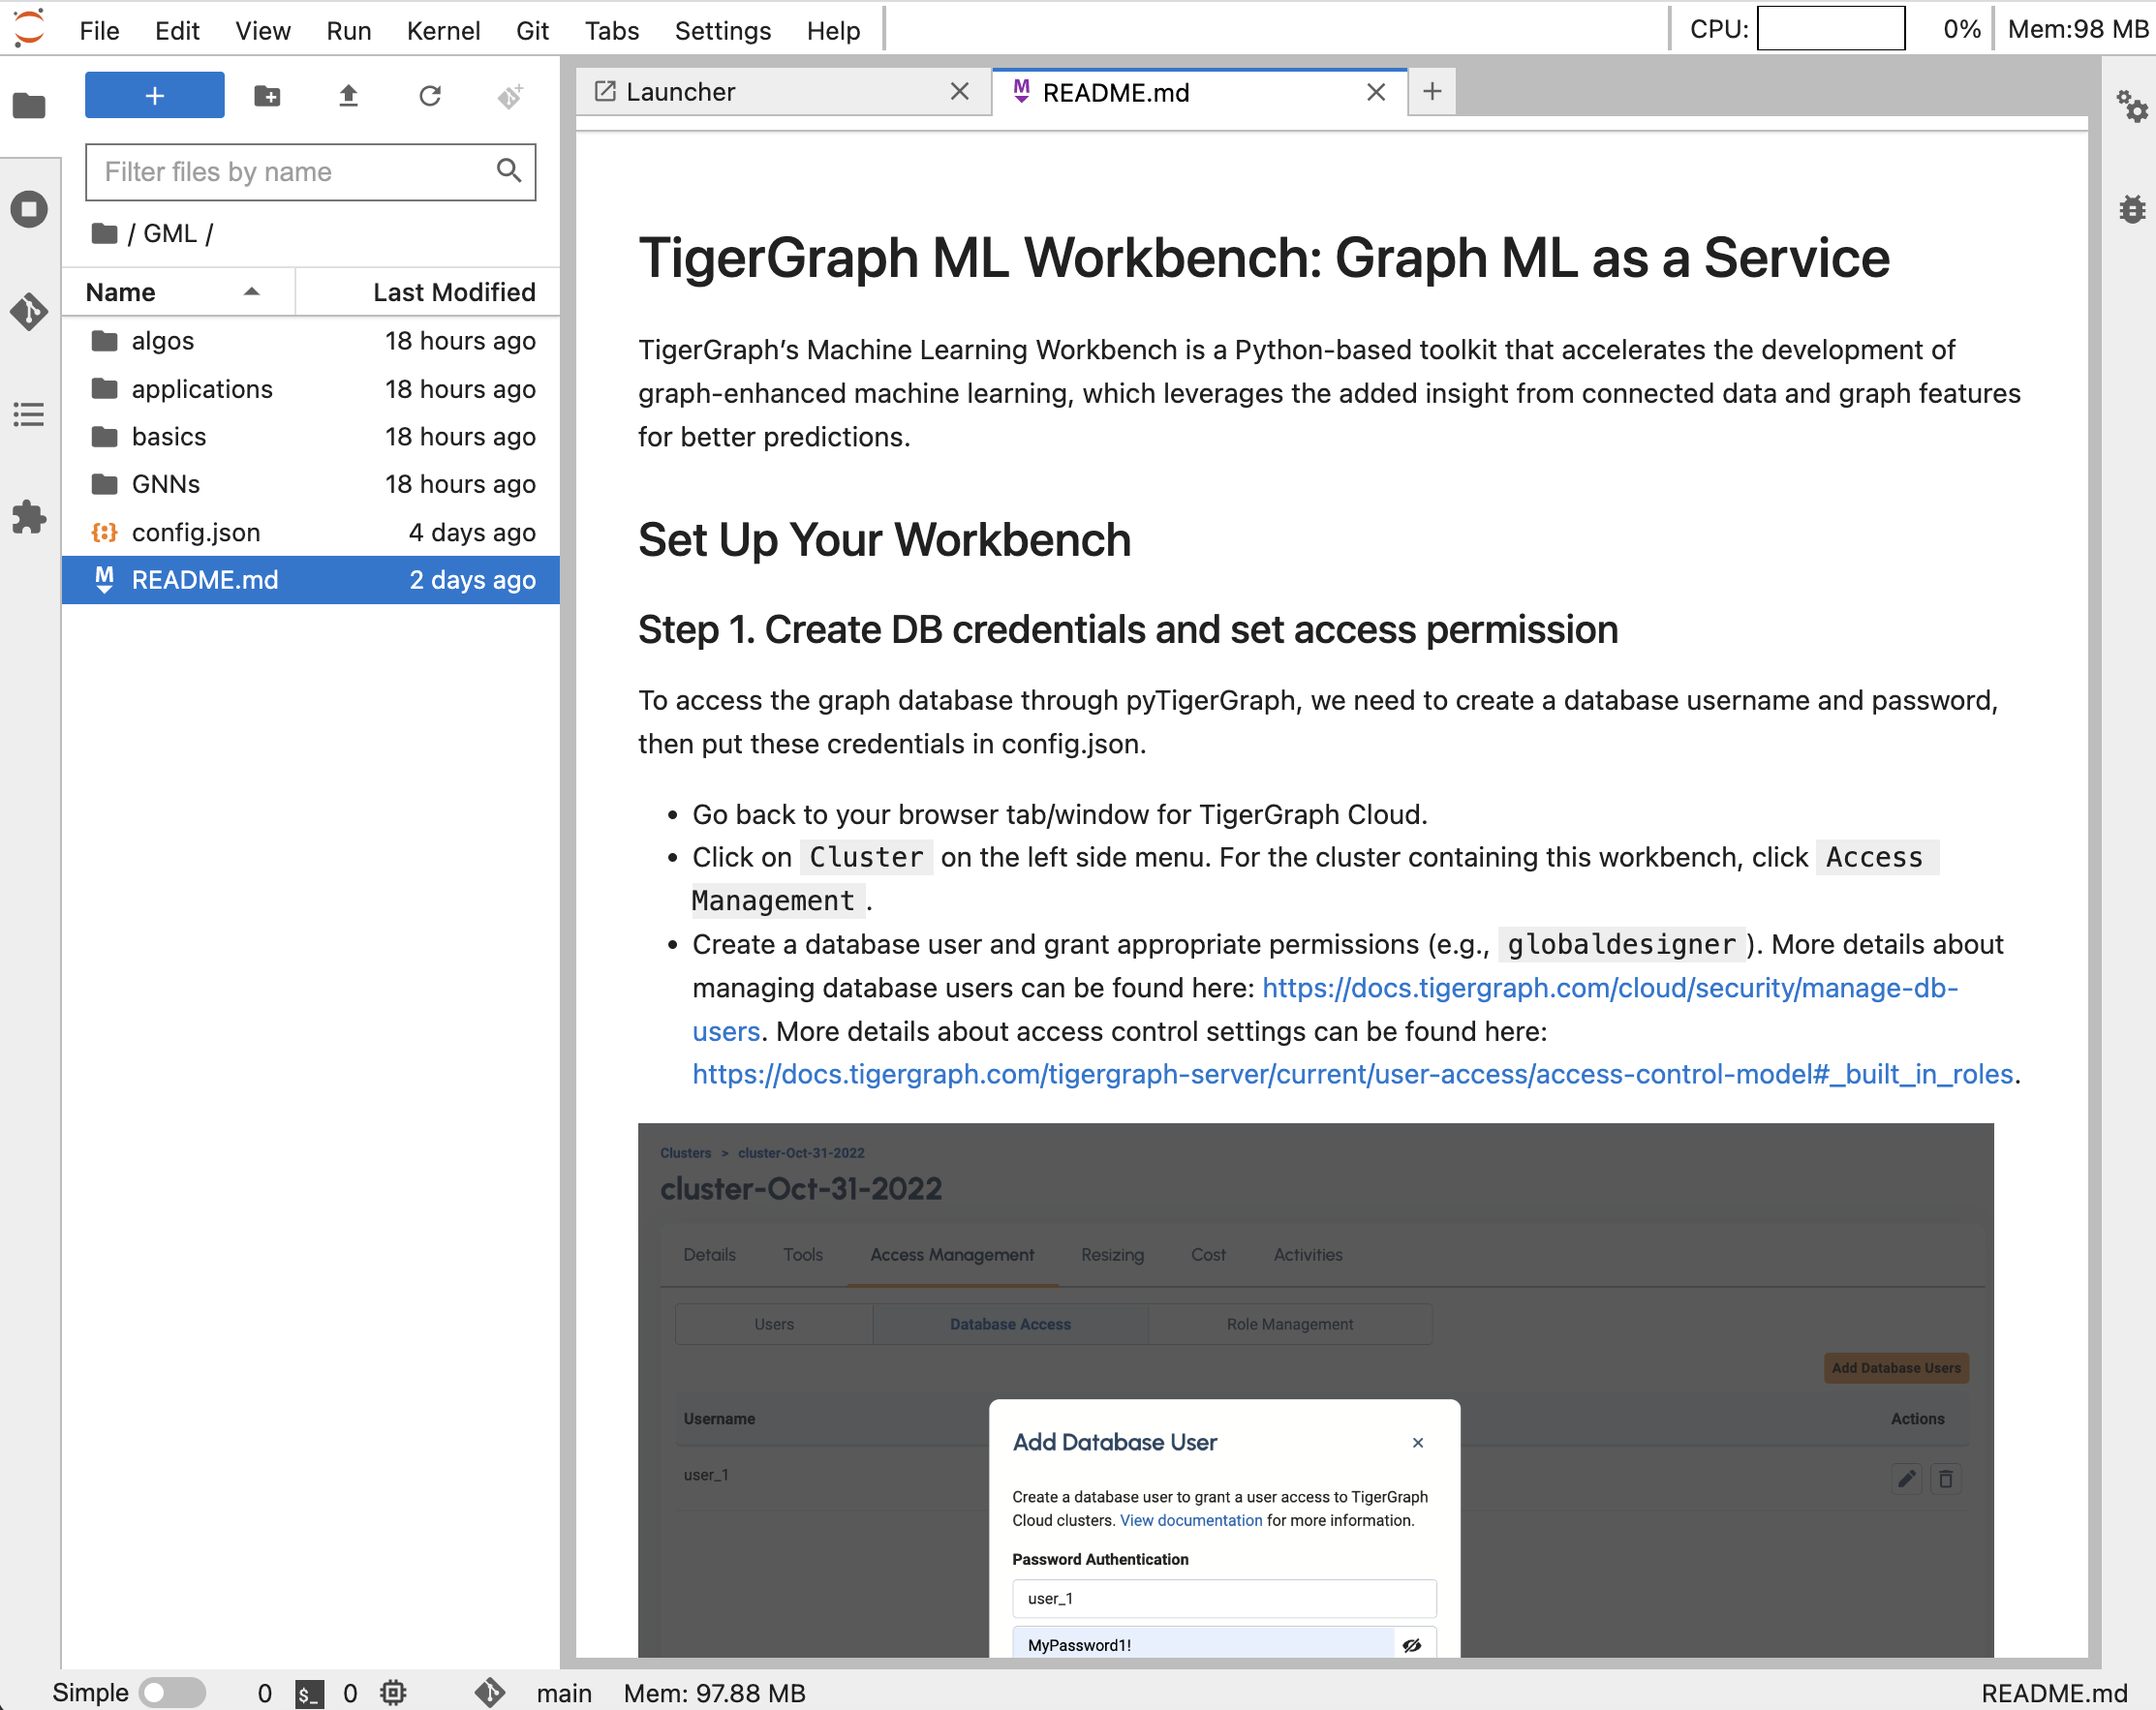
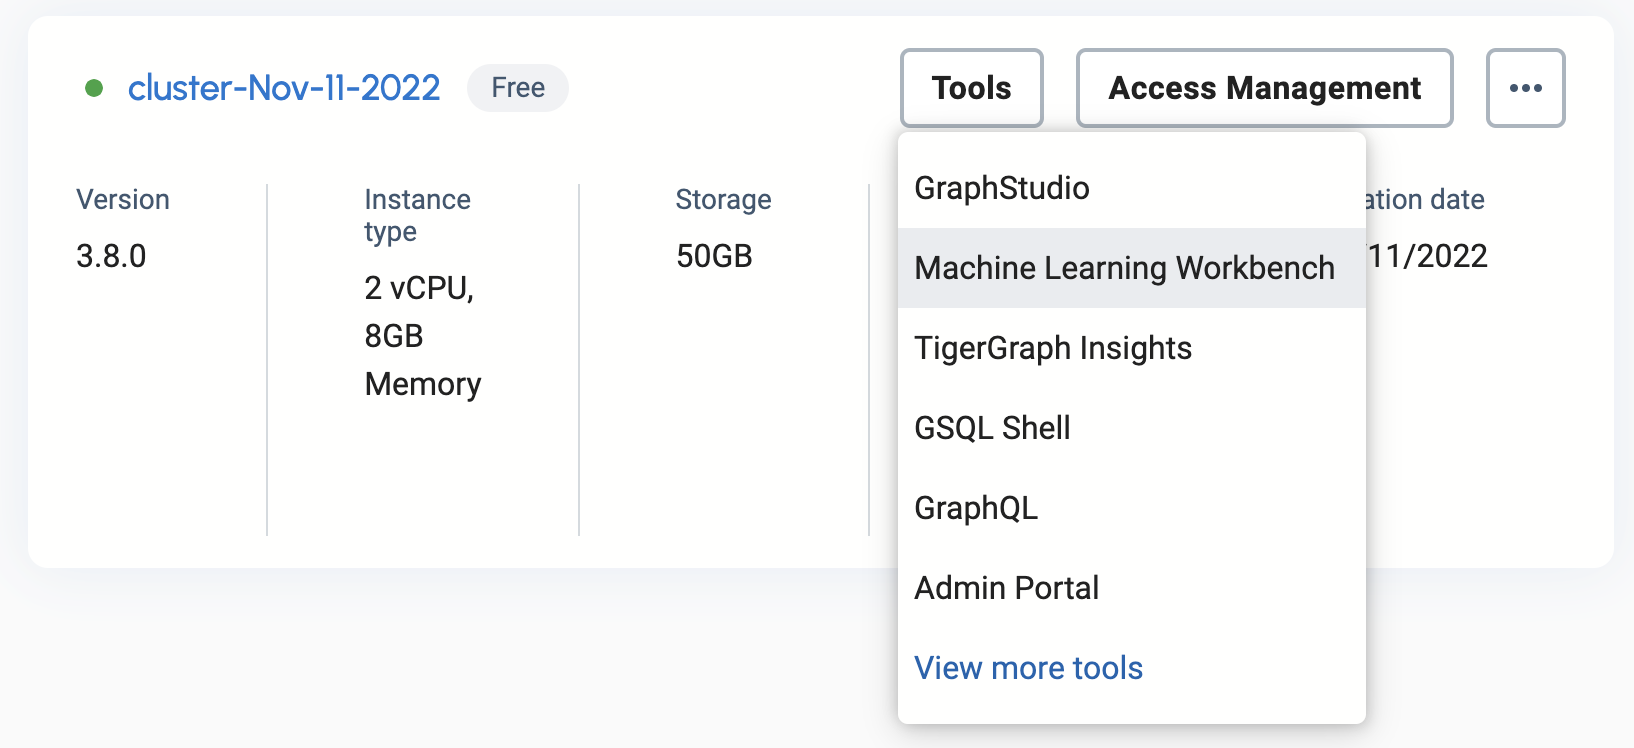
Go to ML Workbench on TigerGraph Cloud
From the Tools dropdown menu on a provisioned cluster, choose Machine Learning Workbench.
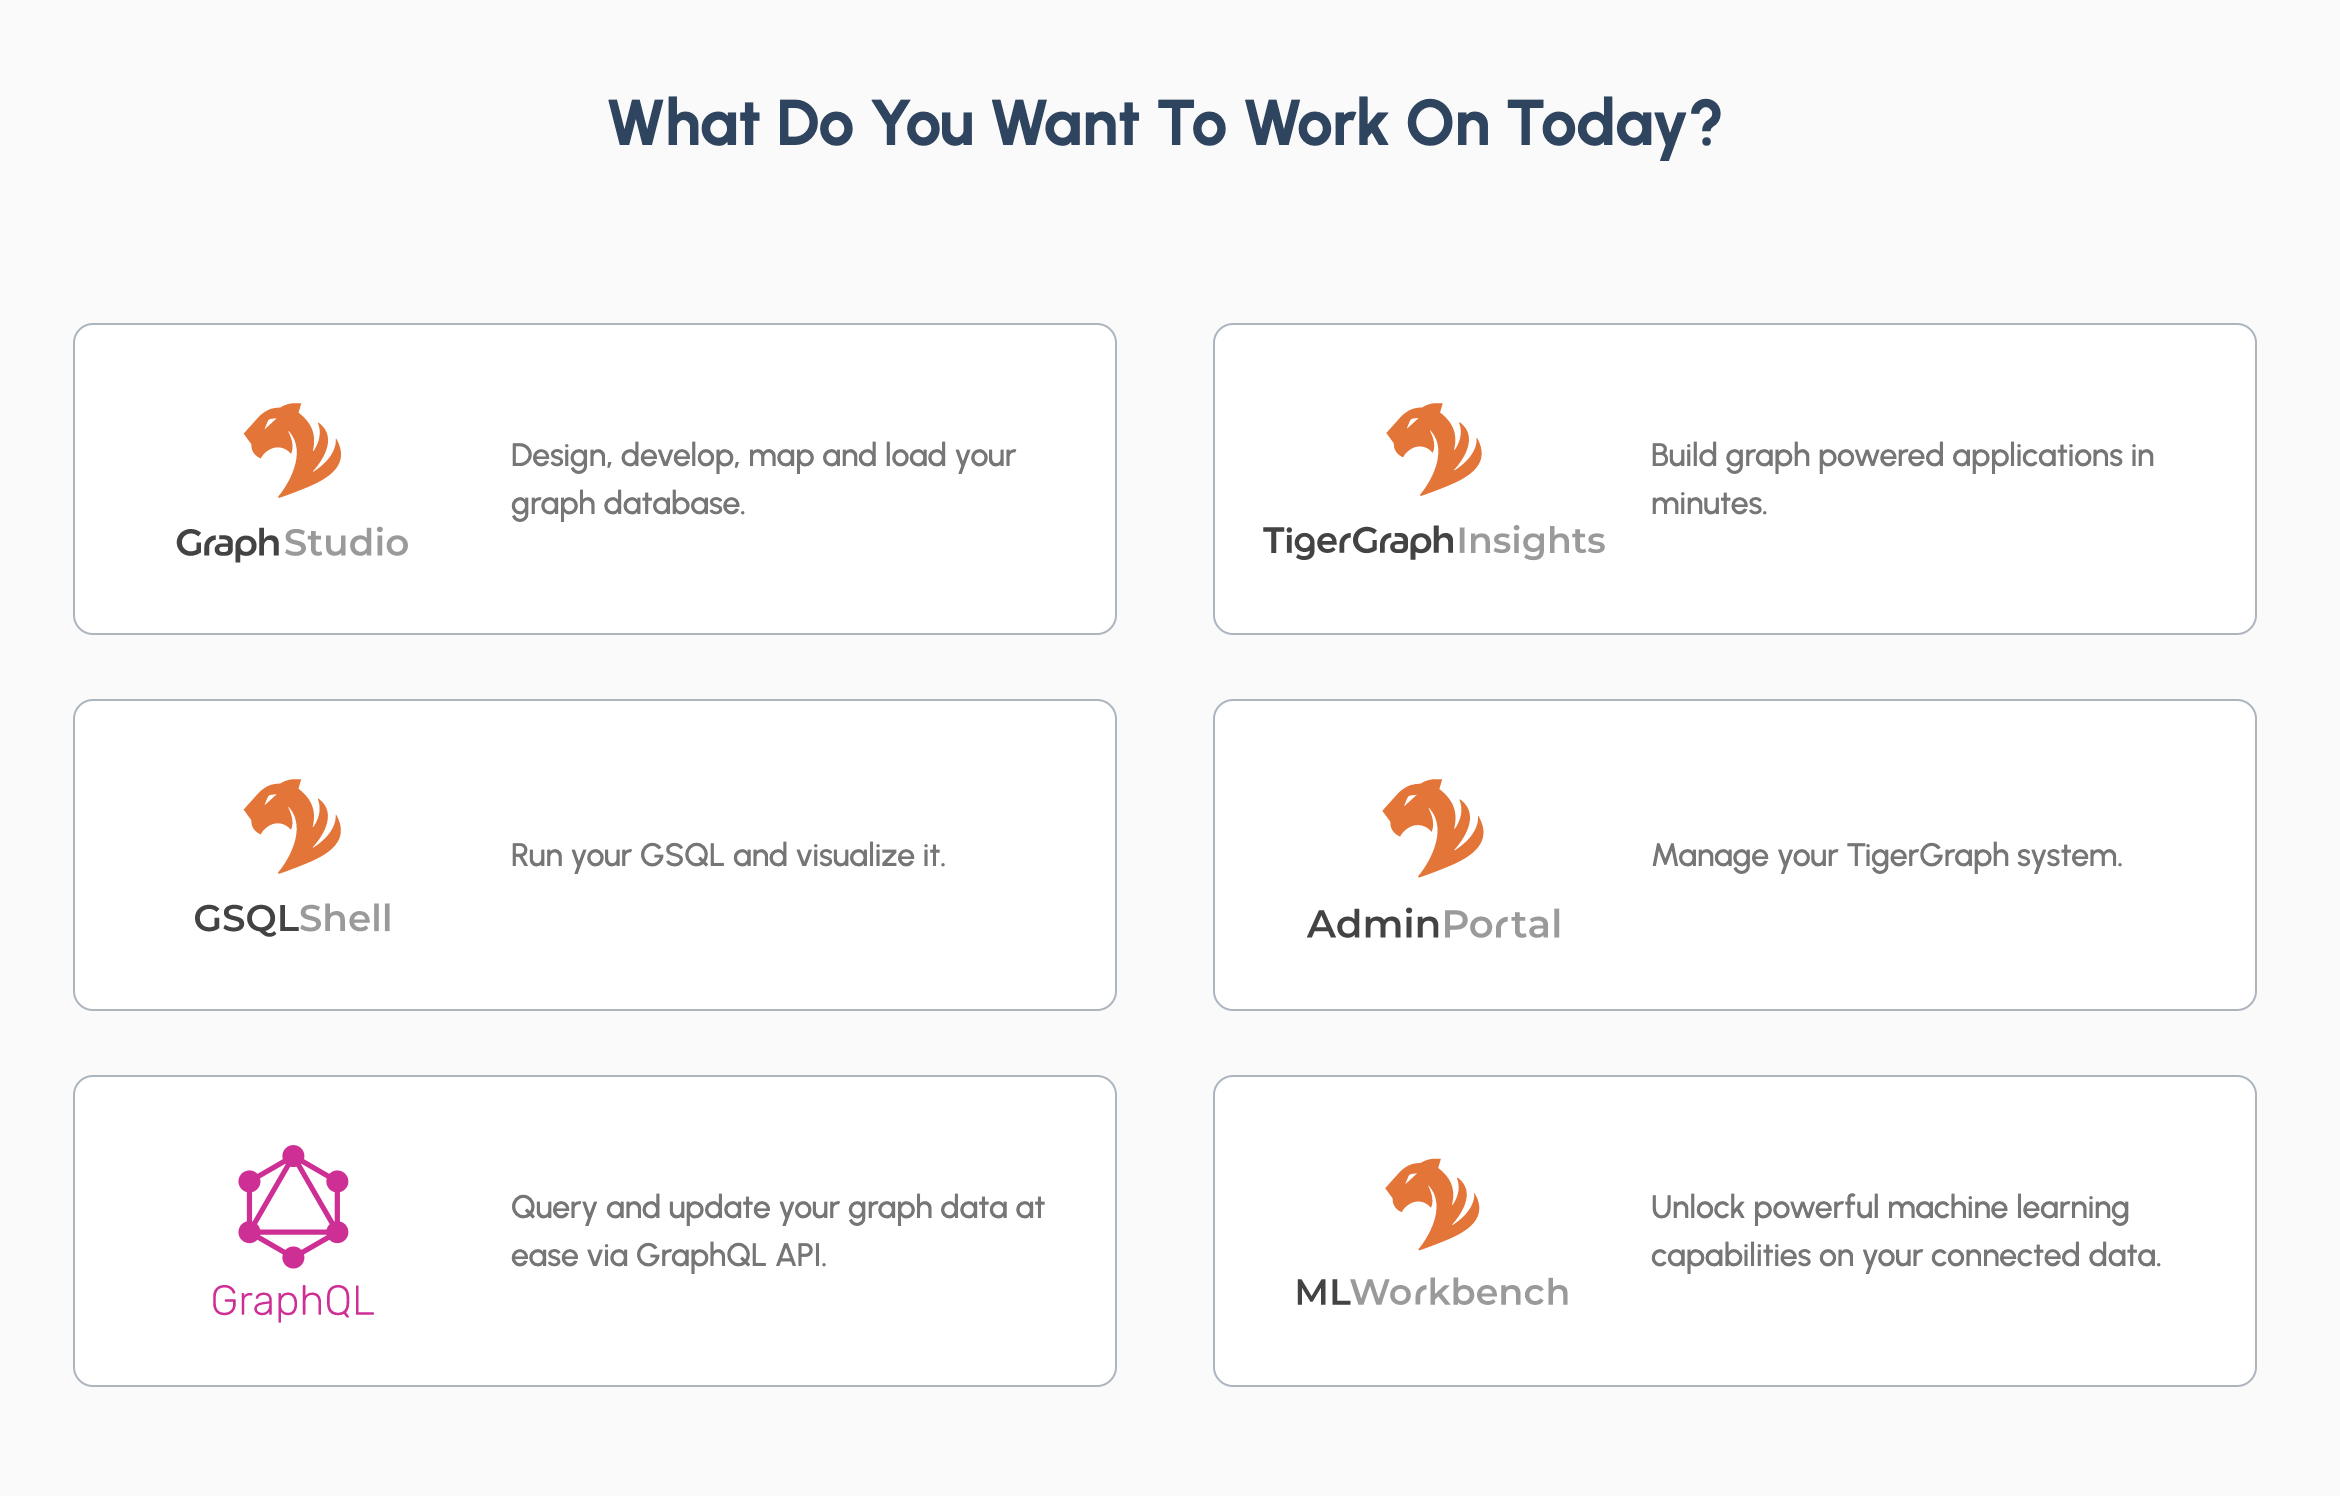
You can also view a list of all clusters by going to the Tools menu on the left (or any nine-dot TigerGraph Suite button) and going to ML Workbench. These options only appear with Machine Learning Workbench-enabled clusters running TigerGraph version 3.8.0 or newer.
If you access a cluster with ML Workbench through its <domain>.tgcloud.io domain name, it will not appear in the TigerGraph Suite display.
It can still be accessed through the Tools menu.
|
Click on ML Workbench to see a list of clusters with ML Workbench enabled.