Set up SSO with Azure Active Directory
This is a tutorial for configuring SAML-2.0 based Single Sign-on (SSO) with Azure Active Directory (Azure AD).
Prerequisites
-
TigerGraph must be configured with SSL.
-
GSQL authentication must be enabled by changing the password of the GSQL default user.
-
An Azure AD Tenant must be granted
Application Administratorto follow the tutorial. -
An Azure AD Tenant must be granted
Conditional Access Administratorto take the next step to configure two-factor authentication (2FA).
Configure Azure AD SSO
-
Log in to Azure Active Directory as an admin user: Azure AAD Portal Login
-
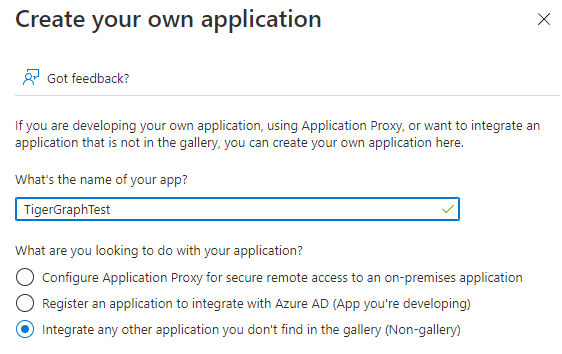
Create a new application by selecting Enterprise Applications in the left sidebar menu and clicking All applications > New application > Create your own application.
-
Enter a name and ensure that you are using a non-gallery application.
-
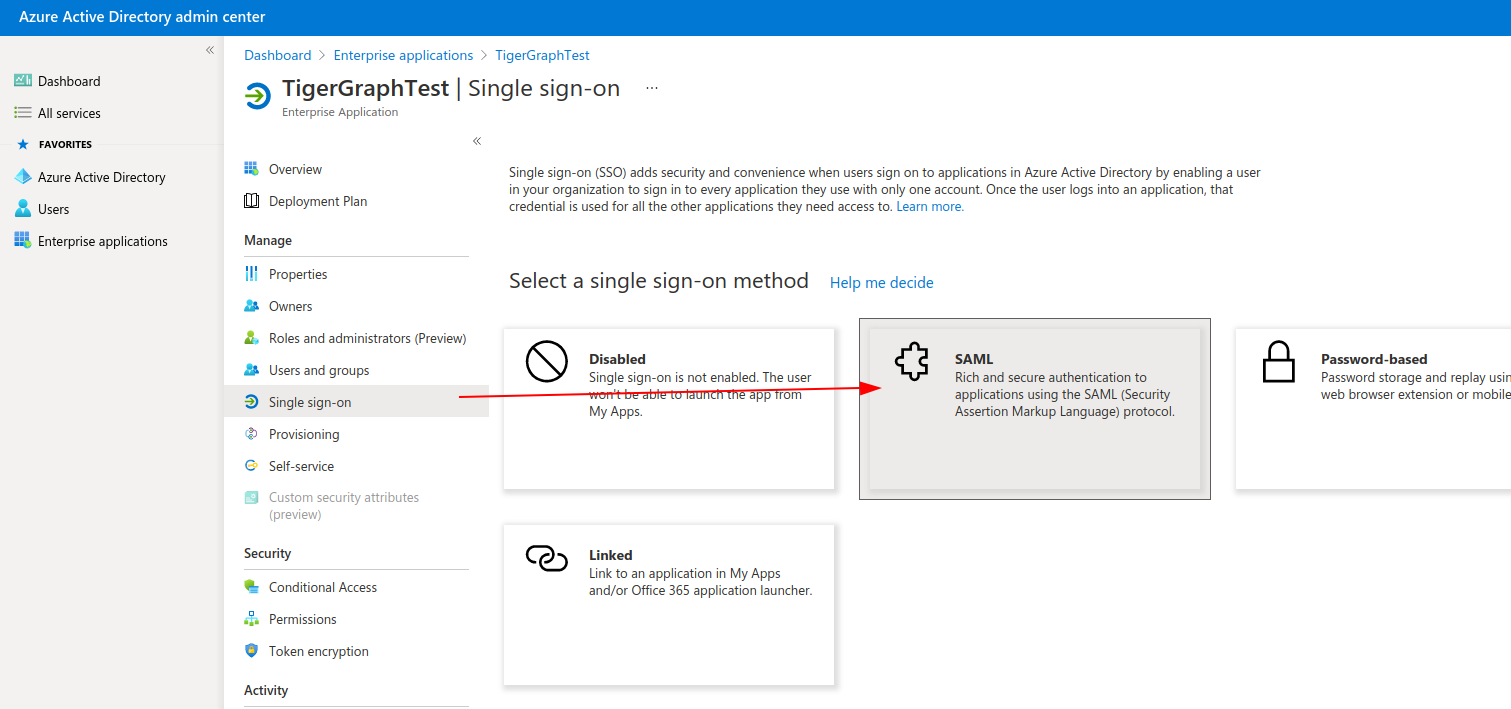
In the sidebar for your new application, choose Single sign-on under Manage, then click the SAML button.
-
Enter this information in the Basic SAML Configuration section. Replace
<tigergraph-machine-hostname>with your TigerGraph machine hostname.-
Identifier (Entity ID):
https://<tigergraph-machine-hostname>:14240/gsql/v1/saml/meta -
Reply URL:
https://<tigergraph-machine-hostname>:14240/api/auth/saml/acs
-
-
Go to Section 3: SAML Signing Certificate and click Edit.
-
Set the Signing Option to "Set SAML Response and Assertion", then click Save.
-
Also in Section 3, click the Download link to download the certificate in Base64 format. This will be used to connect to TigerGraph.
-
In Section 4, copy the following information for later use to configure SSO in TigerGraph’s Admin Portal:
-
Login URL (TigerGraph calls this the "Identity Provider Single Sign-On URL")
-
Azure AD Identifier (TigerGraph calls this the Identity Provider Entity Id in TigerGraph)
-
Enable single sign-on in TigerGraph
First, use the SSO documentation to set up SSO in Admin Portal. This is where you will upload the certificate you downloaded from Azure.
Next, follow these steps:
-
Enter the Identity Provider’s Entity ID and Identity Provider SSO URL you copied in Step 9 of the previous section.
-
At the bottom of the screen, for the Authentication Context section, if SSO should always be authenticated by password, use
urn:oasis:names:tc:SAML:2.0:ac:classes:PasswordIf all authentication methods are allowed, then leave this empty.
For more options, see the OASIS standard Authentication Context for SAML V2.0, Section 3.4: Schemas.
Before Azure and TigerGraph can successfully communicate, the Azure AD groups need to be correctly mapped to TigerGraph proxy groups with the appropriate roles.
The TigerGraph proxy group is created with the key=value proxy rule. The key and value should match the SSO user claims in the SAML response.
For example, you could add a Name key with a value of in_group1 and a Member group attribute value of True for a certain group, in this example TestGroup1.
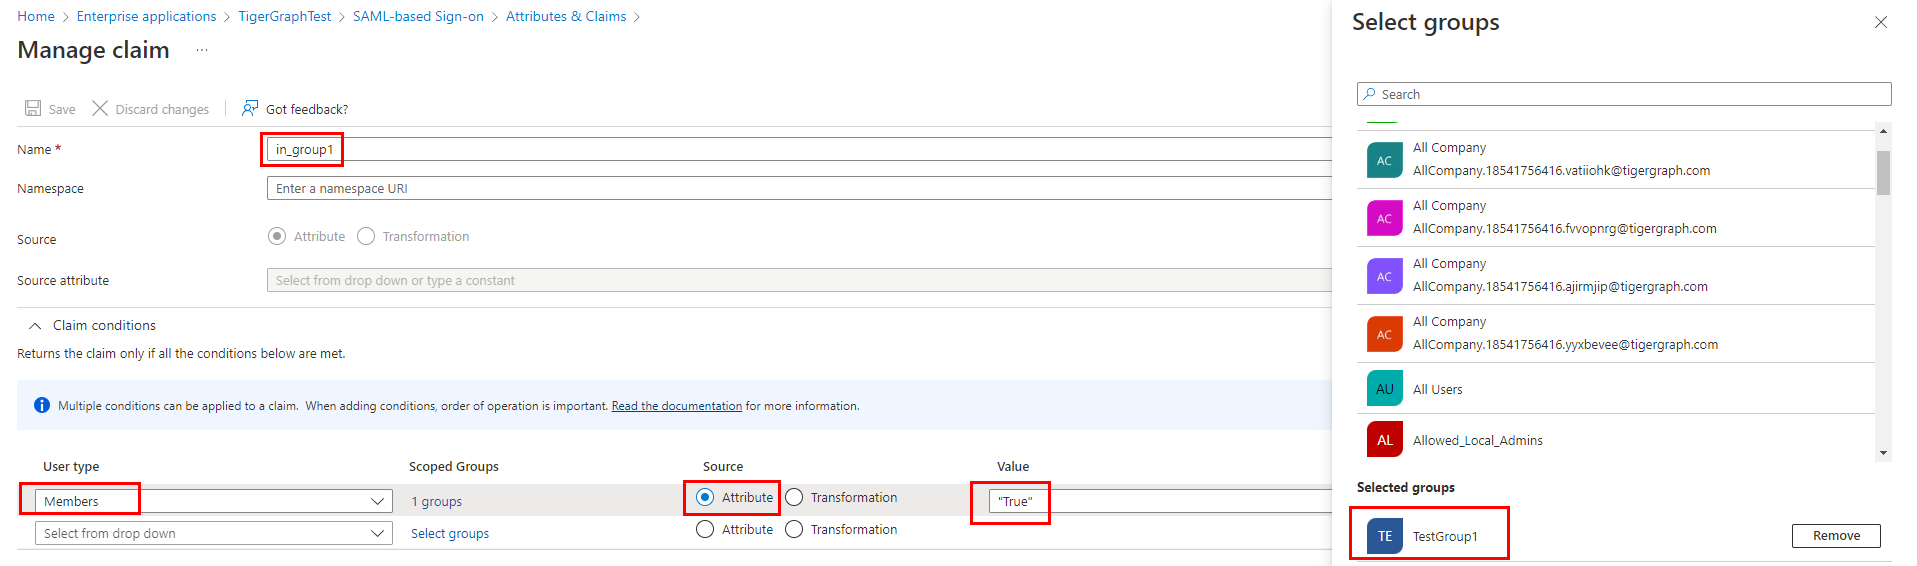
This will return in_group1 = True in the SSO SAML response only if the Azure user is part of TestGroup1.
See Microsoft’s official documentation for instructions on setting up the SAML tokens on the Azure side: Customize Claims issued in the SAML token for enterprise applications
Create a TigerGraph proxy group
-
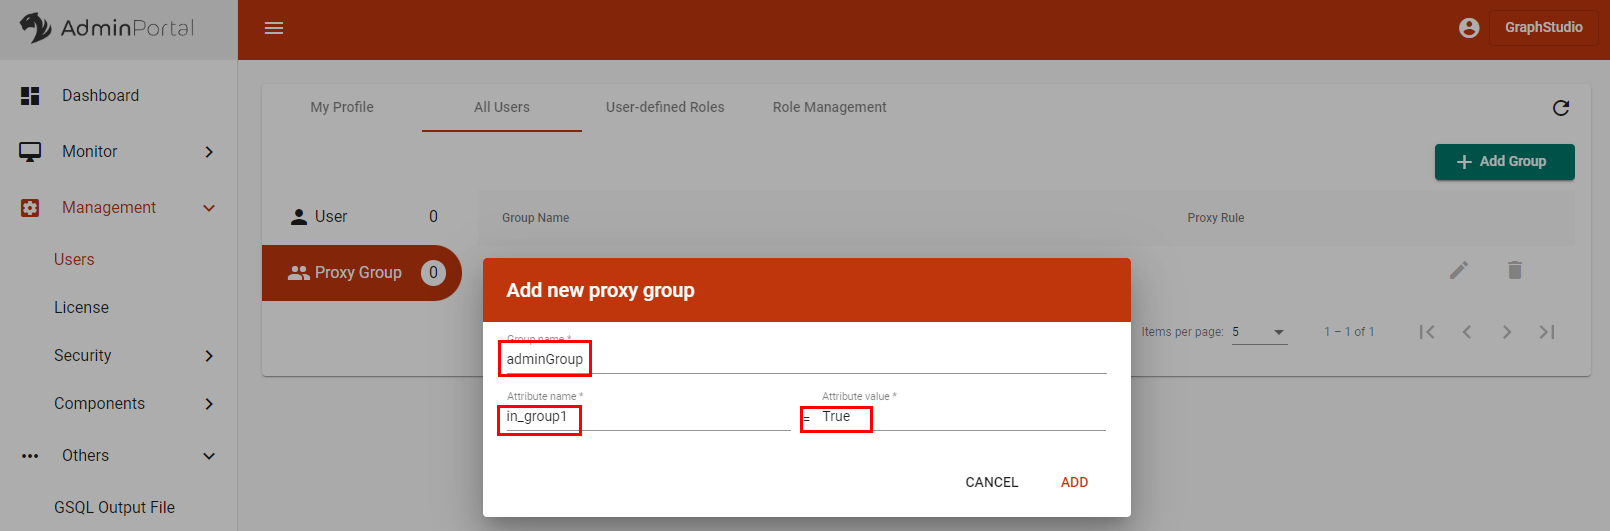
In AdminPortal, select Management > Users from the left sidebar menu.
-
At the top of the Users page, select All Users and click on Proxy Group.
-
Click the + Add Group button to add a new group.
-
Enter a name for your proxy group and use the same attribute name and value from Azure. In this example, the attribute-value pair is
in_group1andTrue.
-
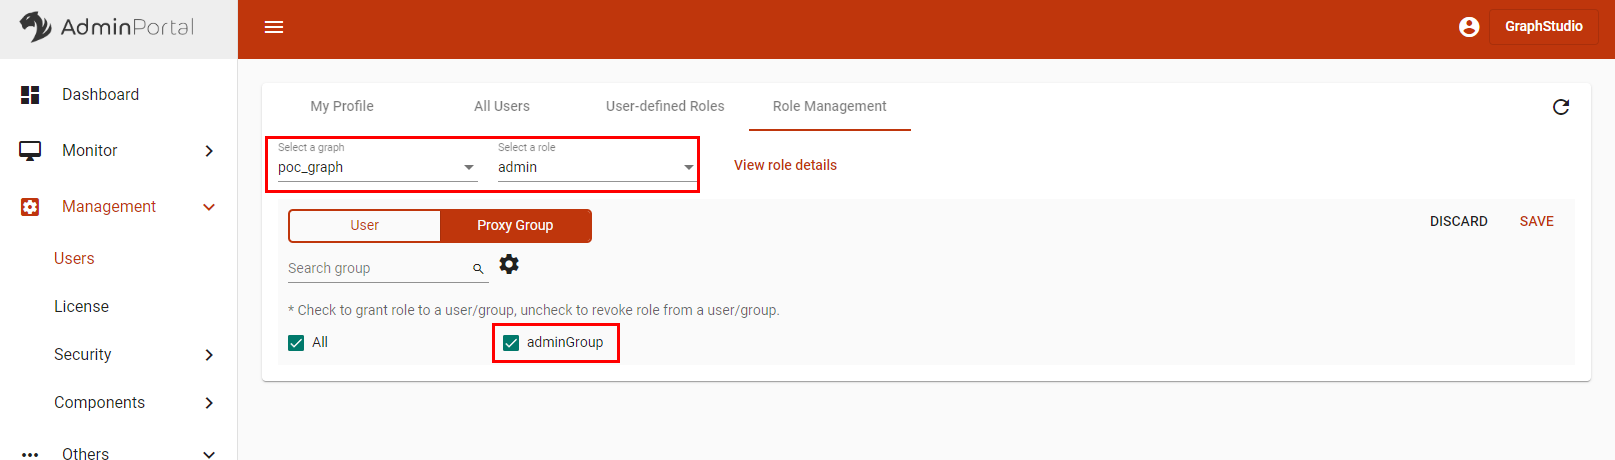
Navigate to the Role Management tab at the top.
-
Select a graph and role on the graph for the proxy group, then click Save.
-
Go to Users > My Profile and check to see that your profile has the correct role.