User Management
The User Management page has three tabs: My Profile, All Users and Role Management.
My Profile
All users can access the My Profile tab to manage their own credentials.
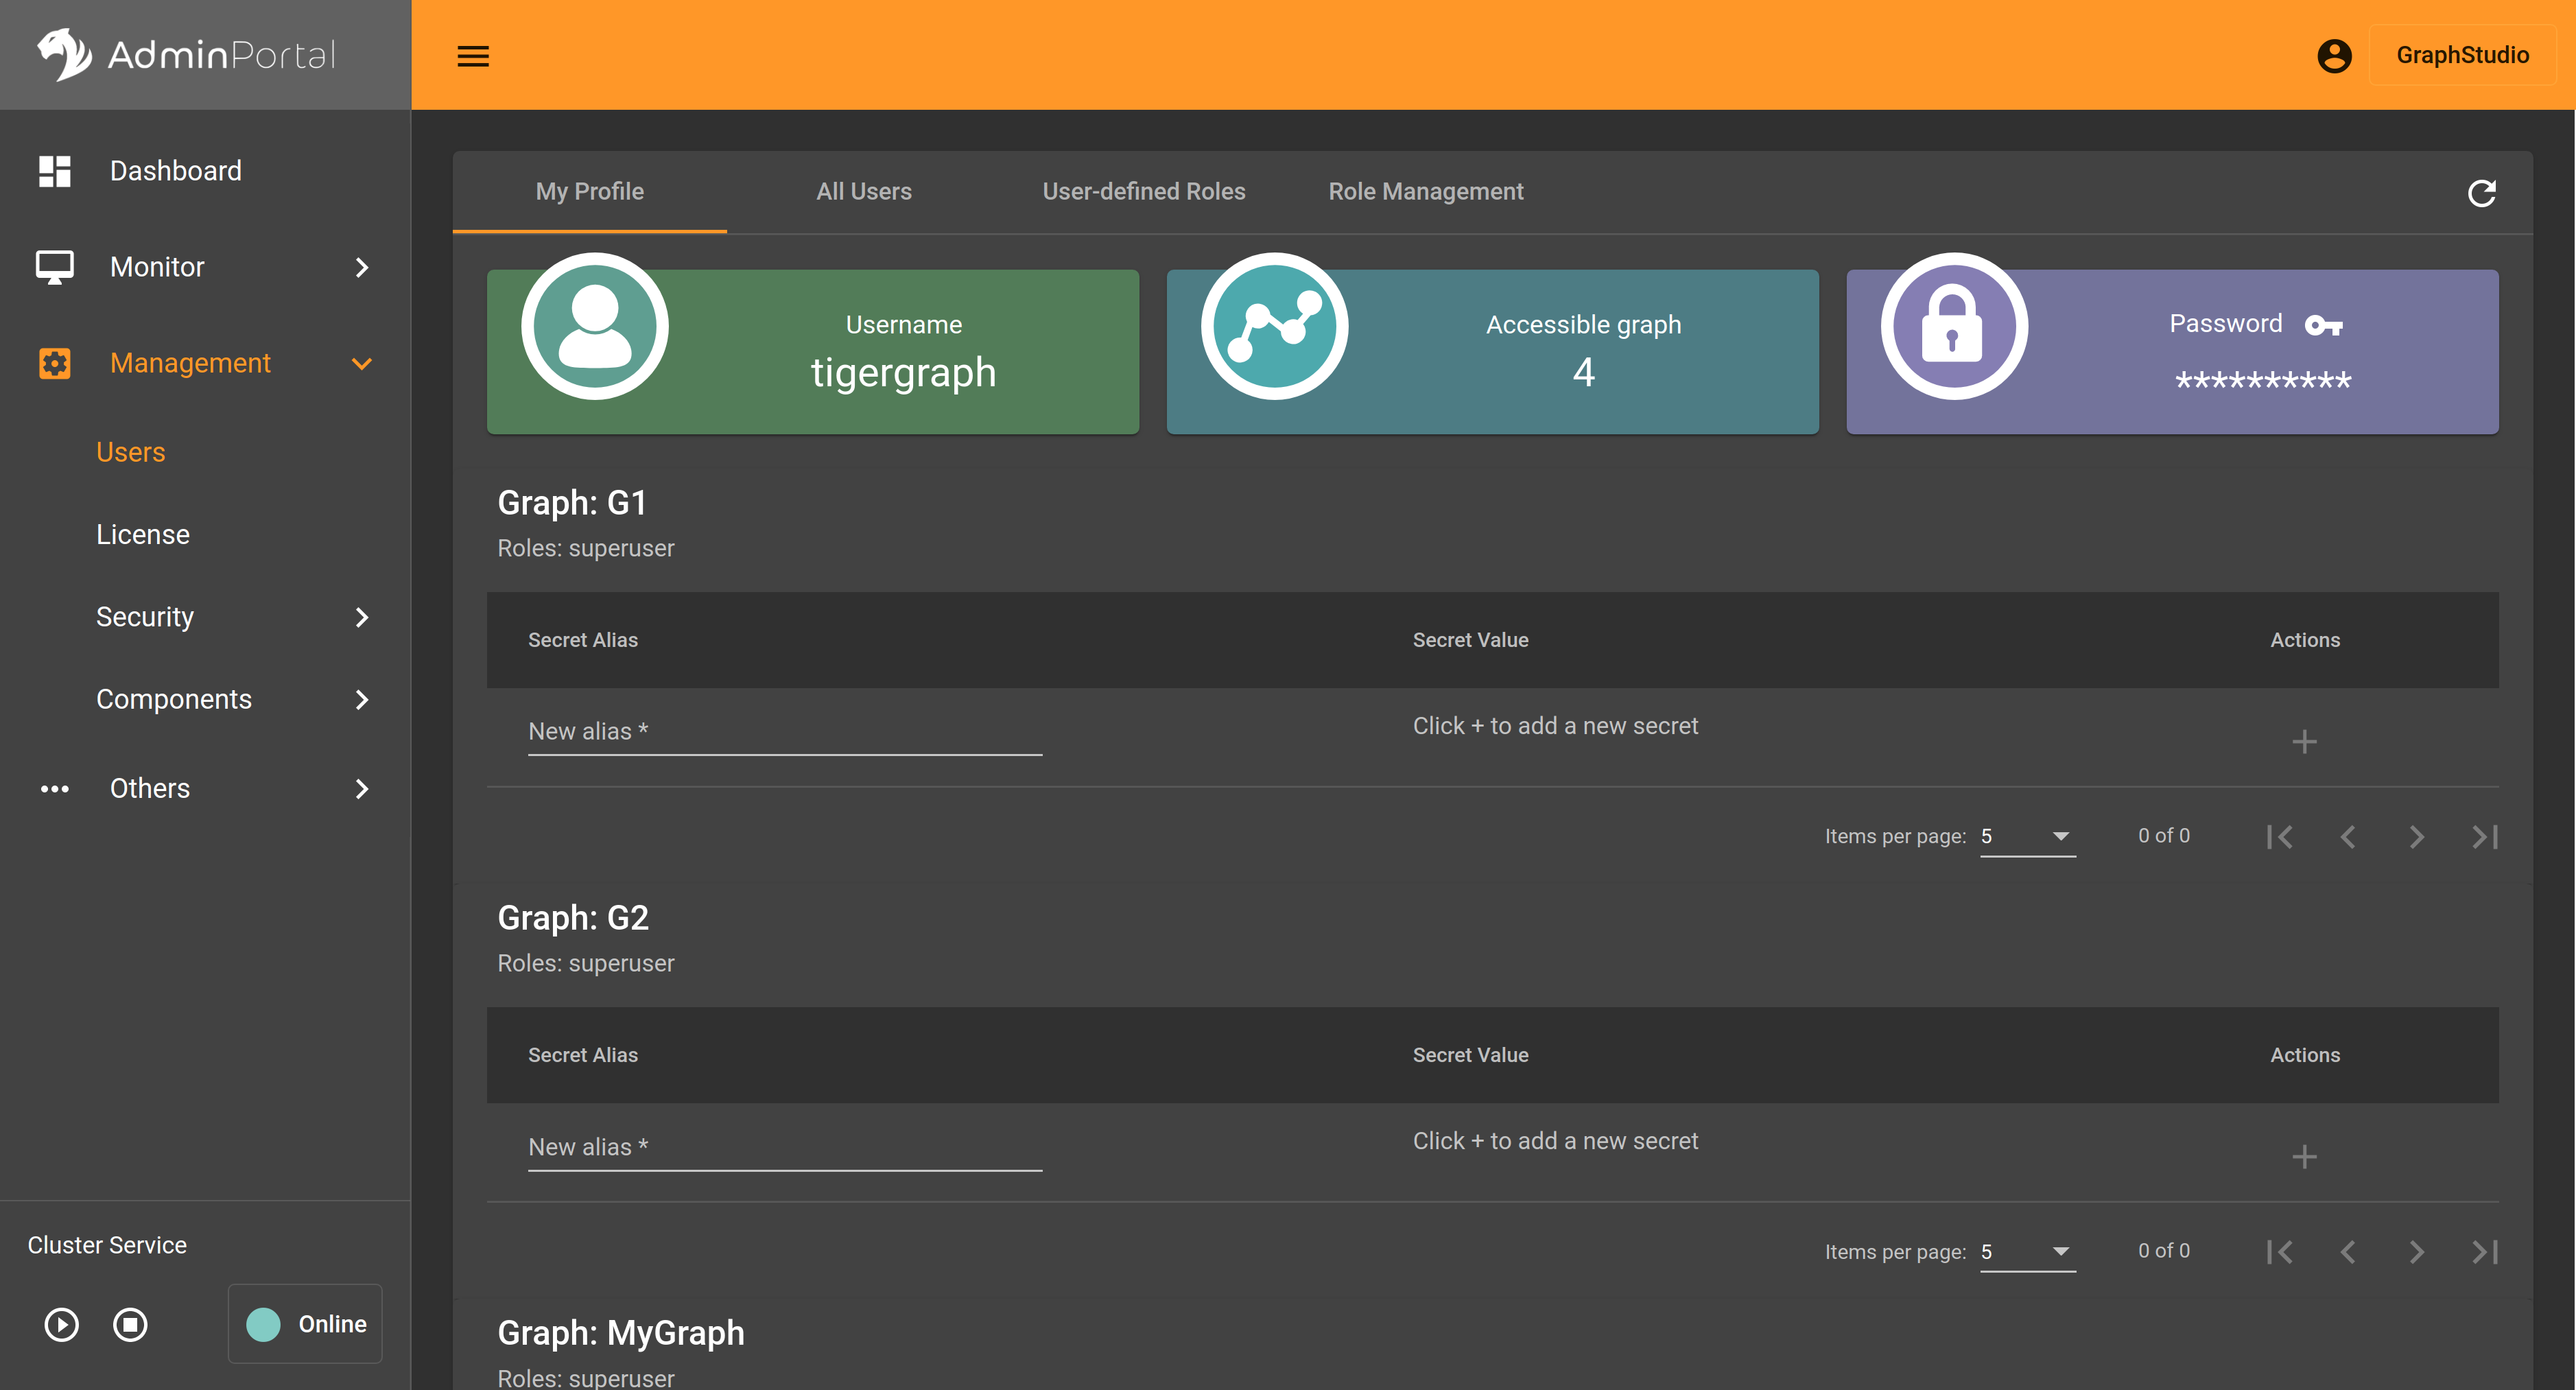
To change your password, click the key icon  in the Password card at the top.
Manage secrets
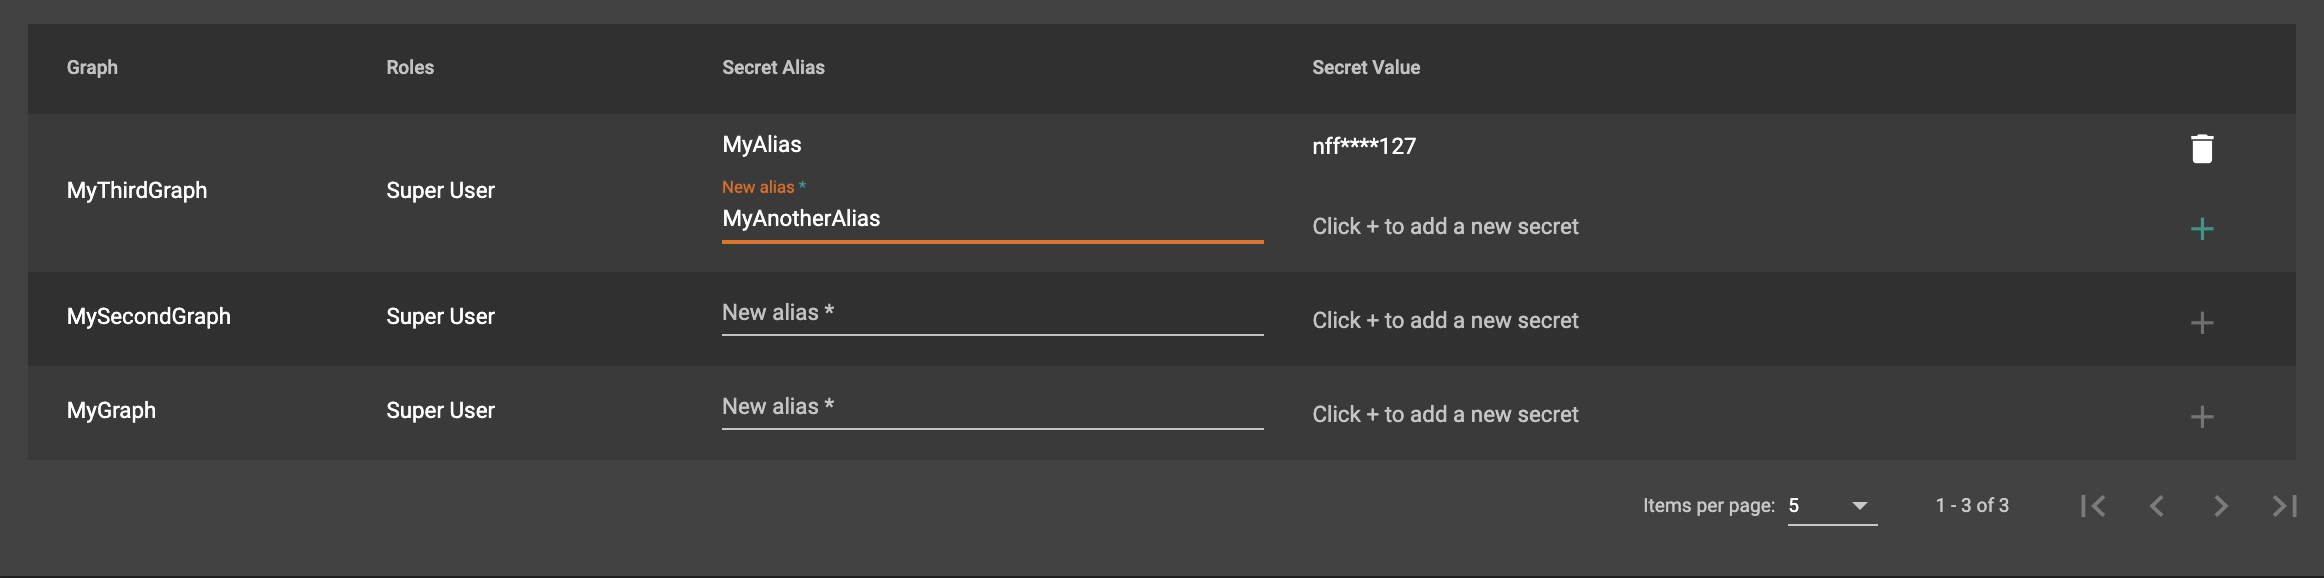
Below the cards, you can create and delete secrets, which are unique strings that can be used to generate authorization tokens. An alias is required for each secret.
You can create as many secrets for each graph as you want, but remember to copy the secret value and save it at a secure location when you generate a secret. Once you refresh the page or go to another page and come back, the actual secret value will be masked for security.
With token authentication enabled, use the secrets to request tokens and add the tokens in the HTTP request headers to call TigerGraph REST endpoints. Read more at: Access Management.
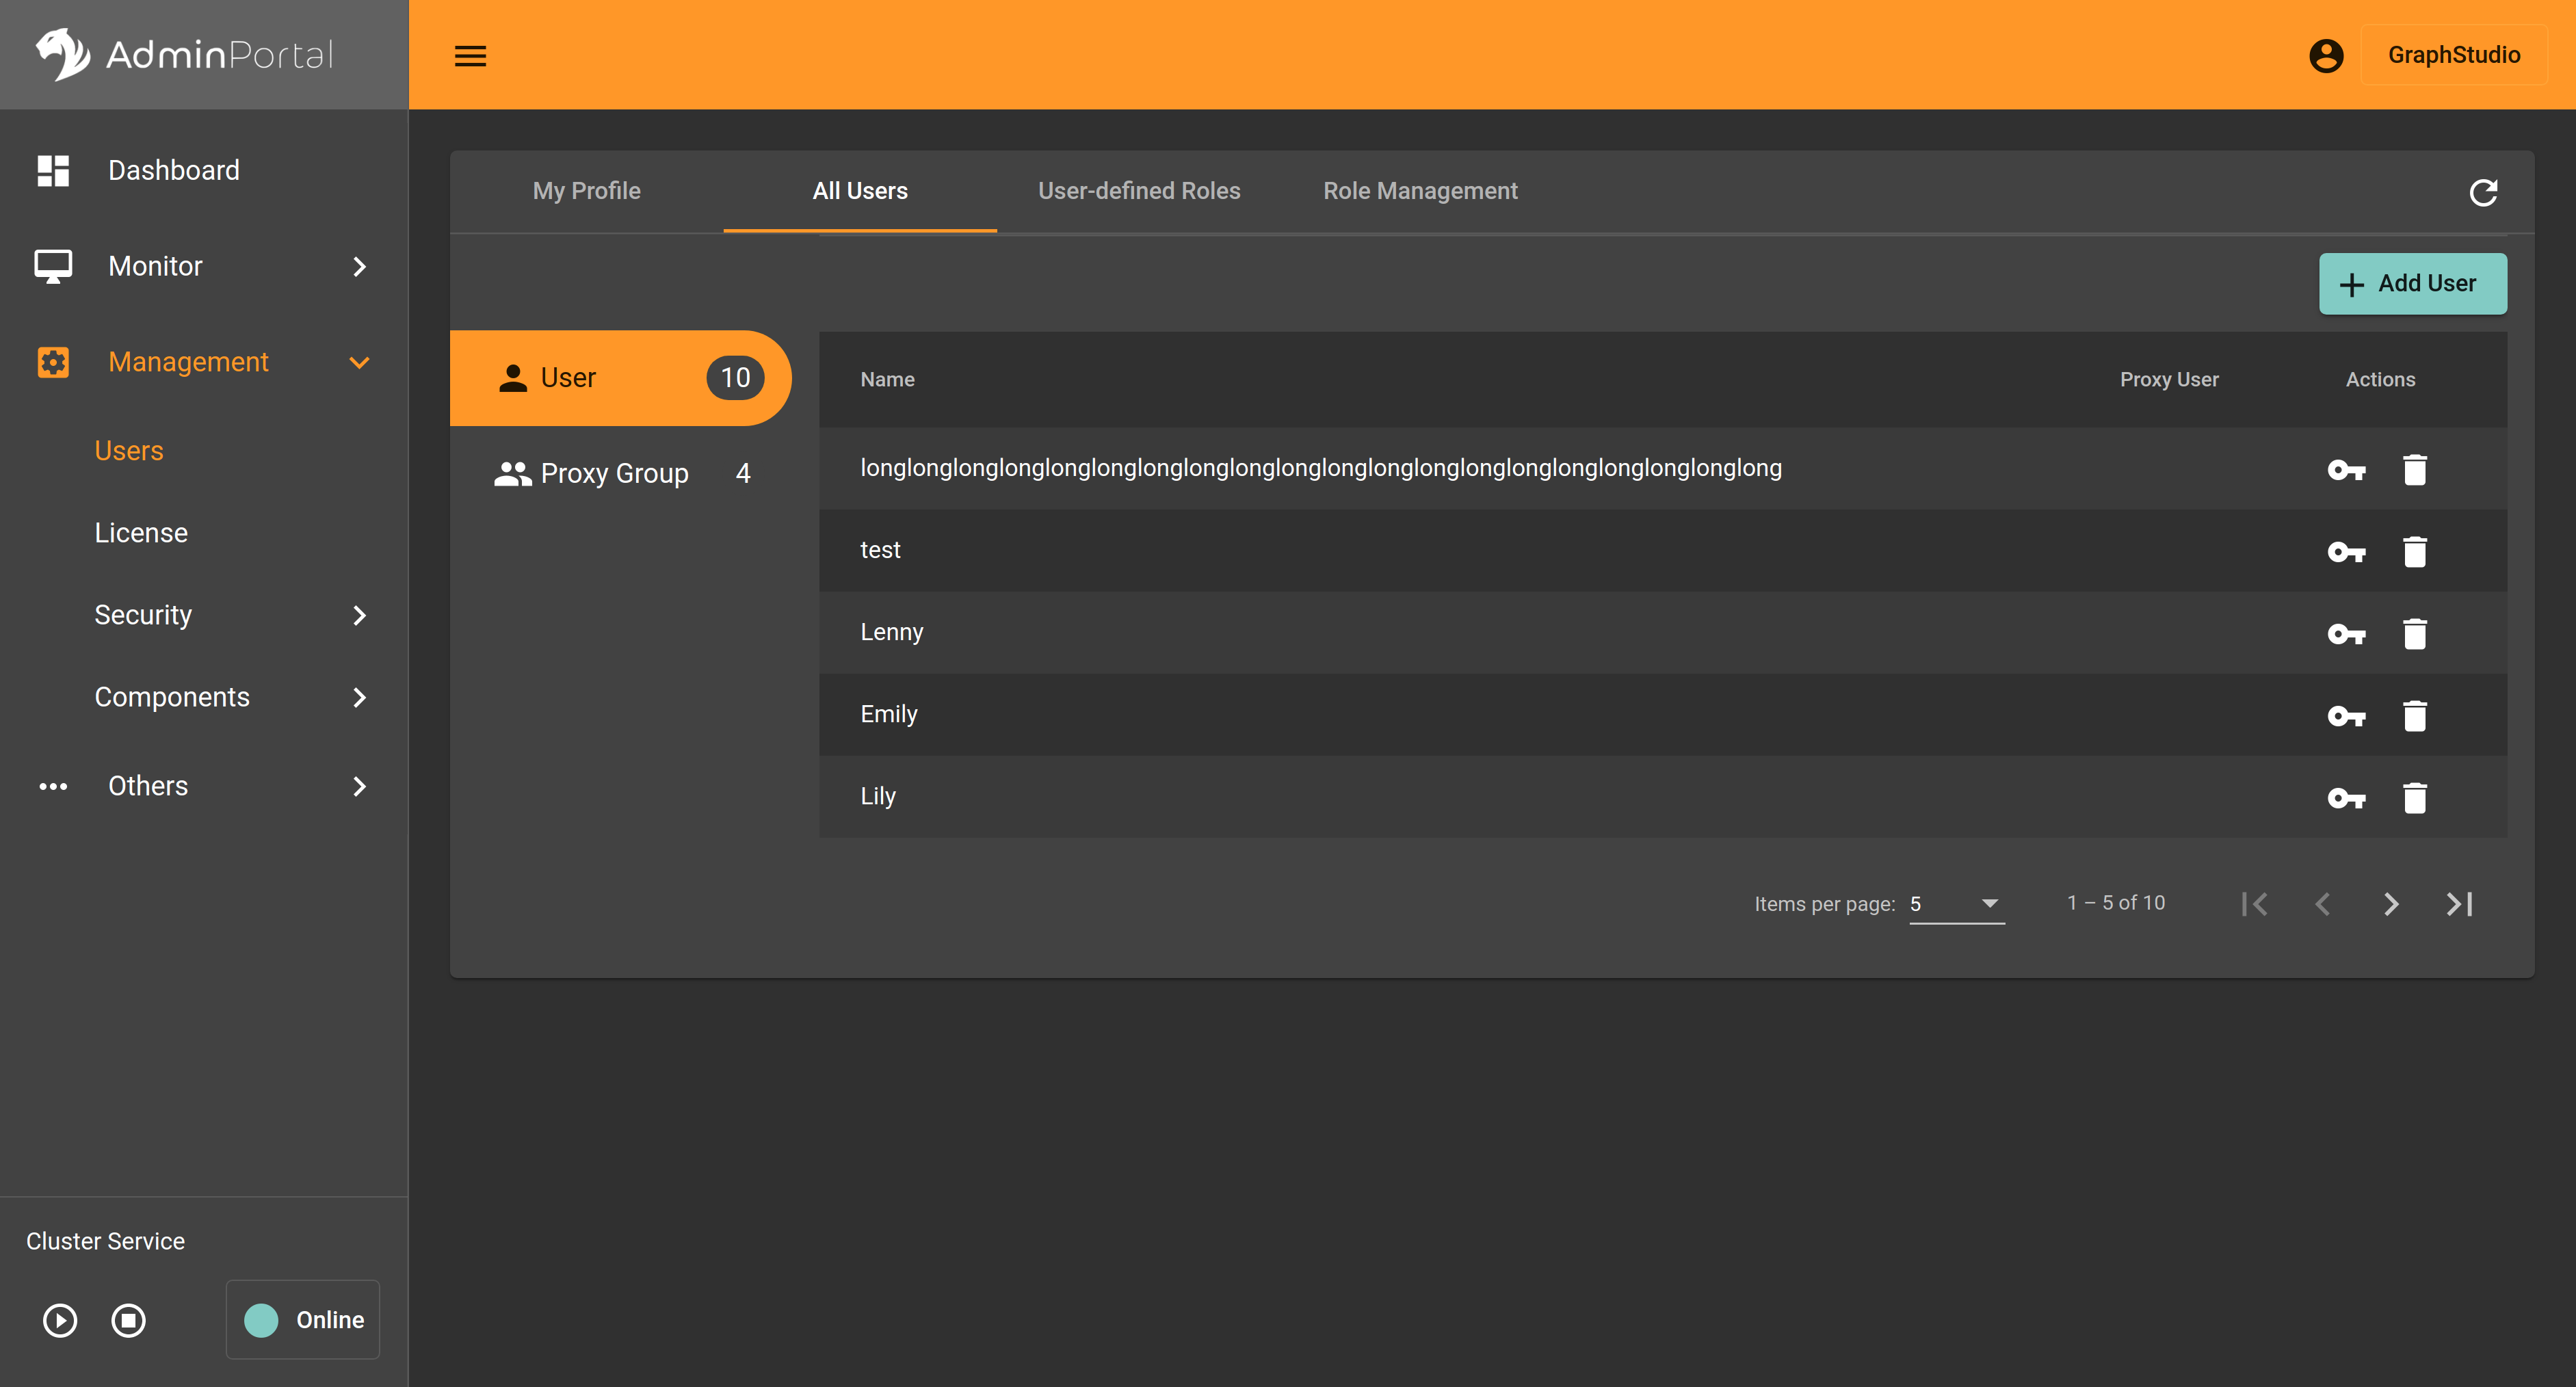
All Users
The All Users tab displays information for all user accounts. The table in this tab includes the following columns:
-
Name: The username for the account
-
Proxy User: Indicates whether the user is a proxy user (Yes/No)
-
Role: The assigned role(s) for the user, showing both global and graph-specific roles
-
Actions: Provides buttons to change the user’s password and delete the user account
Only users with user or proxy groups management permission can access this tab.
Users with user management permissions (READ_USER and WRITE_USER privileges) can:
-
add new users
-
change passwords for other users
-
delete users
Users with proxy groups management permission (READ_PROXYGROUP, WRITE_PROXYGROUP privileges) can:
-
create proxy groups
-
change proxy rules
-
delete proxy groups
To see a list of all privileges, see List of Privileges.
|
Both native users and proxy users are displayed in the User section. However, you can only change the password for native users. |
Click + Add User to add new users:
.png)
Click  to edit another user’s username and password.
Click  to delete a user.
To view all privileges assigned to a specific role, click the role name in the Role column.
Proxy groups
Proxy groups manage user access based on an aspect of their account identity set up as part of SSO or LDAP. For example, different proxy groups could correspond to different teams, and each team could be granted different access levels to different graphs.
To view all proxy groups, click the Proxy Group tab located on the left, under User. The table in this tab displays the following columns:
-
Group Name: The name of the proxy group
-
Proxy Rule: The rule that defines the proxy group
-
Role: The assigned role(s) for the proxy group, showing both global and graph-specific roles
-
Actions: Contains buttons to edit the proxy rule and delete the proxy group
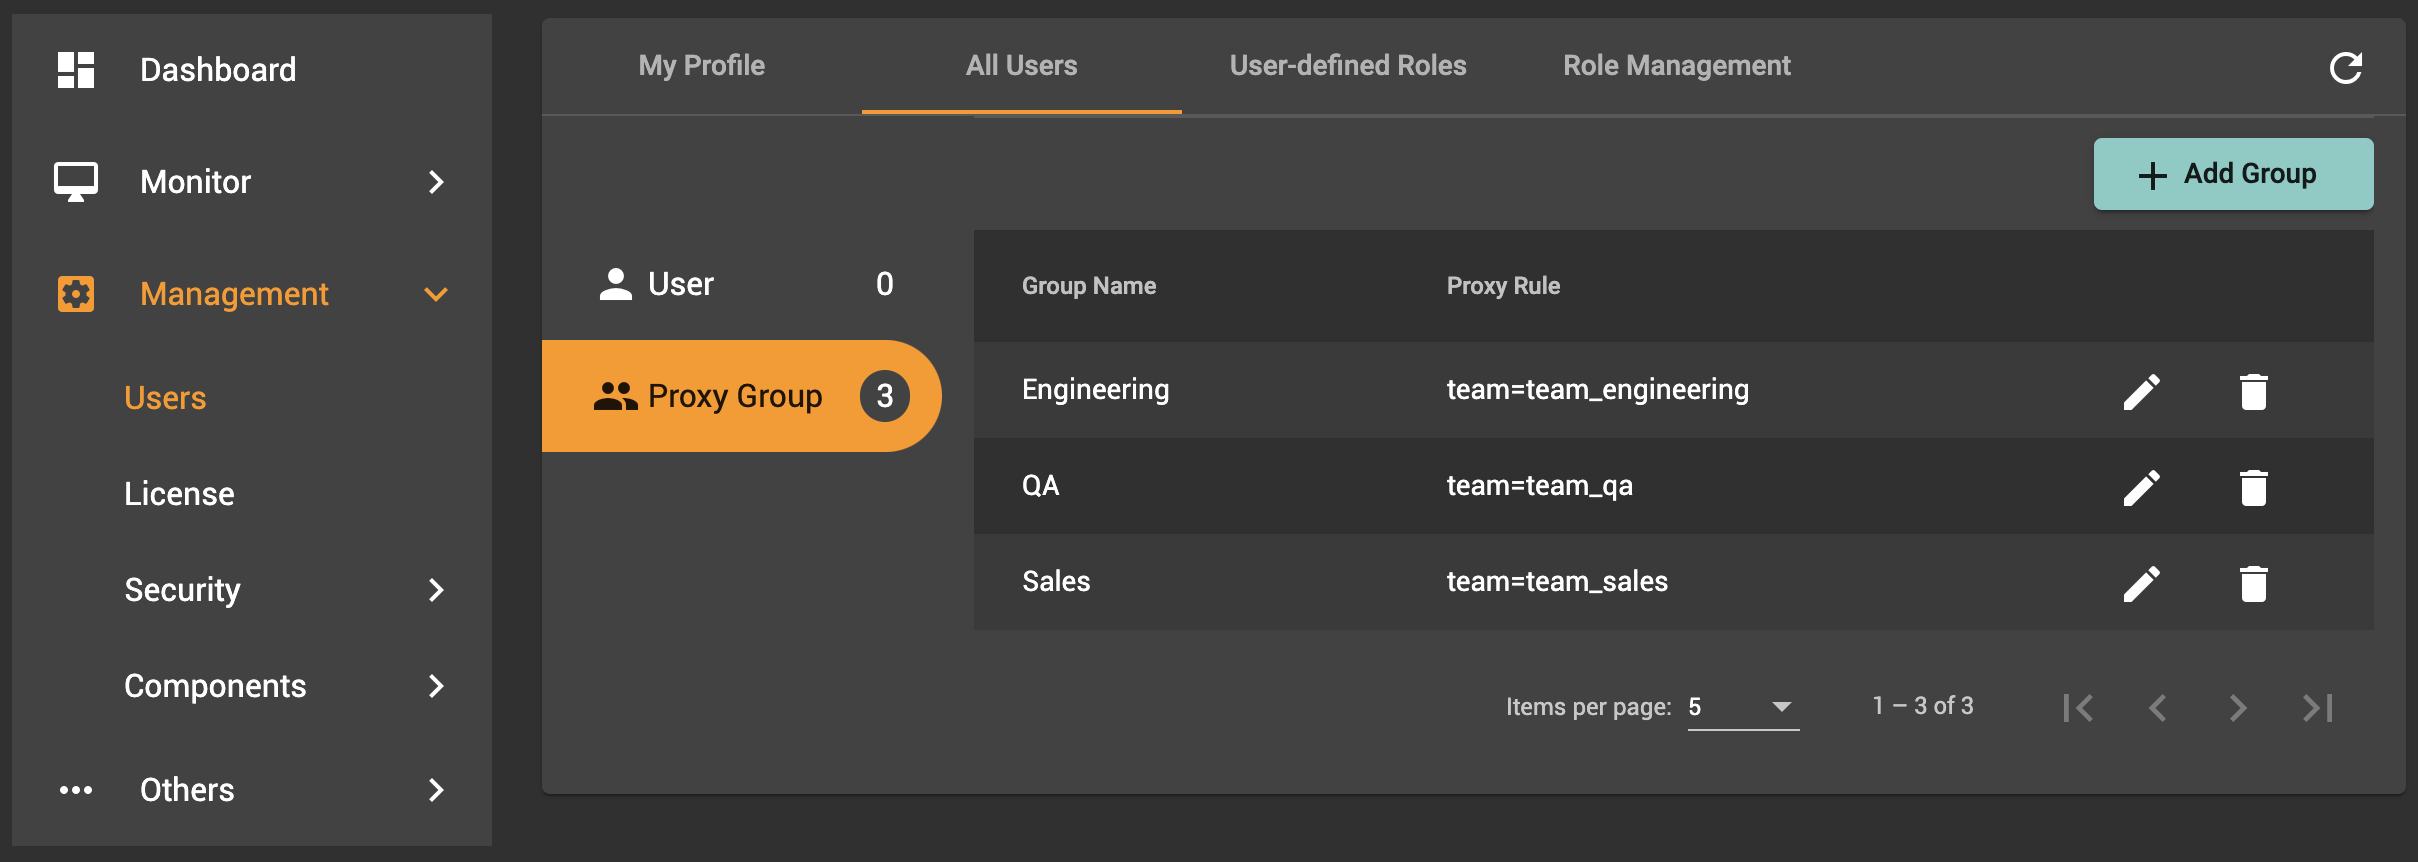
Click + Add Group to add new proxy groups:
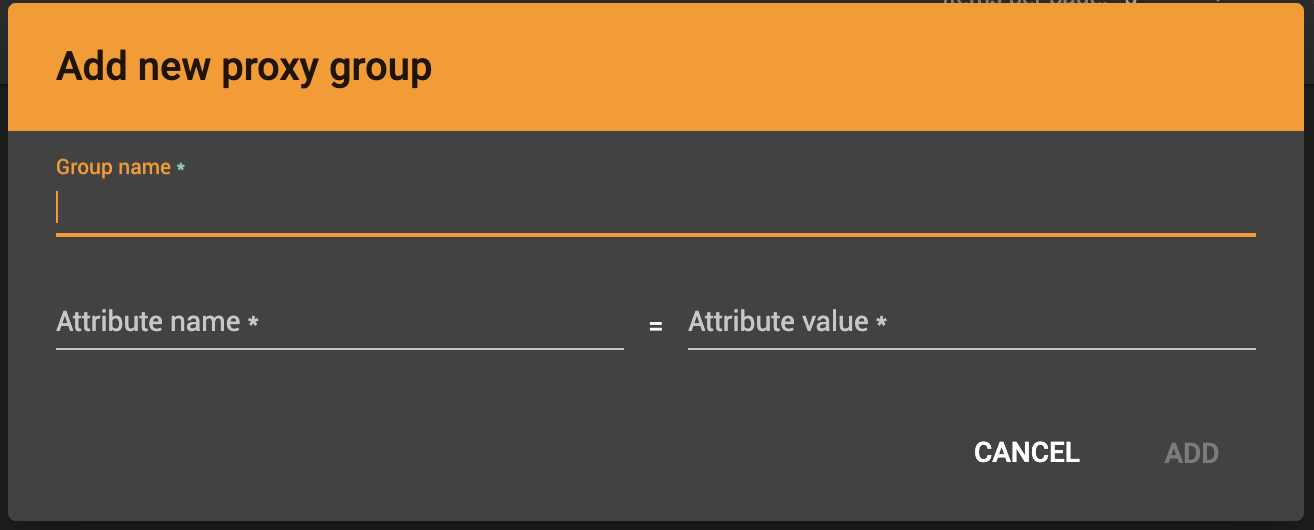
The attribute name and attribute value are checked against all attributes supplied by an identity provider (IDP) using SSO or LDAP. Please ensure the name and value match exactly with the IDP values.
Click  to edit the proxy rule of an existing proxy group.
Click to delete a proxy group.
Read more about proxy groups at Access Management.
User-defined roles
The User-defined roles tab lists all user-defined roles and allows users with sufficient privileges to create new roles. Users must have the READ_ROLE privilege on at least one graph to access this tab. This section describes the procedures to create, edit, and drop roles, as well as assign roles to users in TigerGraph.
To learn more about roles and privileges in TigerGraph’s role-based access control system, see Access Management.
To create/edit/delete a role, a user must also have the WRITE_ROLE privilege on that graph.
See more details in Access Control Model in TigerGraph.
All user-defined roles that you can view appear in a table:
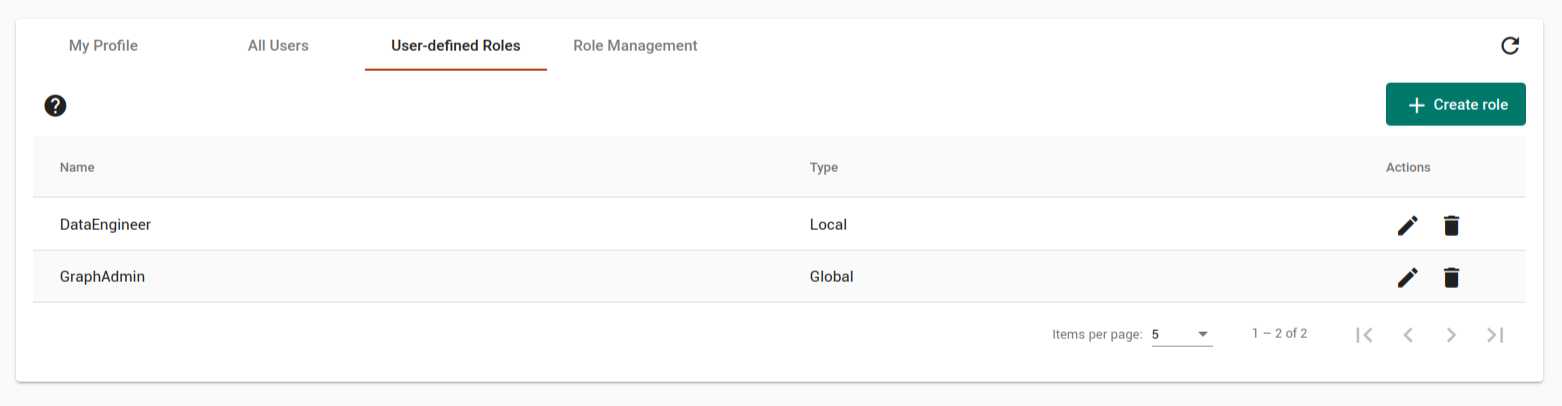
Each row shows one role along with the privileges it contains. For global roles, all privileges on either global level or a specific graph will be listed.
| Parent privileges overwrite child privileges. Similarly, global privileges overwrite local privileges. |
Create a user-defined role
Click + Create role at the right upper corner of the "User-defined Roles" tab to create a role. You can create a global role or a local role on a graph.
A global role can be granted privileges on any graph or globally. A local role is limited to one specific graph.
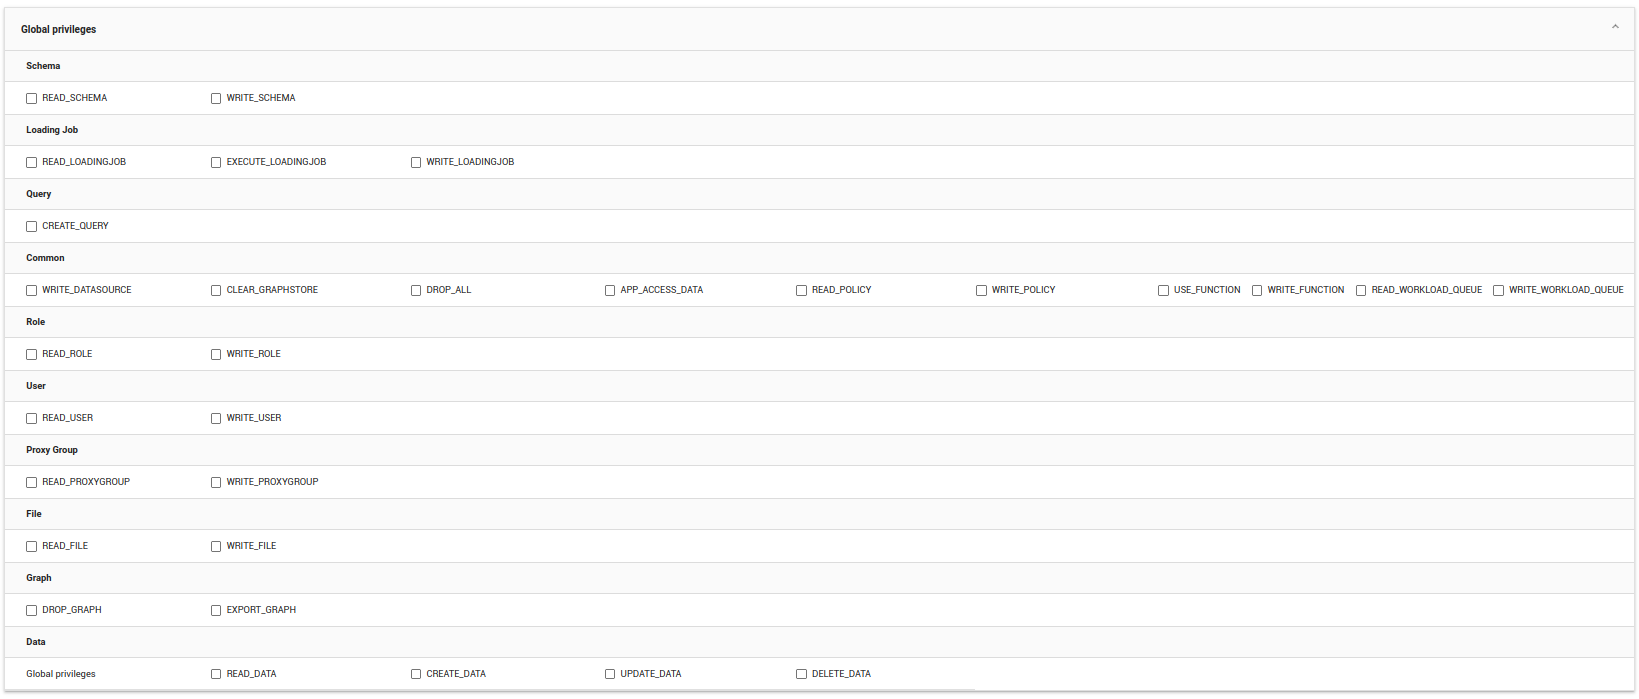
Select  to start creating a global role.
Choose global level privileges to assign to this role in the first panel.
Clicking on a privilege grants that role immediately after the box is checked.
to start creating a global role.
Choose global level privileges to assign to this role in the first panel.
Clicking on a privilege grants that role immediately after the box is checked.
Local privileges
Click + Grant privileges on another graph at the bottom of the window to create privileges for a different graph.
When you grant local privileges, you have the ability to grant READ_DATA, CREATE_DATA, and UPDATE_DATA privileges at various levels:
-
Graph level: Grants access to all data on the graph.
-
Vertex or edge level: Grants access to all data on the specified vertices and edges, but not others.
-
Data level: Grants access to the specified attributes on the specified vertices and edges, but not other attributes on those or other vertices or edges.
Because of the granularity offered with this feature, the expanded window for some graphs is quite large. This example uses the ldbc_snb graph, which has too many vertex properties to see on one screen. Just the properties for one vertex type, Comment, are shown here.
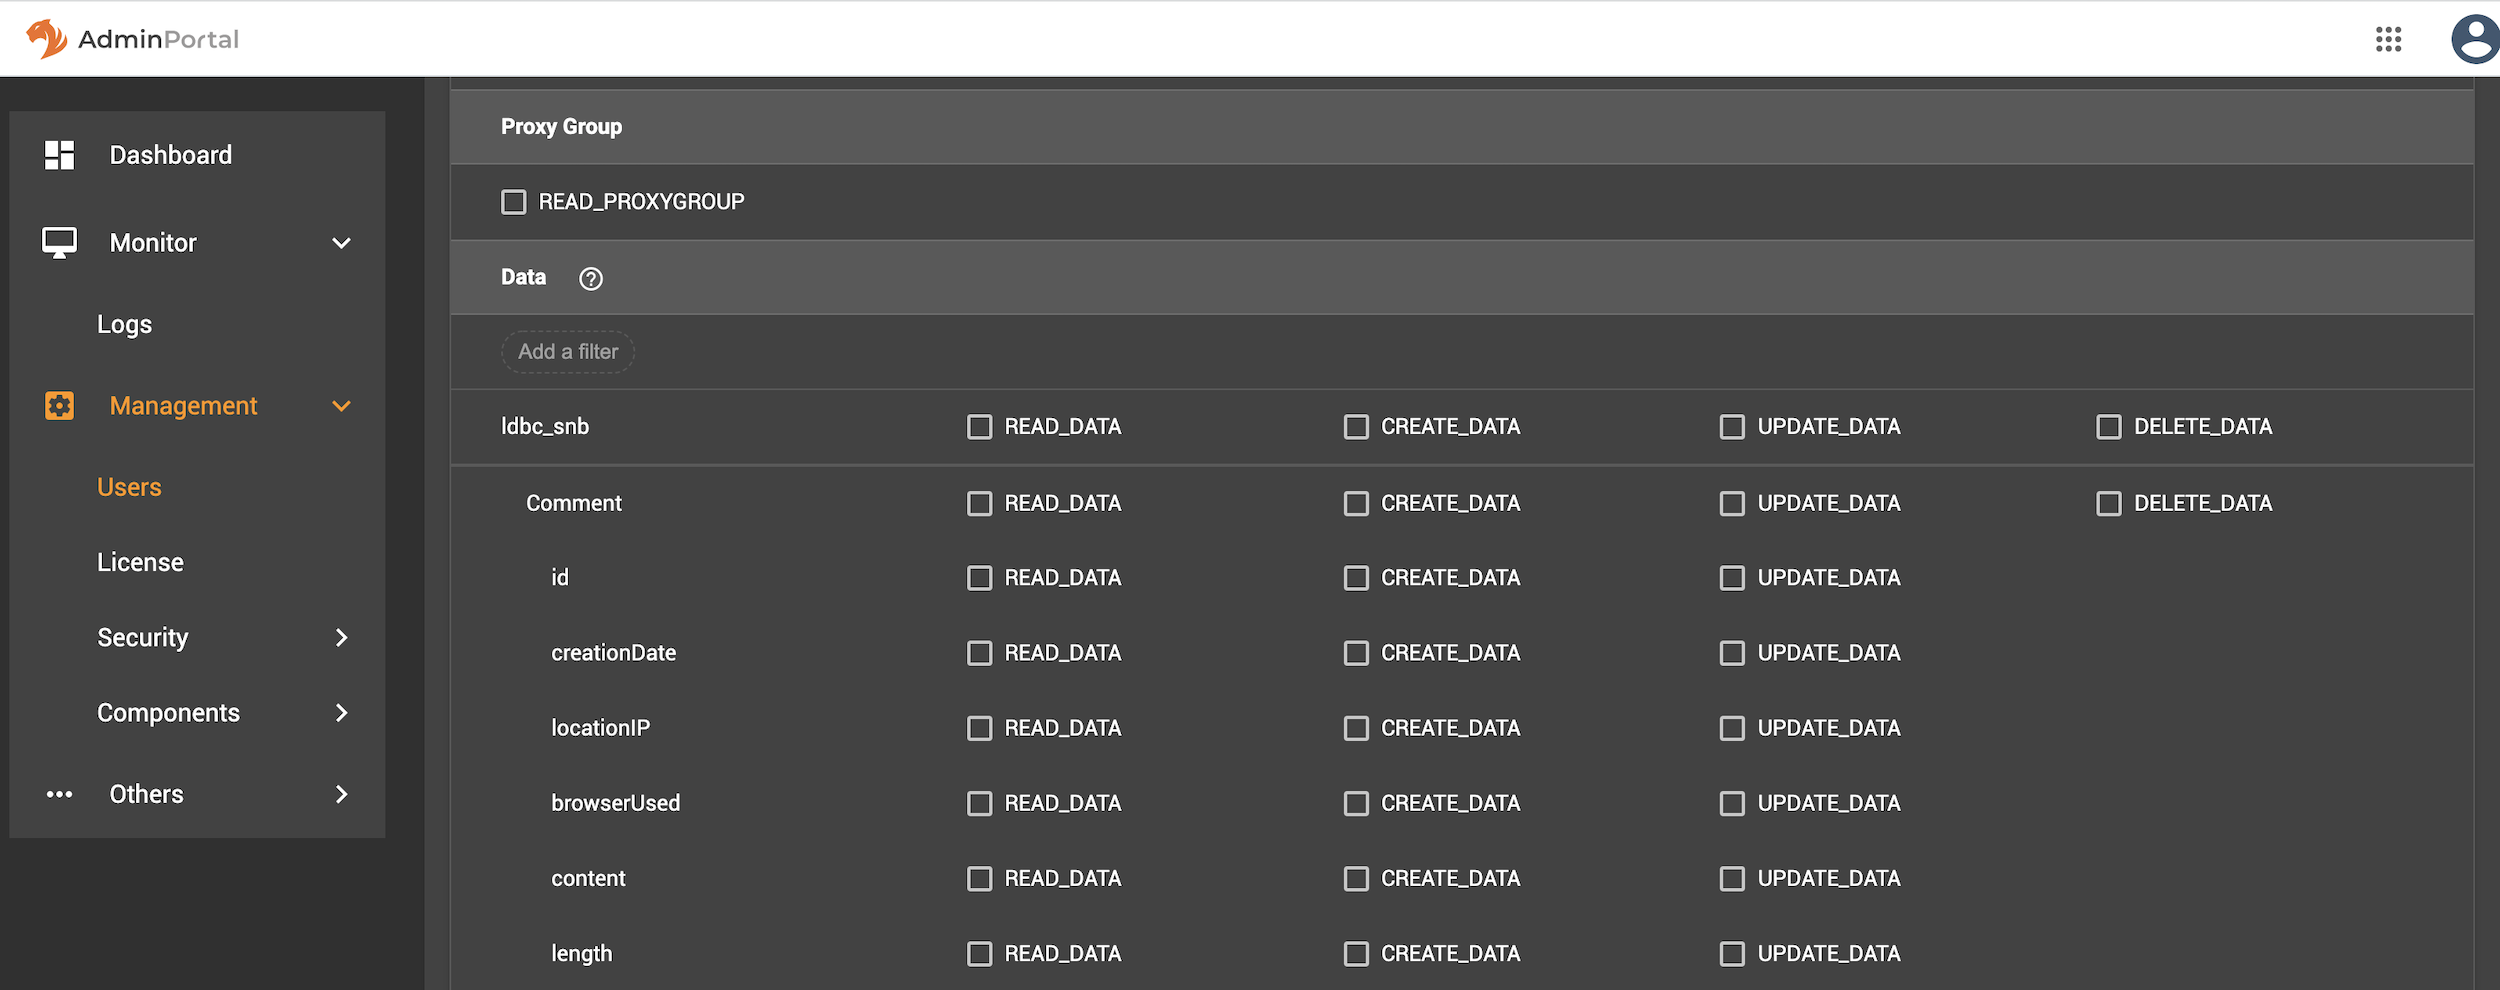
Parent privileges override child privileges, so setting privileges for the graph automatically sets privileges for all vertex and edge types. Setting privileges for a vertex or edge type automatically sets privileges for all attributes.
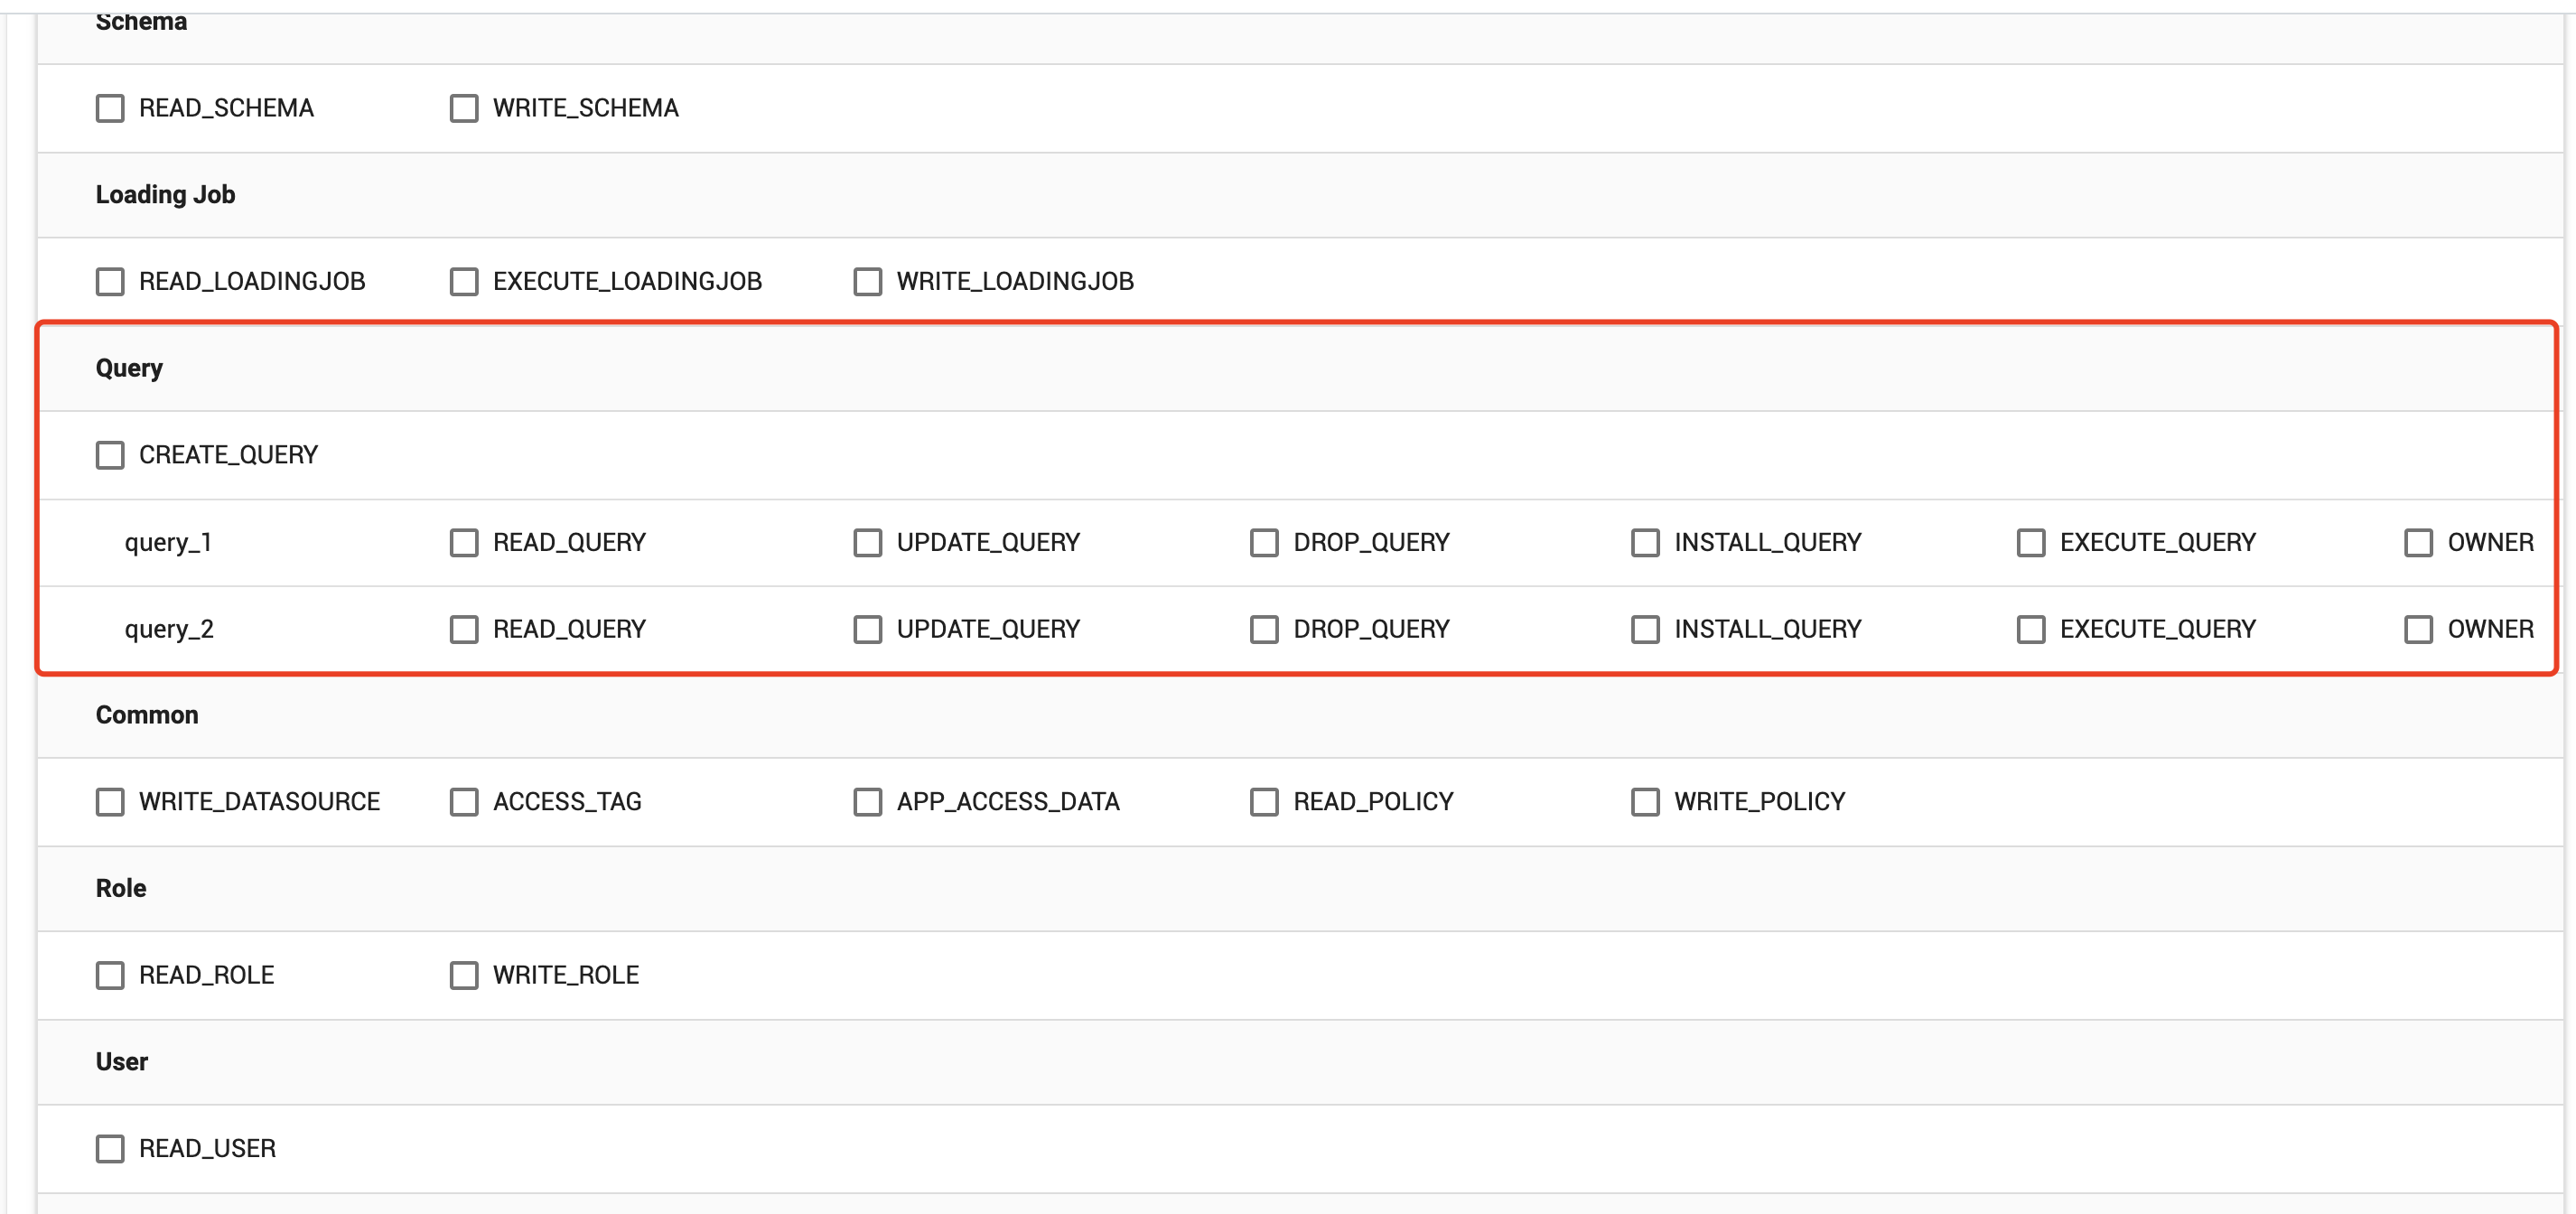
In addition, you can grant CREATE_QUERY permission to create queries, and you can also assign different capabilities such as OWNER, UPDATE_QUERY, DROP_QUERY, INSTALL_QUERY, and EXECUTE_QUERY for different types of queries.
The results can be filtered with the Add a filter button, which is useful for large and complex graphs. Enter text into this field to only return vertices and attributes that match the filter.
Role management
In the Role Management tab, users can view the role assignment of users, assign roles to users, and revoke roles from users. Users must have the READ_ROLE privilege along with the READ_USER or READ_PROXYGROUP privilege on at least one graph to access this tab.
|
Admin Portal does not indicate whether a user belongs a proxy group. You can find out more from the GSQL client. Admin Portal shows a combination of roles for proxy users. Proxy user which belongs to a proxy group inherits all the roles from the proxy group plus all the roles the proxy user has. Therefore, if you want to revoke a role from a proxy user, you need to revoke the role from the proxy group first. Then you might need to revoke the same role from the proxy user if the proxy user also has that role. |
A user needs to have the WRITE_ROLE privilege to assign roles via Admin Portal.
If you only have the READ_ROLE privilege, you can view the current assignment but cannot modify it.
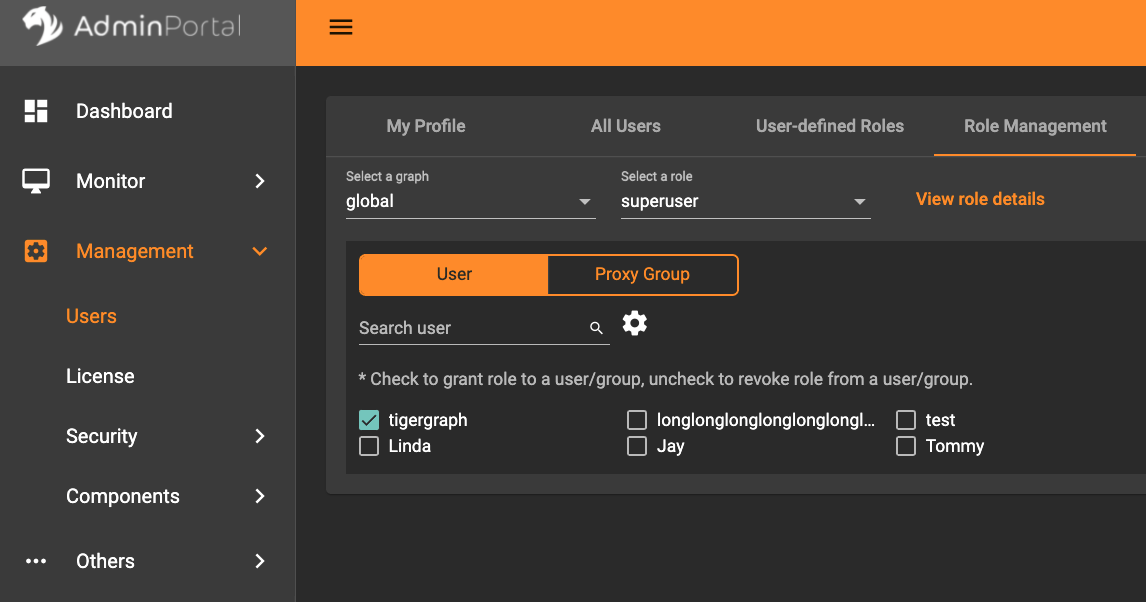
Select a graph
You can use the dropdown menu in the top left corner to select on which graph you want to assign different roles to different users.
Choose global to assign global roles or a specific graph to assign local roles.
Select a role
You can use the second dropdown menu to select a previously defined role that you want to assign to different users.
With global selected, you can assign all global built-in or user-defined roles.
With a specific graph selected, you can assign all local built-in roles or local user-defined roles within that graph.
|
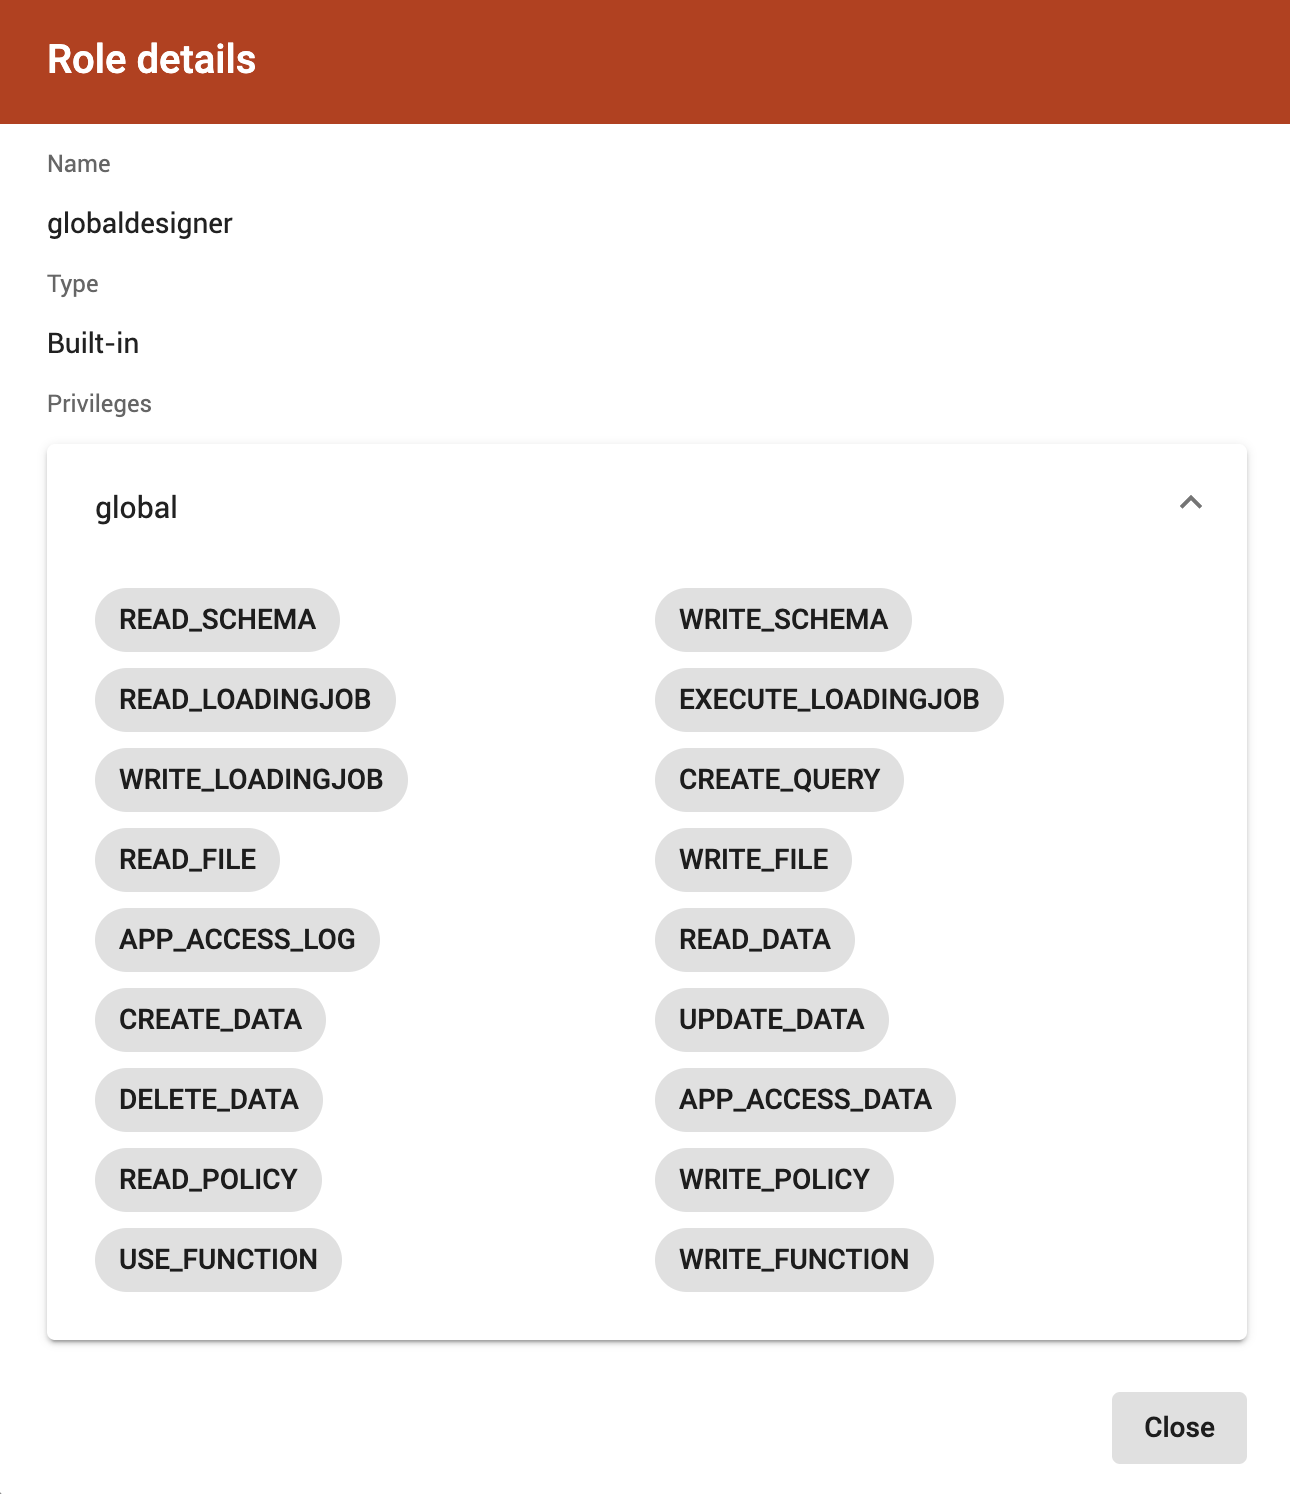
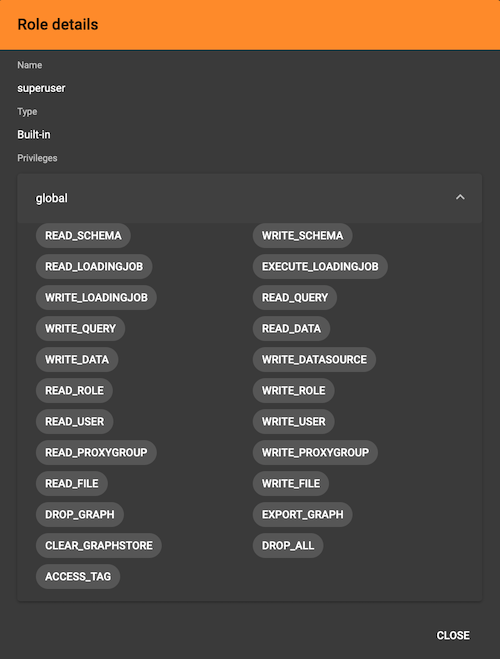
View role details
Next to the dropdowns, click the View role details button to view the information on the selected role.
Settings for user view
In the Settings dropdown, you can sort the users in alphabetic order or by name length.
You can also choose to show all users, show the users who have the role, or show only the users who don’t have the role.
Grant/revoke a role
| On a small screen, you need to click Manage to open the assignment panel. |
Once you’ve selected a graph and a role, all users will be listed with a checkbox. You can check the box next to the user to grant the role, or uncheck to revoke the role.

After modifying your assignment, click SAVE to save your changes. You can also discard your changes with the DISCARD button.
Click the proxy group button to switch to proxy groups and manage their roles.

|
If you have made changes to users through GSQL after opening the user management page, click the refresh button in the top right corner to reflect the changes in Admin Portal. |
[NOTE]: Starting from version 4.1, the GSQL allows you to directly grant or revoke privileges for individual users. This eliminates the need to assign permissions to roles and then link those roles to users, simplifying user privilege management. Additionally, this functionality is not yet available in the AdminPortal and can only be performed via the GSQL client.