High Availability Support for Application Server
TigerGraph supports native HA functionality for its application server, which serves the APIs for TigerGraph’s GUI - GraphStudio and Admin Portal. The application server follows the active-active architecture, and runs on the first three nodes in a cluster by default.
| Three is the maximum number of application servers per cluster. |
If one server falls offline, you can use the other servers without any loss of functionality.
When you deploy TigerGraph in a cluster with multiple replicas, it is ideal to set up load balancing to distribute network traffic evenly across the different servers.
This page discusses what to do when a server fails when you haven’t set up load balancing, and the steps needed to set up load balancing for the application server.
When a server fails
When a server fails, users can proceed to the next available server within the cluster to resume the operations.
For example, assume the TigerGraph cluster has Application Server on nodes m1 and m2. If the server on m1 fails, users can access m2 to use GraphStudio and Admin Portal.
To find out which node hosts the application server, run the gssh command in the bash terminal of any active node in the cluster.
The output will show you which nodes are hosting a GUI server.
Keep in mind that any long-running operation in progress when the server fails will be lost.
Load Balancing
When you deploy TigerGraph in a cluster with multiple replicas, it is ideal to set up load balancing to distribute network traffic evenly across the different servers.
Set up load balancing with Nginx
TigerGraph includes Nginx in the package by default. This Nginx has a function in the pre-built template to route traffic between the available RESTPP, GSQL and GUI instances. This means that load balancing is built into your deployment, when a request reaches Nginx, this request is load balanced between the available RESTPP, GSQL and GUI.
However, Nginx is only a proxy at the instance level, to expose the cluster to outside world usually an external load balancer is employed. This guide describes how to configure load balancing in AWS, Azure, and GCP.
Prerequisite
A potential issue with the setup is that Nginx may not always skip an unhealthy instance of RESTPP, GSQL, or GUI, causing requests to be routed to an unhealthy instance and return errors to the load balancer. Because of the routing behavior and health check configuration, an instance may alternate between healthy and unhealthy states in the cloud console, depending on how many requests return successfully. To avoid this, verify that the TigerGraph built-in Nginx template is configured correctly.
To retrieve the template, you can run this command:
gadmin config get Nginx.ConfigTemplate > nginx.templateObserve the file nginx.template and make sure that proxy_next_upstream error timeout http_502 http_504 exists in the required block:
        # 1. Forward to upstream backend in round-robin manner.
        # 2. The URL prefixed with "/internal/".
        # 3. Using the same scheme as the incoming request.
        location @gui-server {
            rewrite ^/(.*) /internal/gui/$1 break;
            proxy_read_timeout 604800s;
            proxy_set_header Host $host;
            proxy_set_header X-Real-IP $remote_addr;
            proxy_set_header X-Forwarded-For $proxy_add_x_forwarded_for;
            proxy_http_version 1.1;
            proxy_set_header Connection "";
            proxy_buffering off;
            proxy_pass __UPSTREAM_GSQLGUI_SCHEME__://all_gui_server;

            # This line is required to skip unhealthy GUI instance.
            proxy_next_upstream error timeout http_502 http_504;
        }
        ...

        # 1. Forward to upstream backend in round-robin manner.
        # 2. The URL prefixed with "/internal/".
        # 3. Using the same scheme as the incoming request.
        location /gsqlserver/ {
            proxy_read_timeout 604800s;
            proxy_set_header X-Real-IP $remote_addr;
            proxy_set_header X-Forwarded-For $proxy_add_x_forwarded_for;
            proxy_set_header X-User-Agent $http_user_agent;
            proxy_http_version 1.1;
            proxy_set_header Connection "";
            proxy_buffering off;
            proxy_pass __UPSTREAM_GSQLGUI_SCHEME__://all_gsql_server/internal/gsqlserver/;

            # This line is required to skip unhealthy GSQL instance.
            proxy_next_upstream error timeout http_502 http_504;
        }

         location ~ ^/restpp/(.*) {
            # use rewrite since proxy_pass doesn't support URI part in regular expression location
            rewrite ^/restpp/(.*) /$1 break;
            proxy_read_timeout 604800s;
            proxy_set_header X-Real-IP $remote_addr;
            proxy_set_header X-Forwarded-For $proxy_add_x_forwarded_for;
            proxy_set_header X-User-Agent $http_user_agent;
            proxy_http_version 1.1;
            proxy_set_header Connection "";
            proxy_set_header Host $http_host;
            proxy_buffering off;
            proxy_pass __UPSTREAM_GSQLGUI_SCHEME__://all_fastcgi_backend;

            # This line is required to skip unhealthy RESTPP instance.
            proxy_next_upstream error timeout http_502 http_504;
        }
For 4.1.3 and below, RESTPP uses fastcgi so we have to use
fastcgi_next_upstream
         location ~ ^/restpp/(.*) {
            fastcgi_pass fastcgi_backend;
            fastcgi_keep_conn on;
            fastcgi_param REQUEST_METHOD  $request_method;
            ...
            # This line is required to skip unhealthy RESTPP instance.
            # note: http_502 and http_504 are not for fastcgi, but for proxy_pass
            fastcgi_next_upstream error timeout;
         }
If the mentioned line doesn’t exist, please add them to the aforementioned block and apply the config.
gadmin config set Nginx.ConfigTemplate @/path/to/nginx.template
gadmin config apply -y
gadmin restart nginx -y
Common Load Balancer Settings
In 3.10.3 the following settings apply to all three services (RESTPP, GSQL, GUI) across AWS, Azure, and GCP.
| Service | Protocol | Port | Health Check Path |
|---|---|---|---|
RESTPP |
HTTP |
14240 |
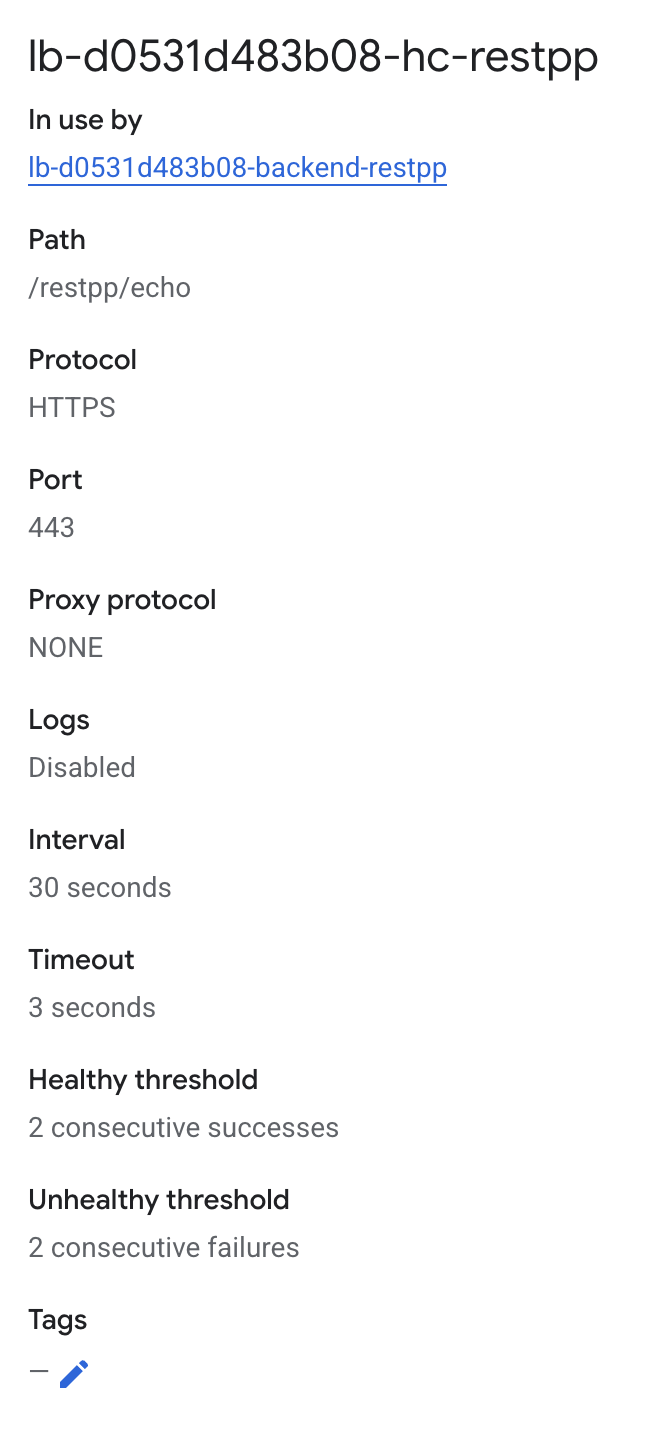
/restpp/echo |
GSQL |
HTTP |
14240 |
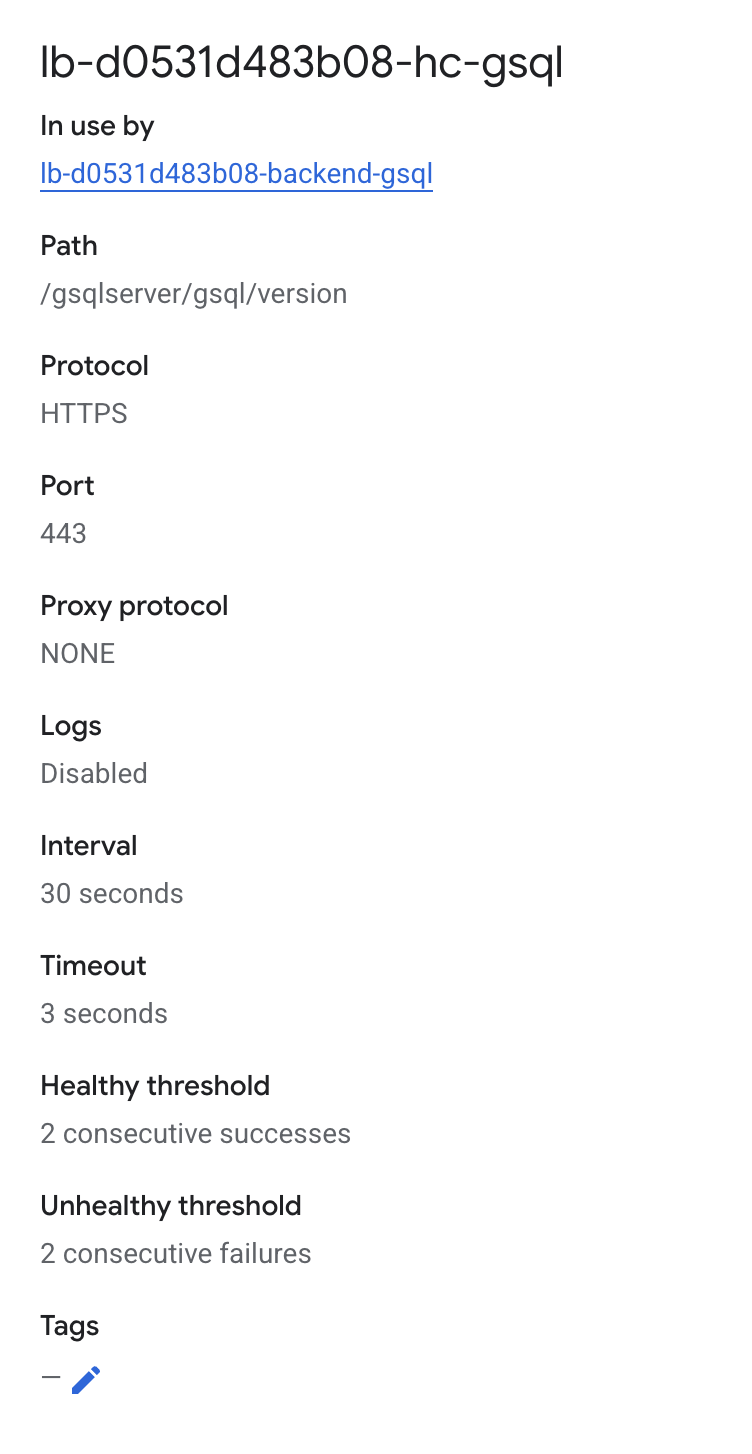
/gsqlserver/gsql/version |
GUI |
HTTP |
14240 |
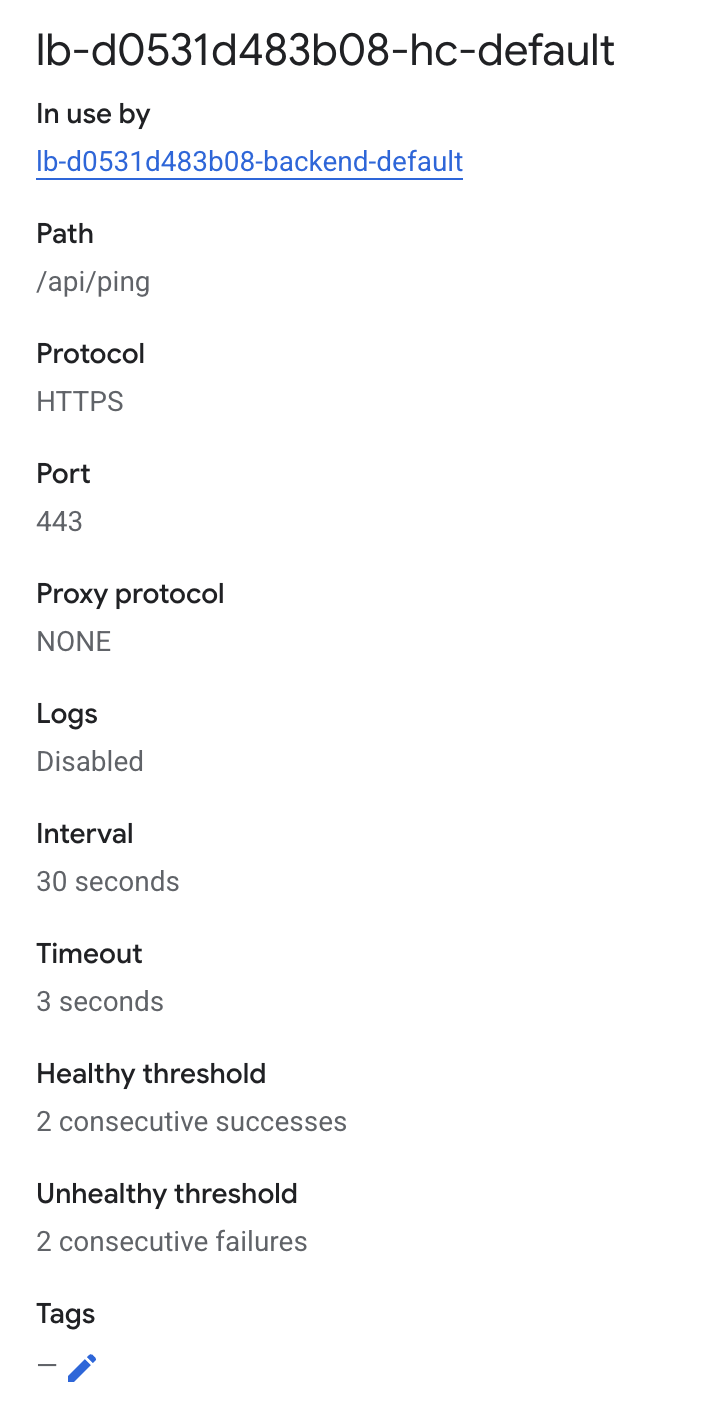
/api/ping |
For the basic setup, apply the following configuration to all the three services (RESTPP, GSQL, GUI) and across AWS, Azure, and GCP:
-
Protocol: HTTP (default TigerGraph deployment)
-
Port: 14240 (default TigerGraph deployment)
-
Configure health check paths individually for each service as shown in the table above.
Set up AWS Elastic Load Balancer
If your applications are provisioned on AWS, another choice for load balancing is through the use of an Application Load Balancer.
To create an application load balancer, follow AWS’s guide to create an application load balancer.
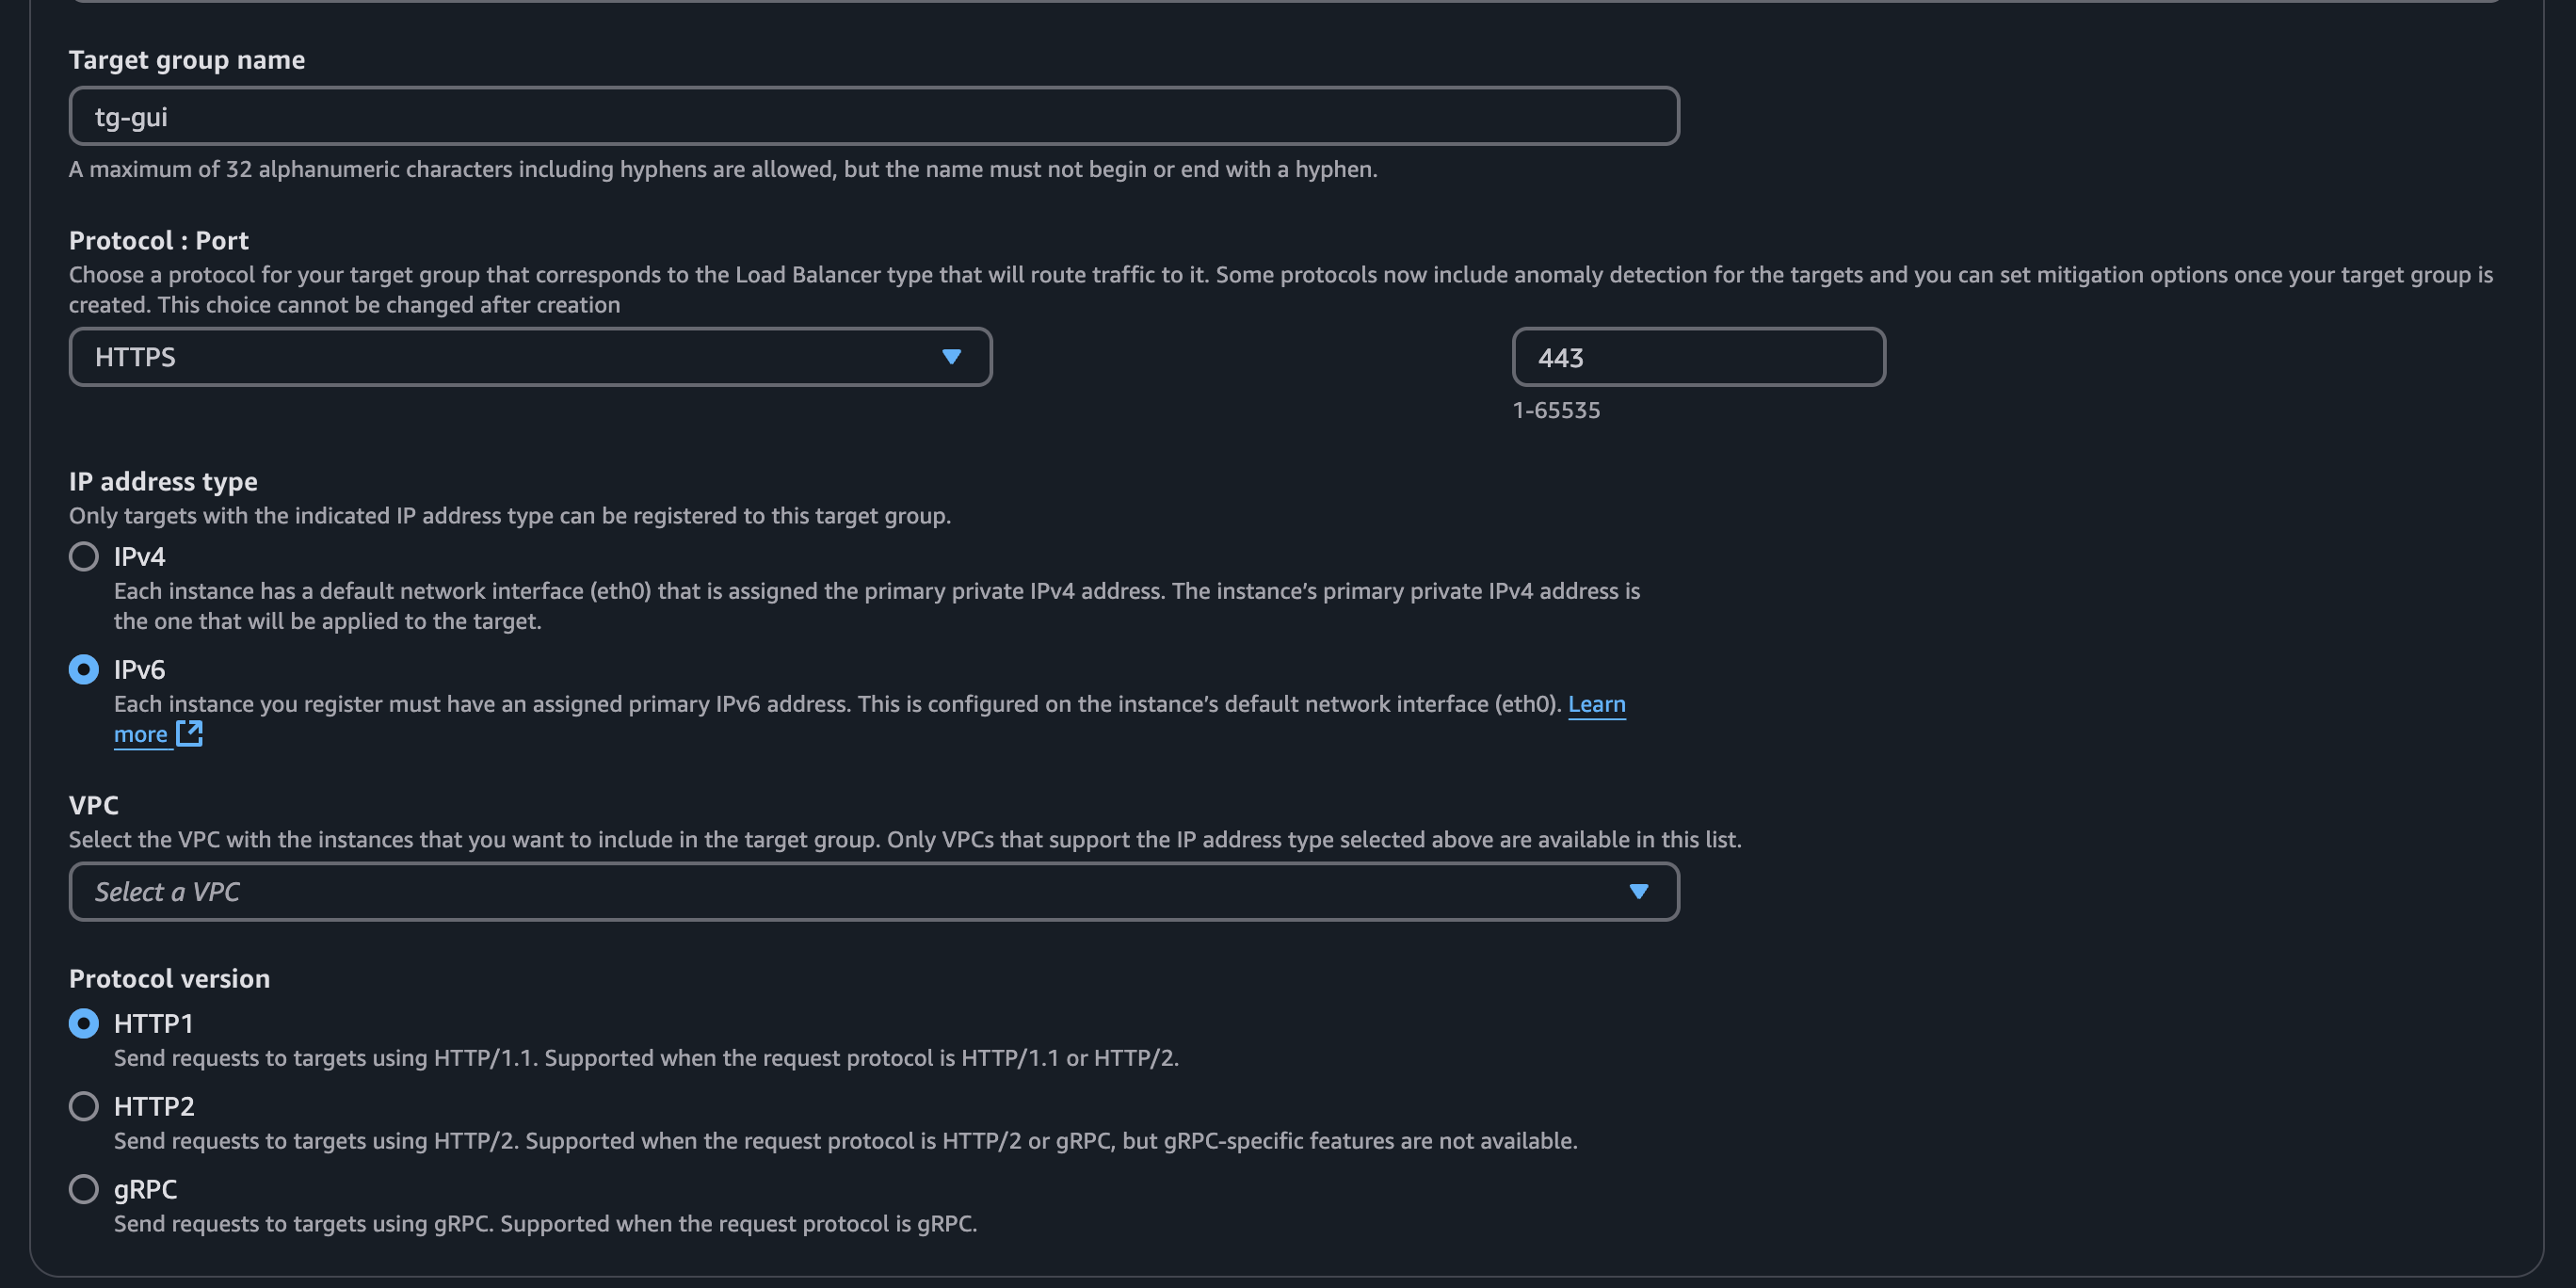
Health check
Each service requires a different health check configuration. Use the following paths:


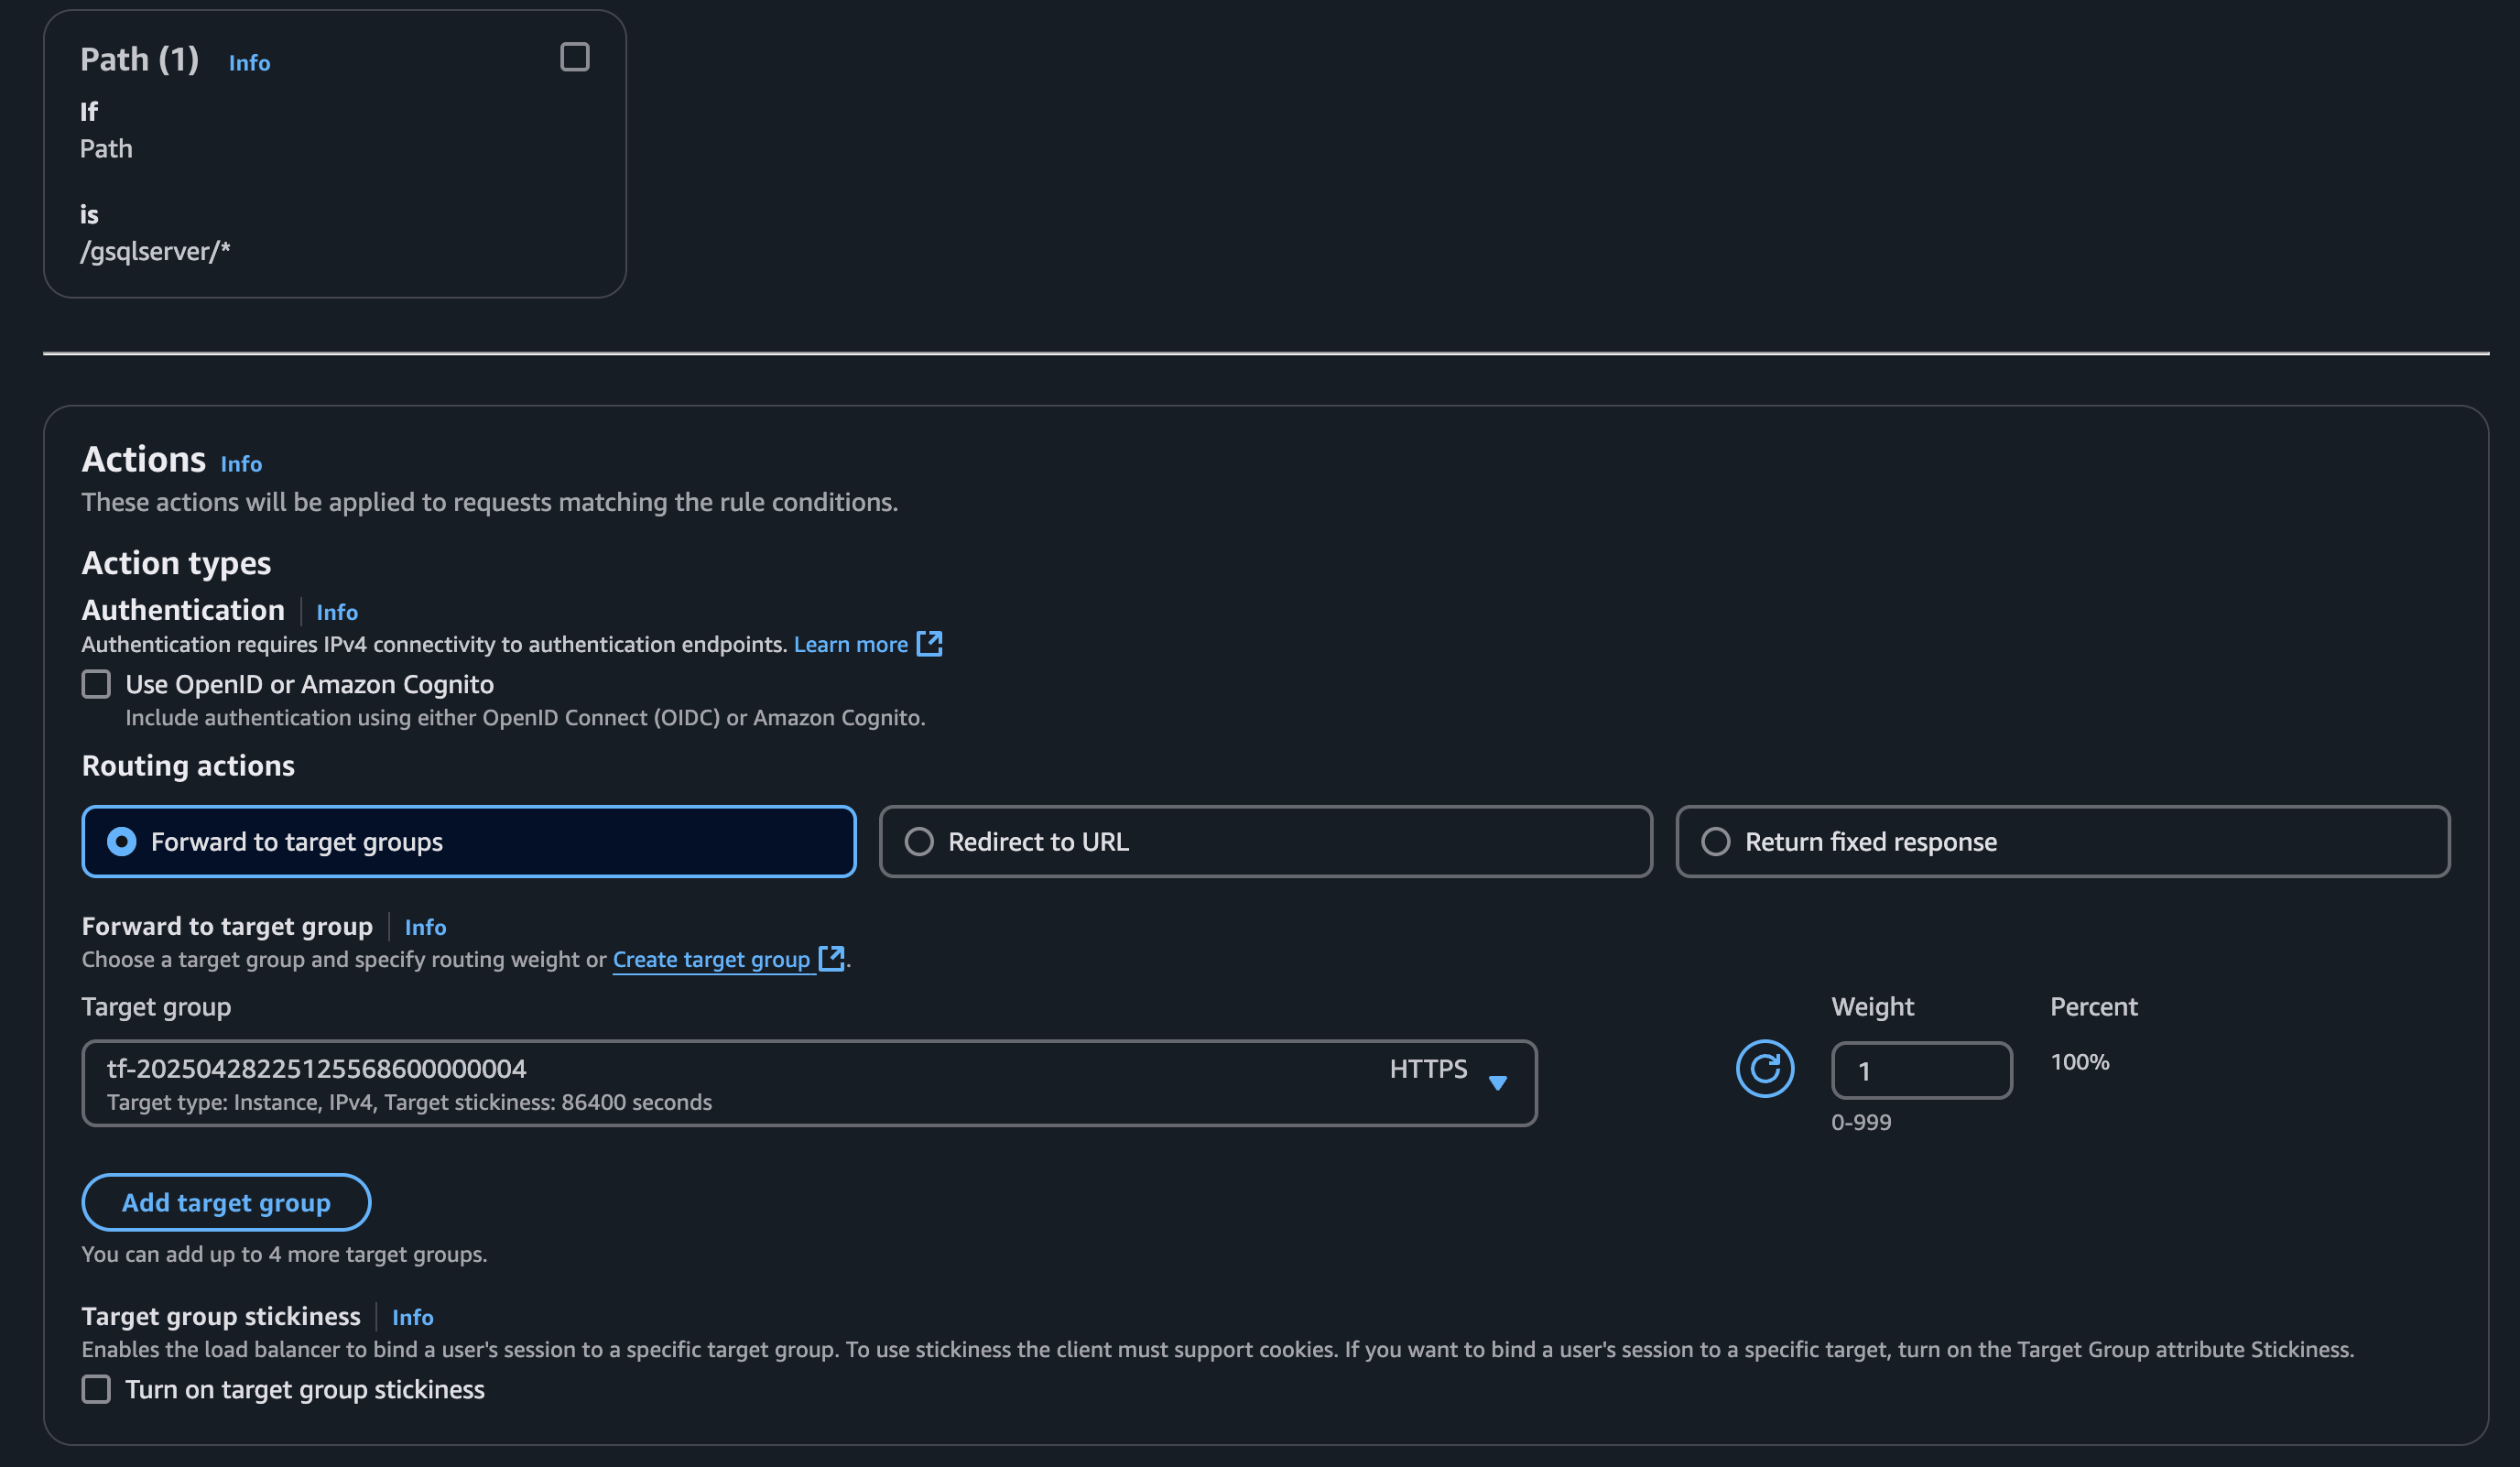
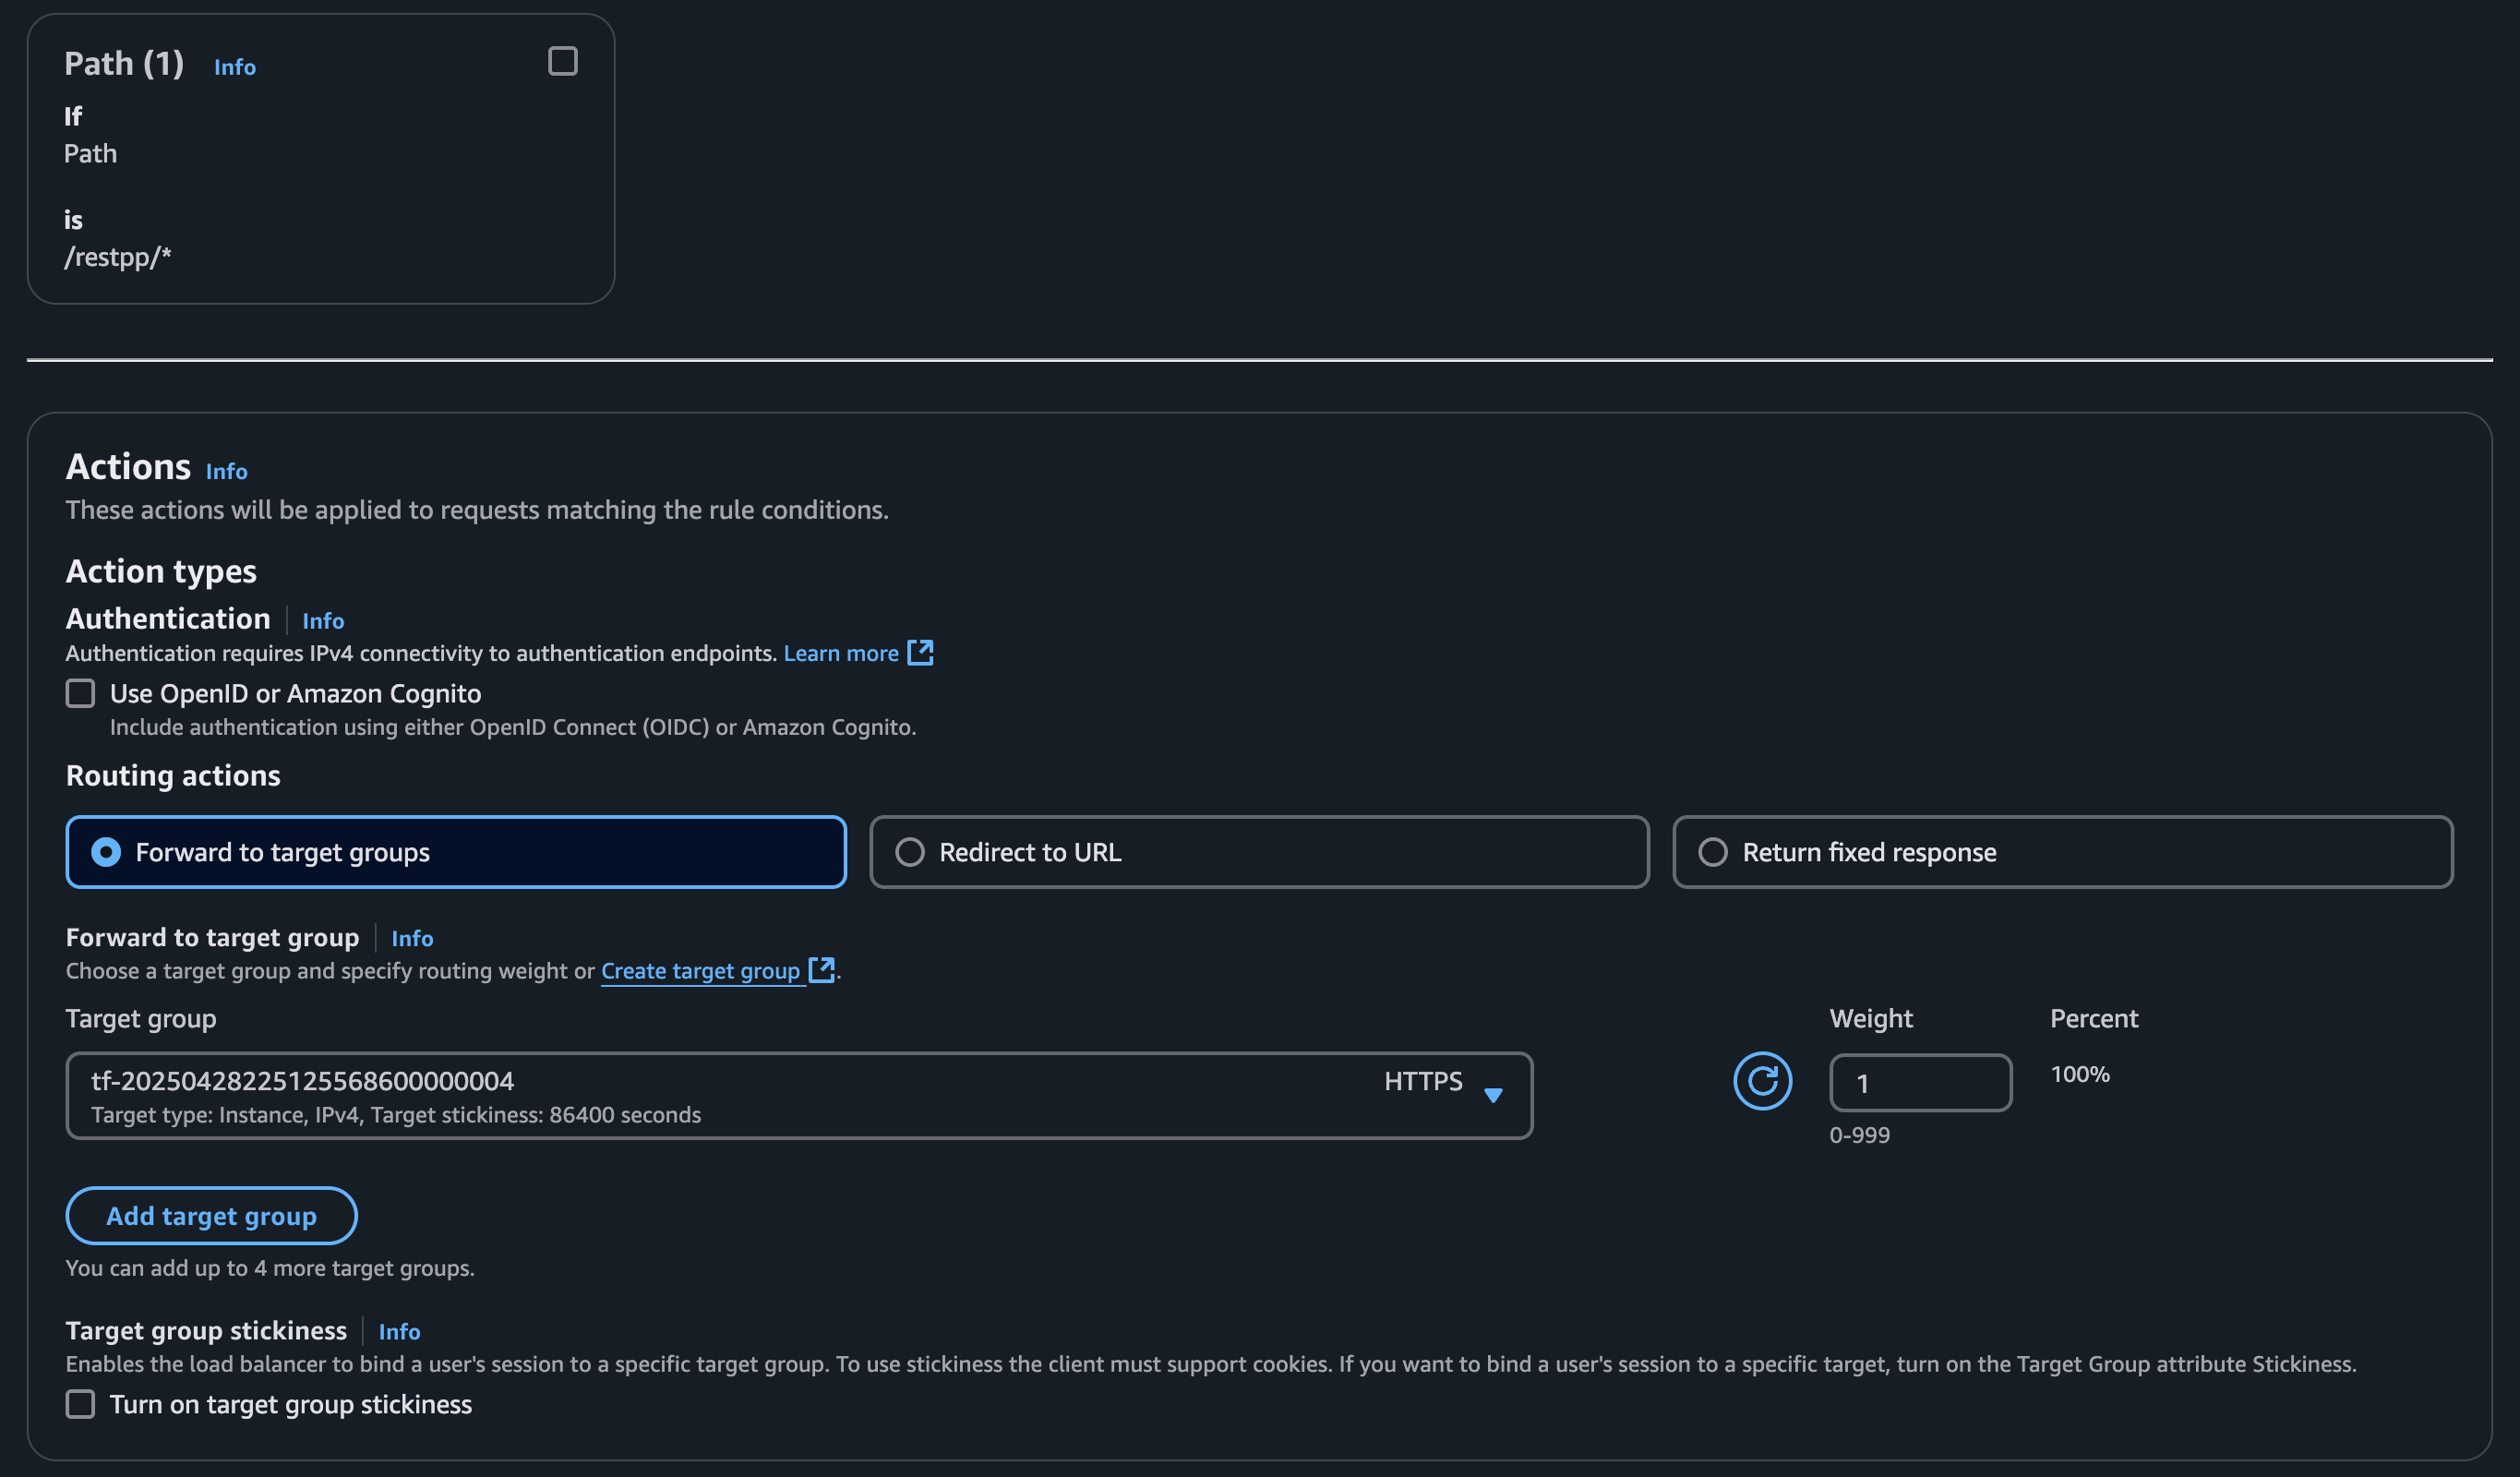
Listener
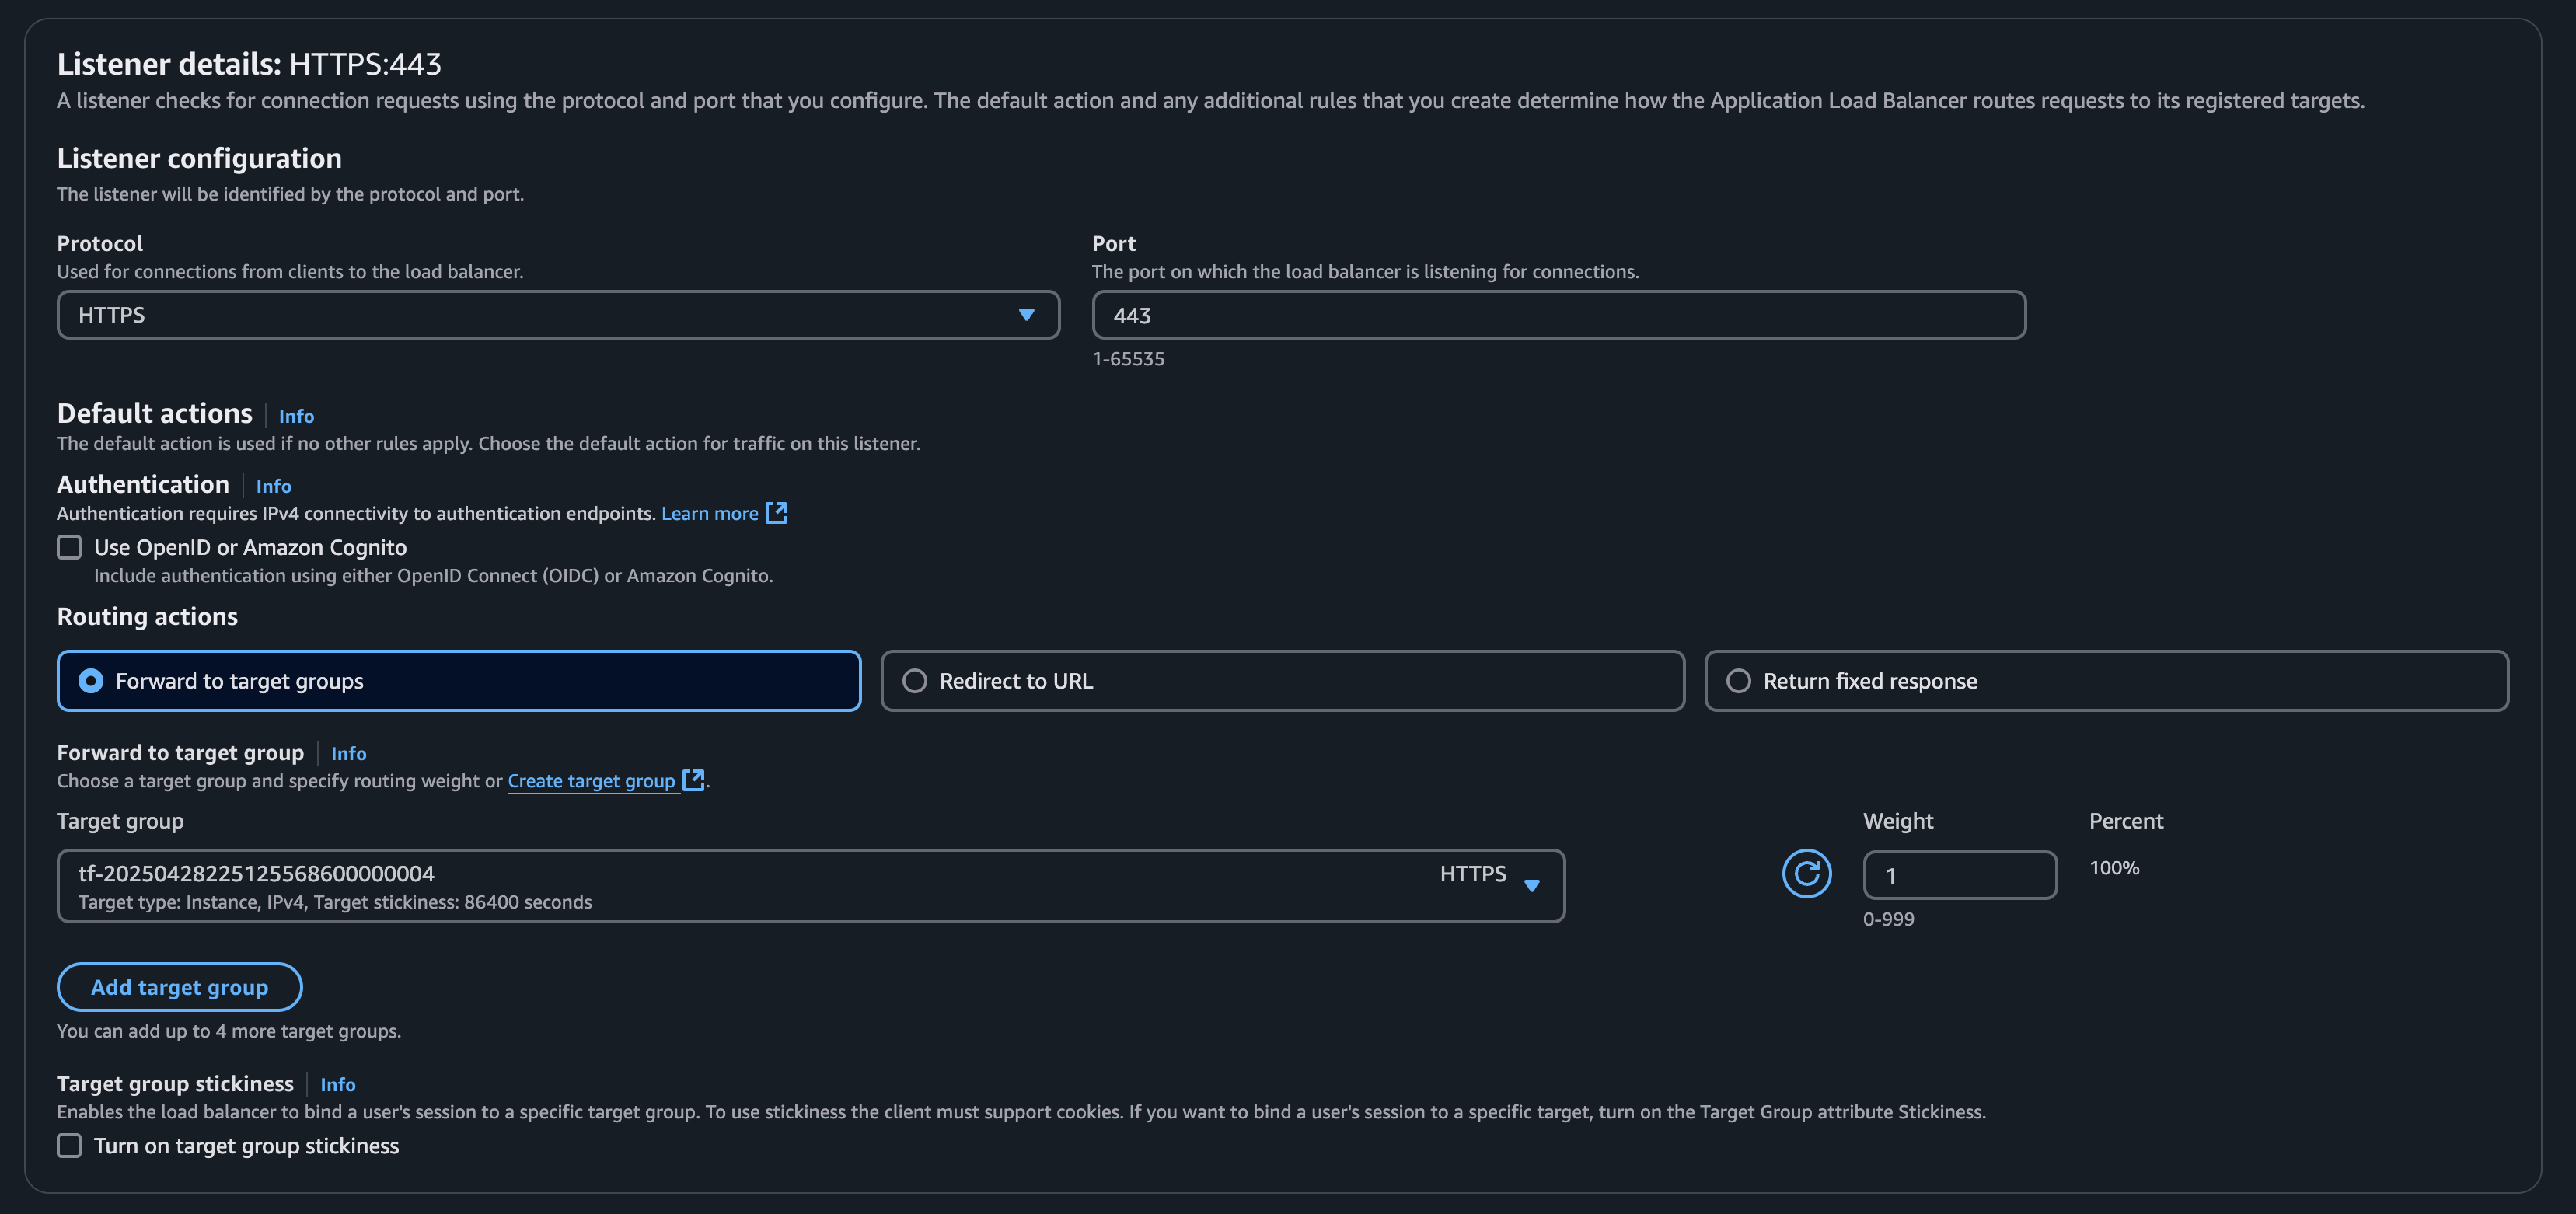
Create a listener that routes to the GUI target group, as most requests will go here. You can also choose the GSQL or RESTPP target group. This target group acts as the fallback option if no other rules match.
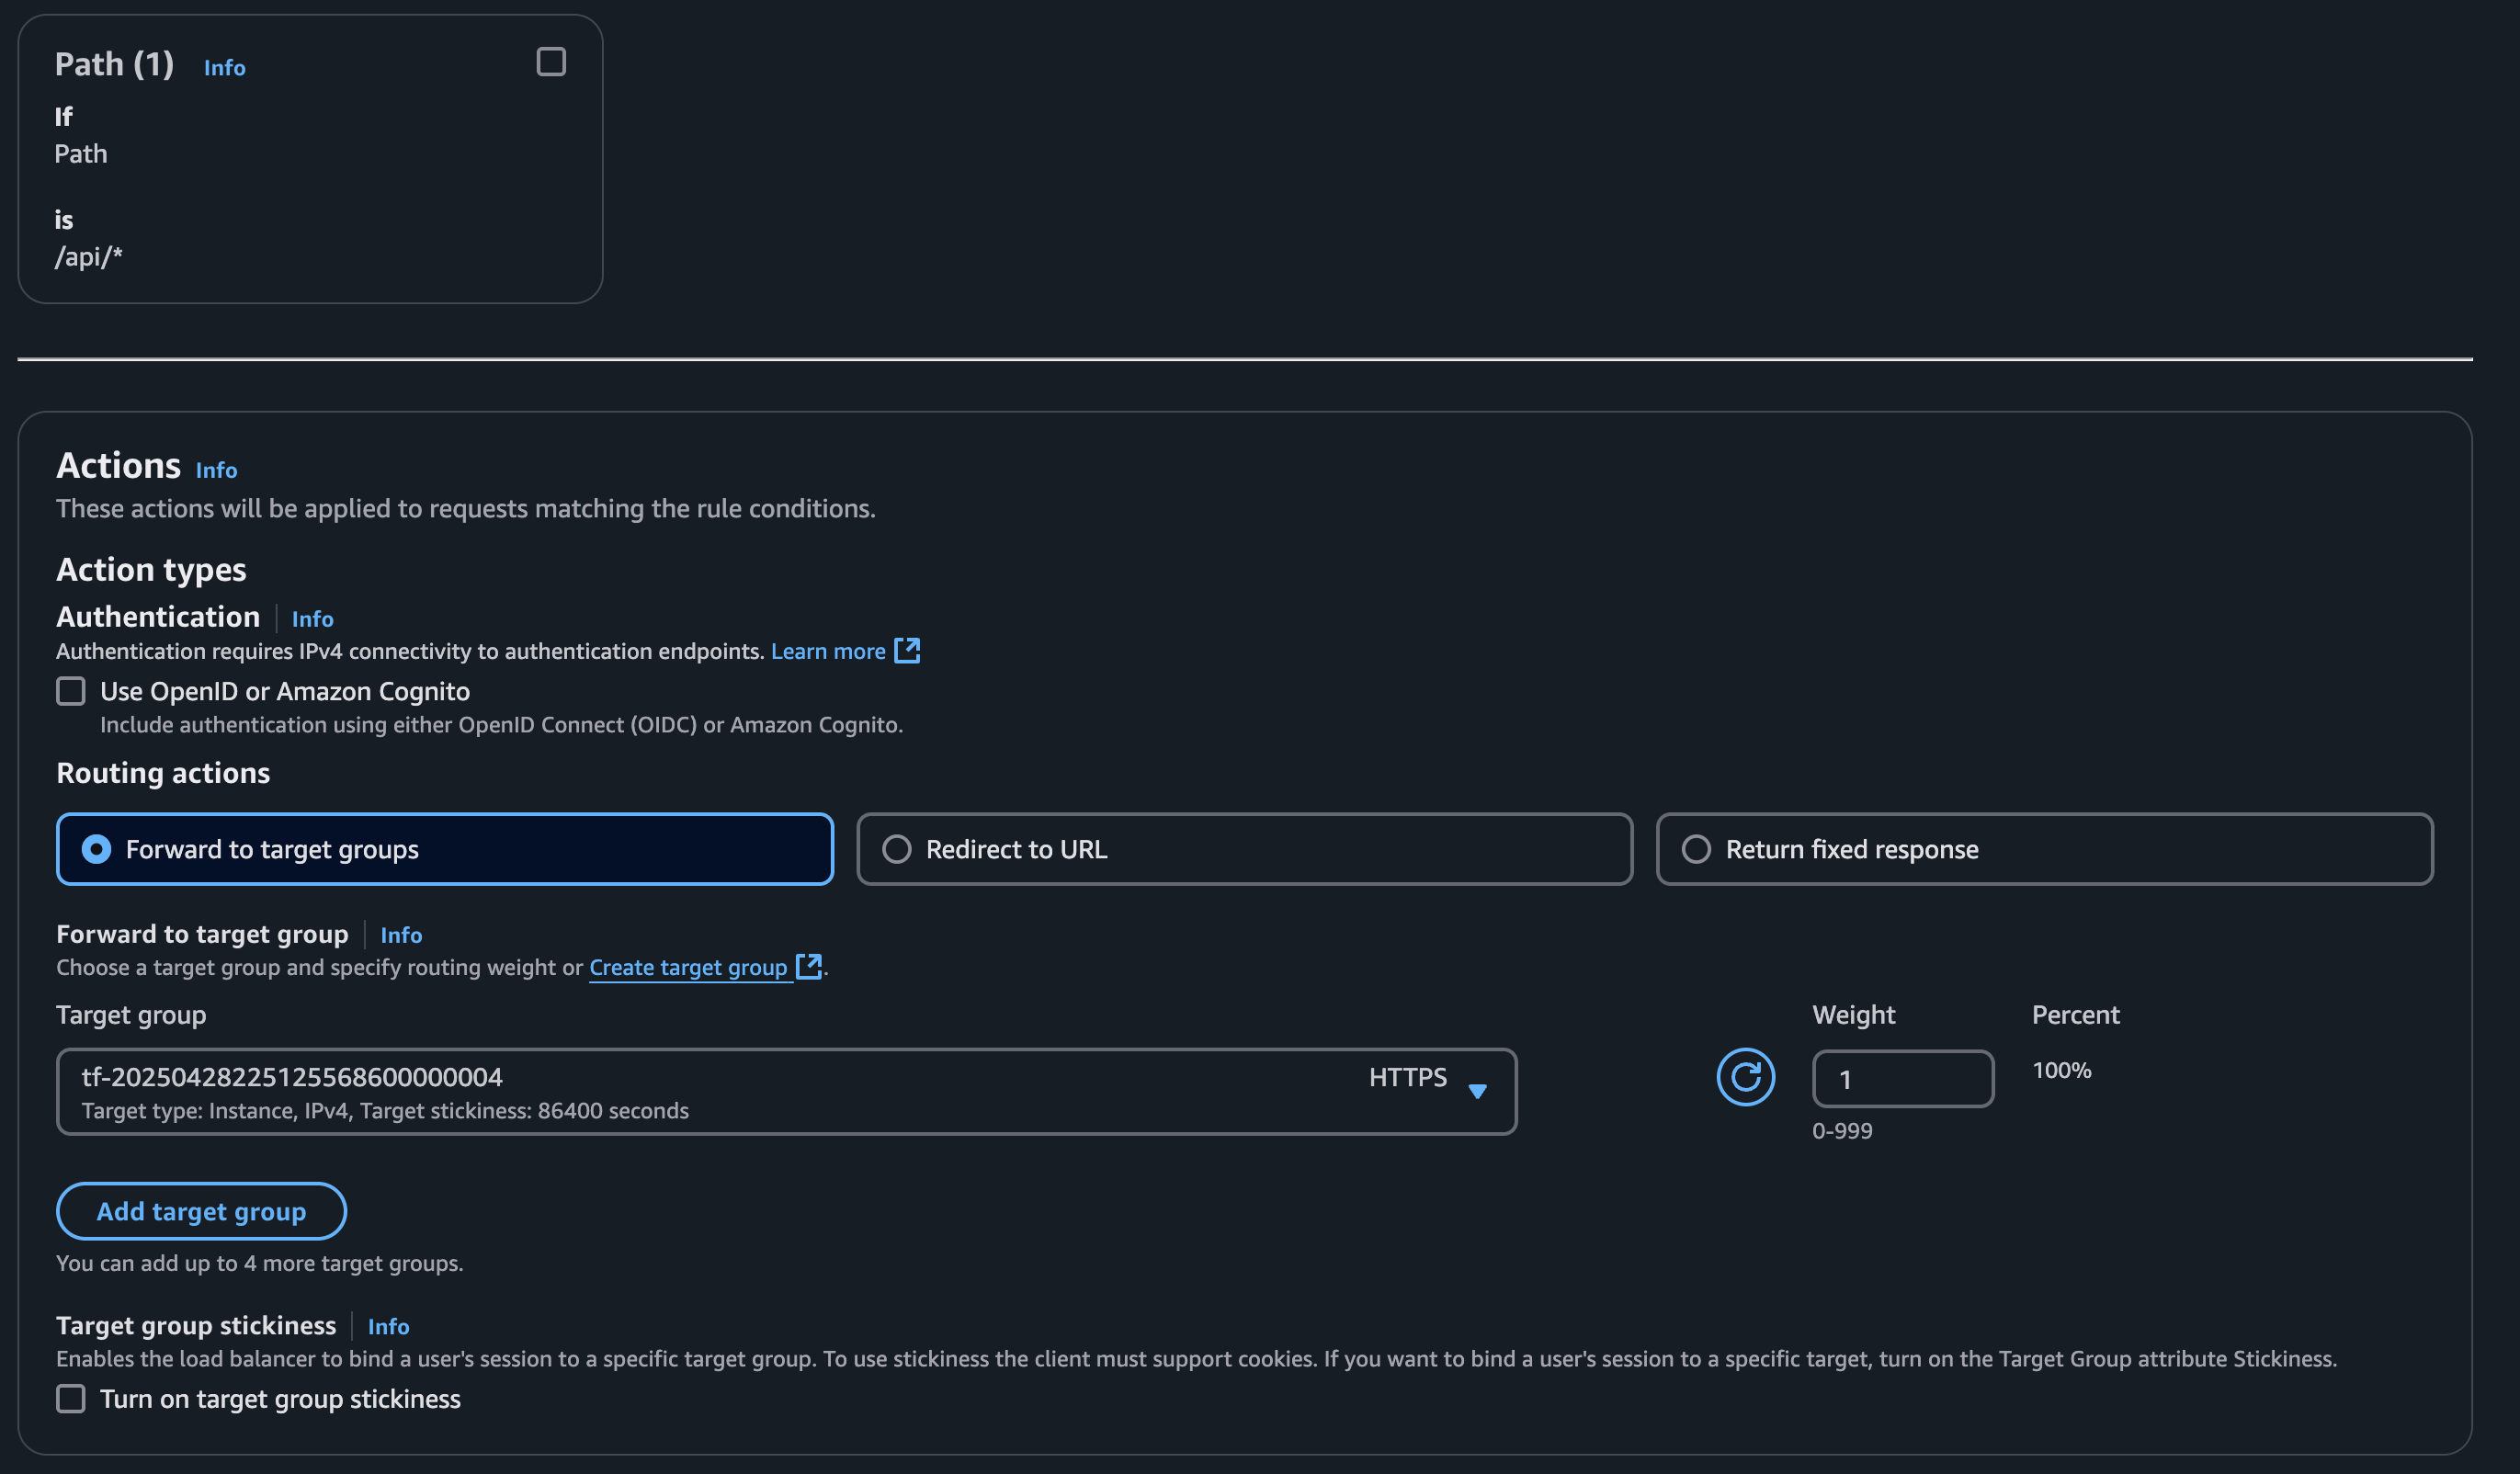
Create a rule for each target group. Skip the rule for the target group that is your default routing action since if nothing matches it will fallback to this rule.

Set up Azure Application Gateway
If your instances are provisioned on Azure, you can set up an Application Gateway.
Follow the steps for setting up an Application Gateway outlined here: Quickstart: Direct web traffic using the portal - Azure Application Gateway
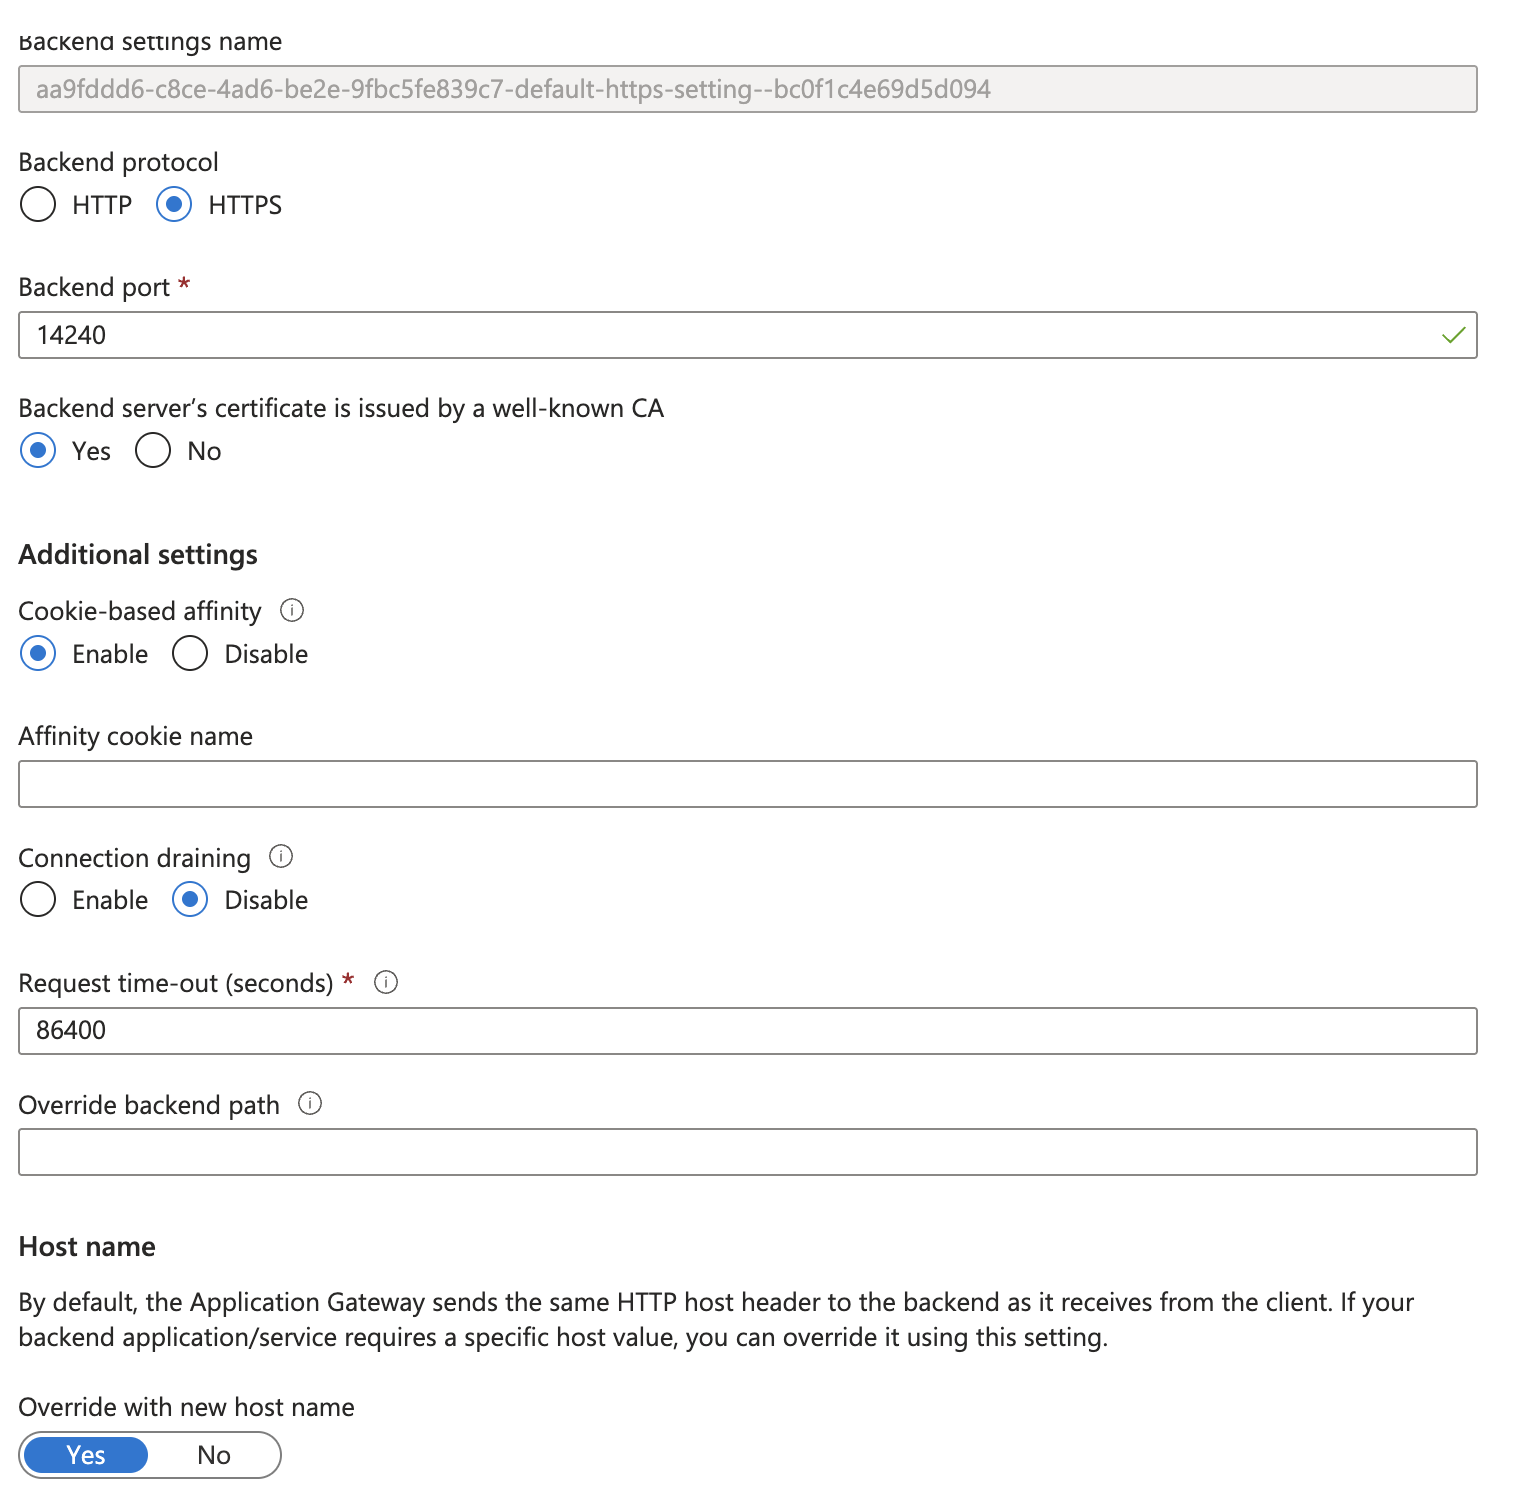
Some different TigerGraph specific settings are required during Application Gateway setup:
-
Under the section "Configuration Tab"
-
Step 5 states to use port 80 for the backend port. Use port
14240instead. -
In the same window, enable “Cookie-based affinity”.
-
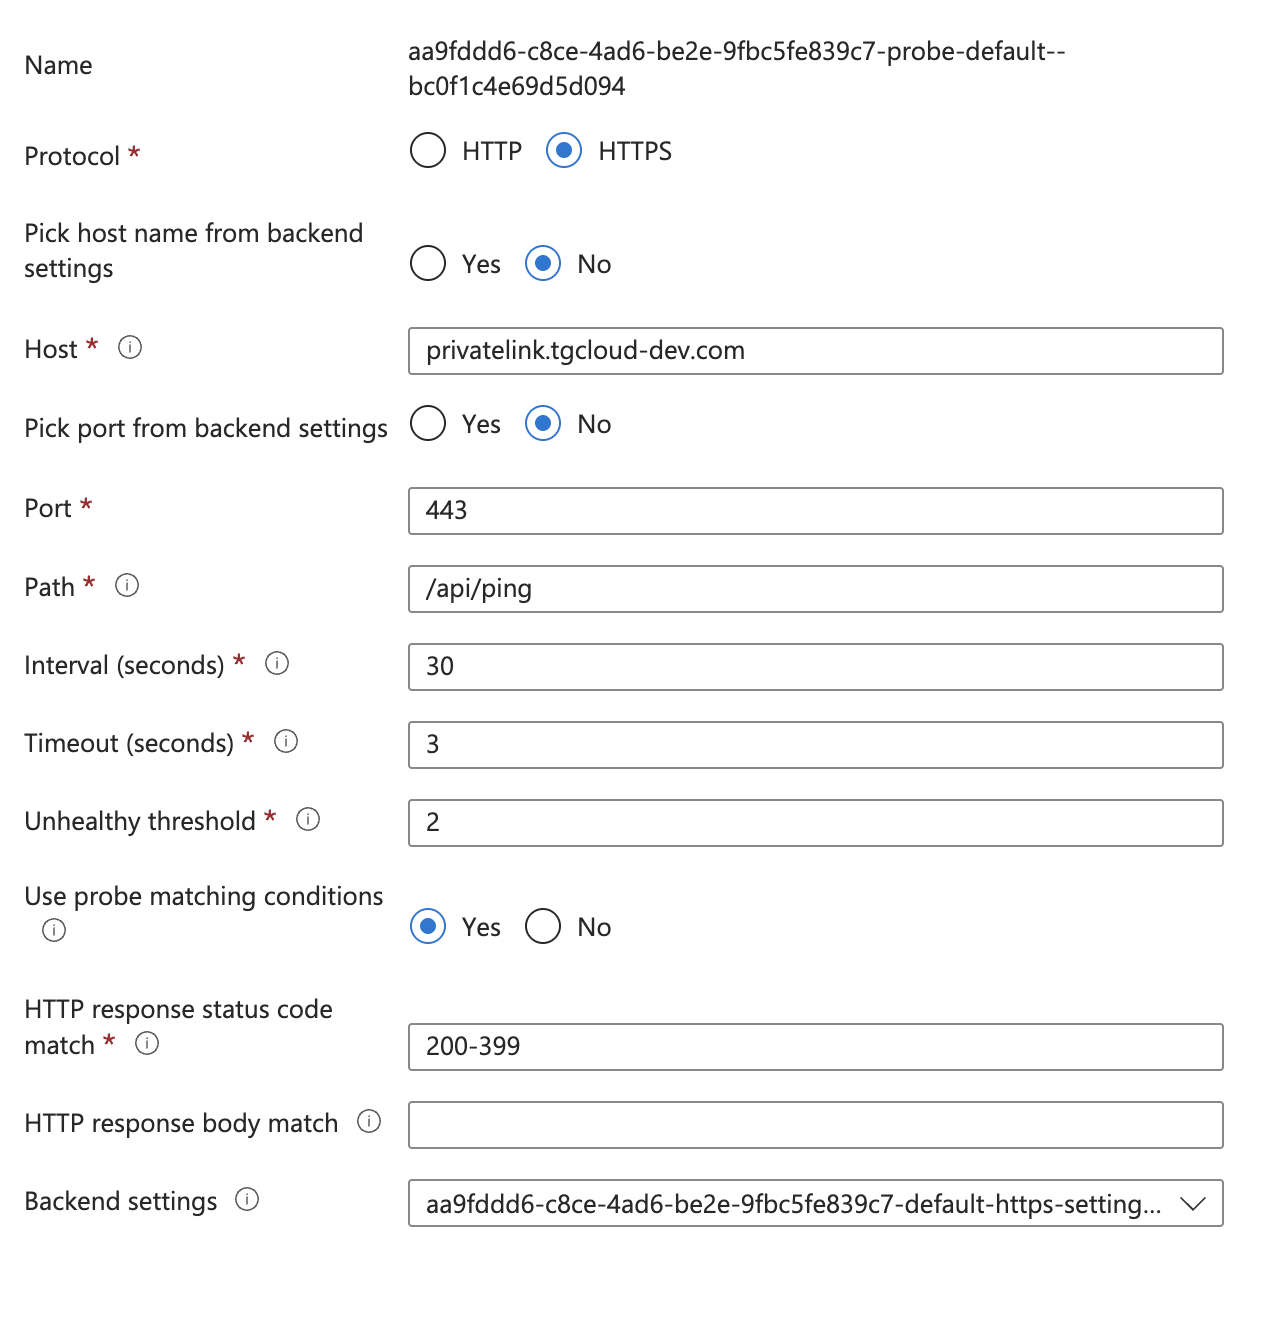
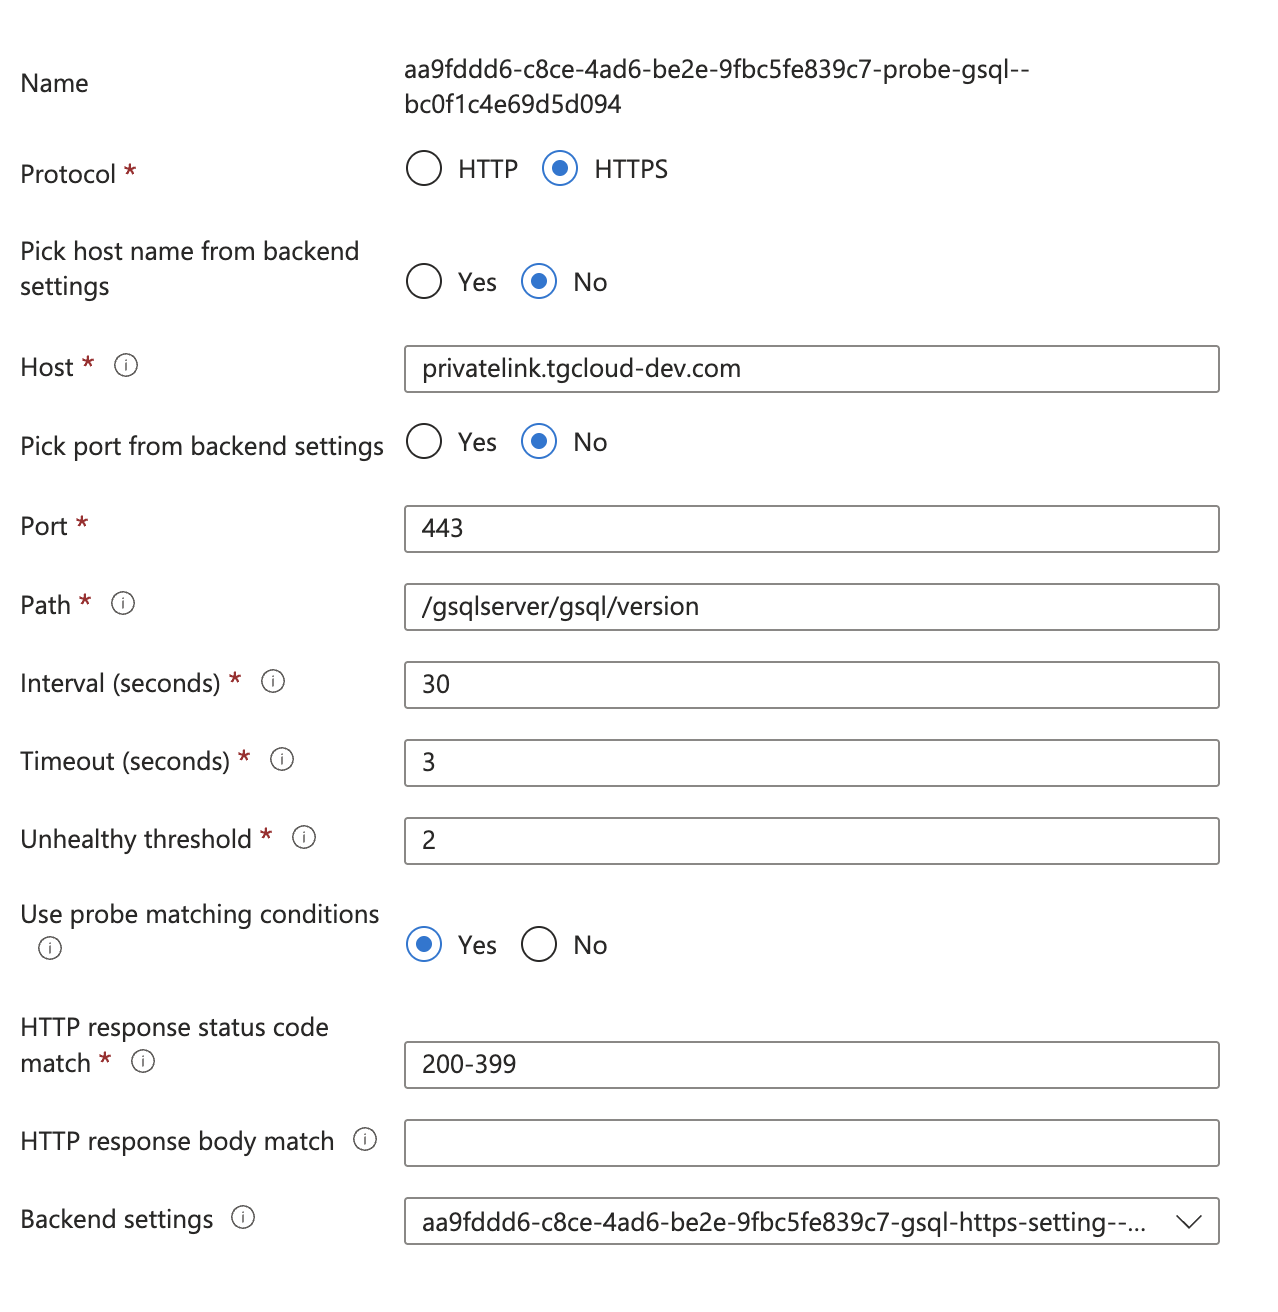
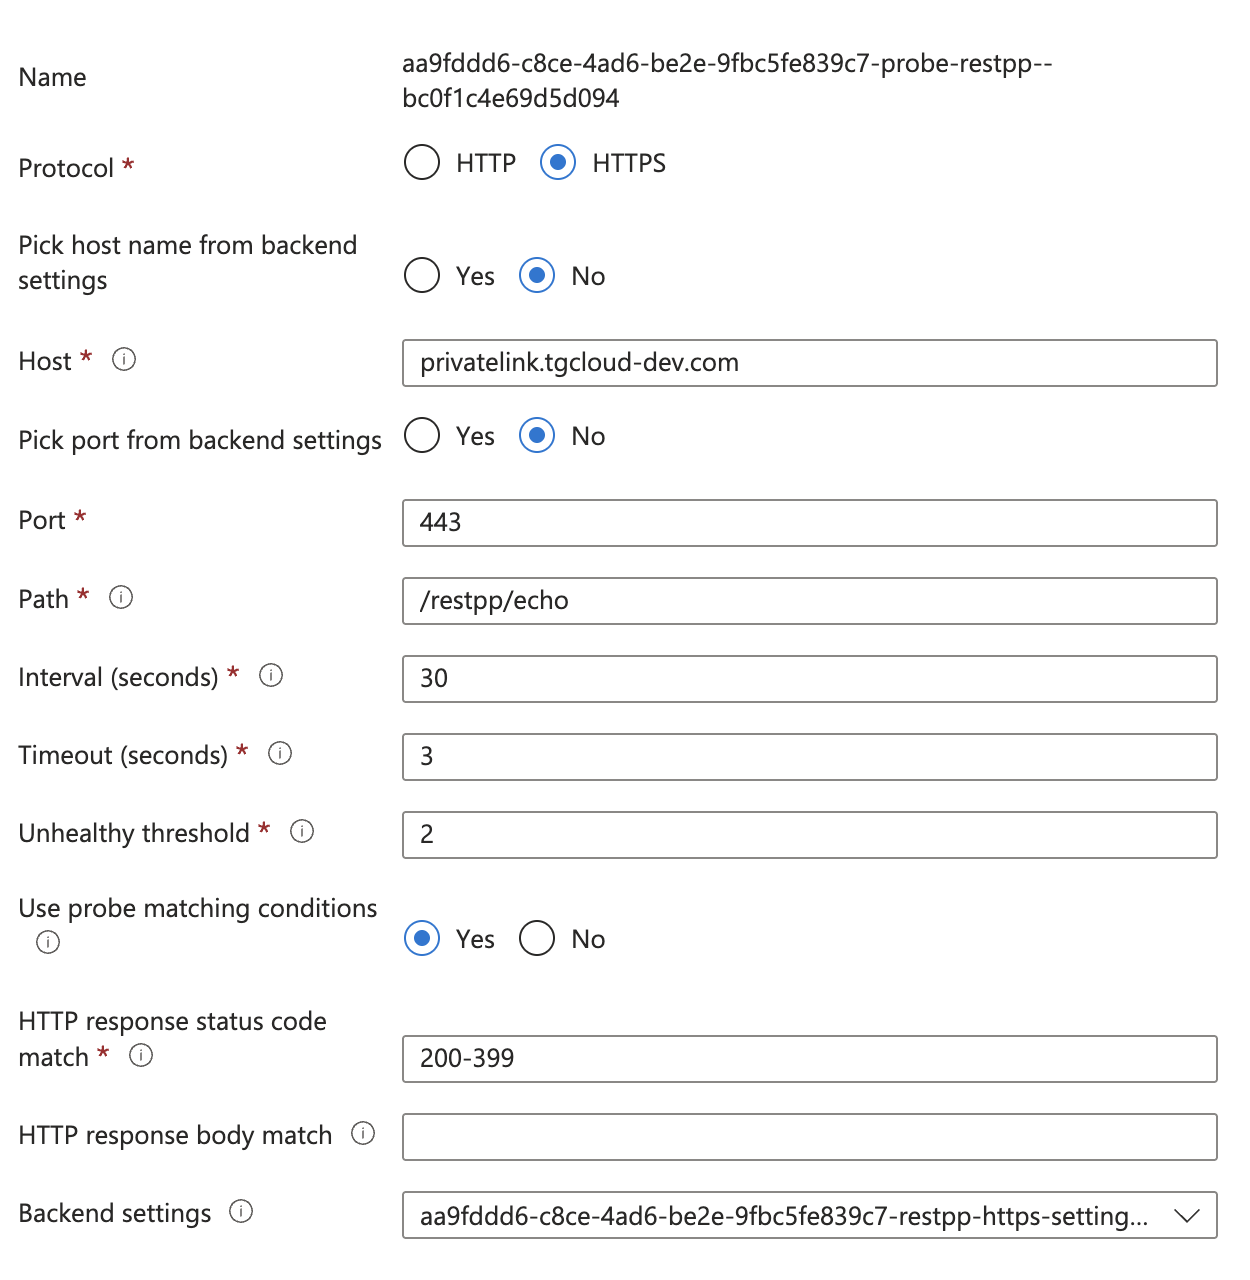
Create a custom probe for Application Gateway
After the Application Gateway is complete, we need to create a custom health probe in order to check the health/status of our Application Servers. You can follow the following steps outlined here: Create a custom probe using the portal - Azure Application Gateway
Health check
Each service requires a different health check configuration. Use the following paths:
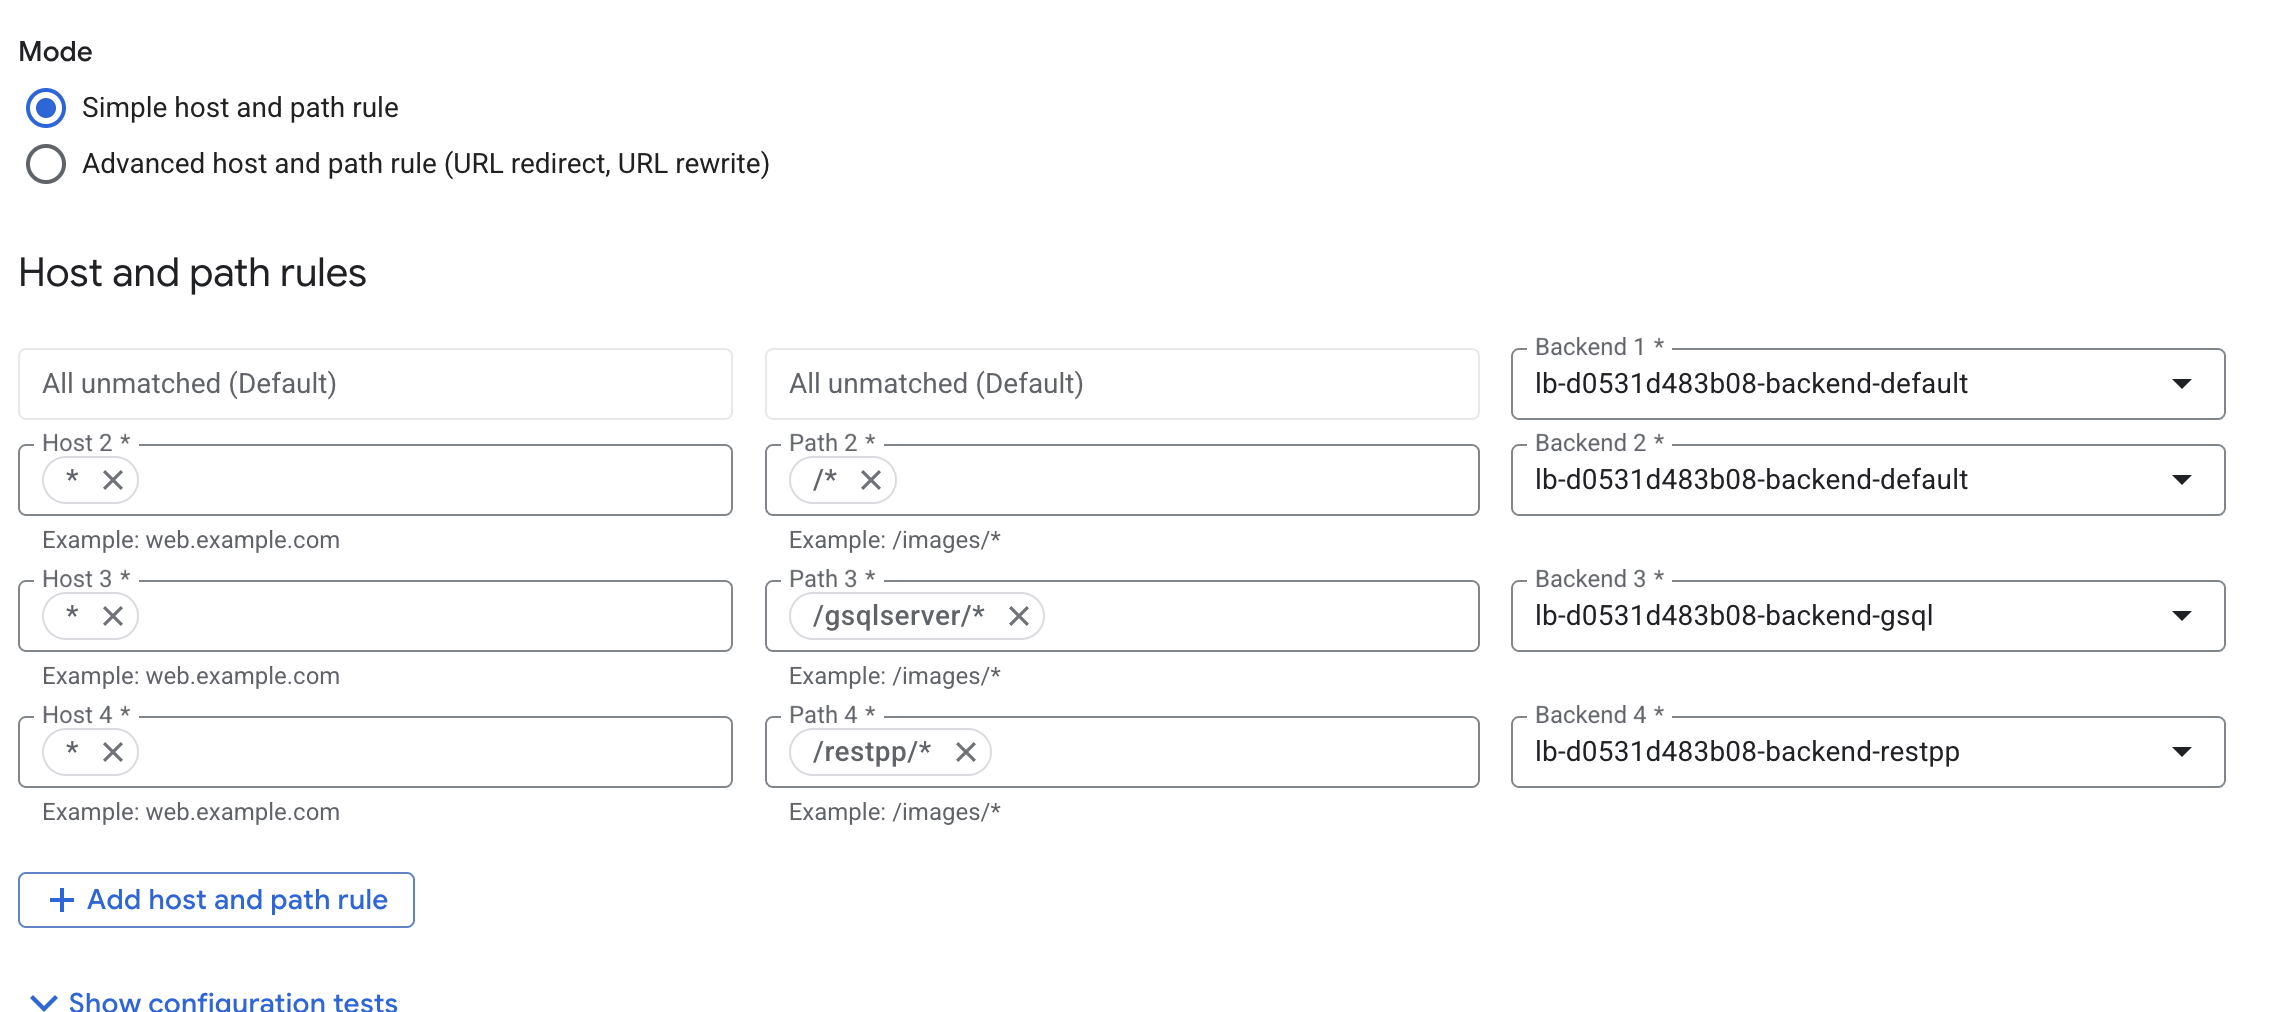
Rules
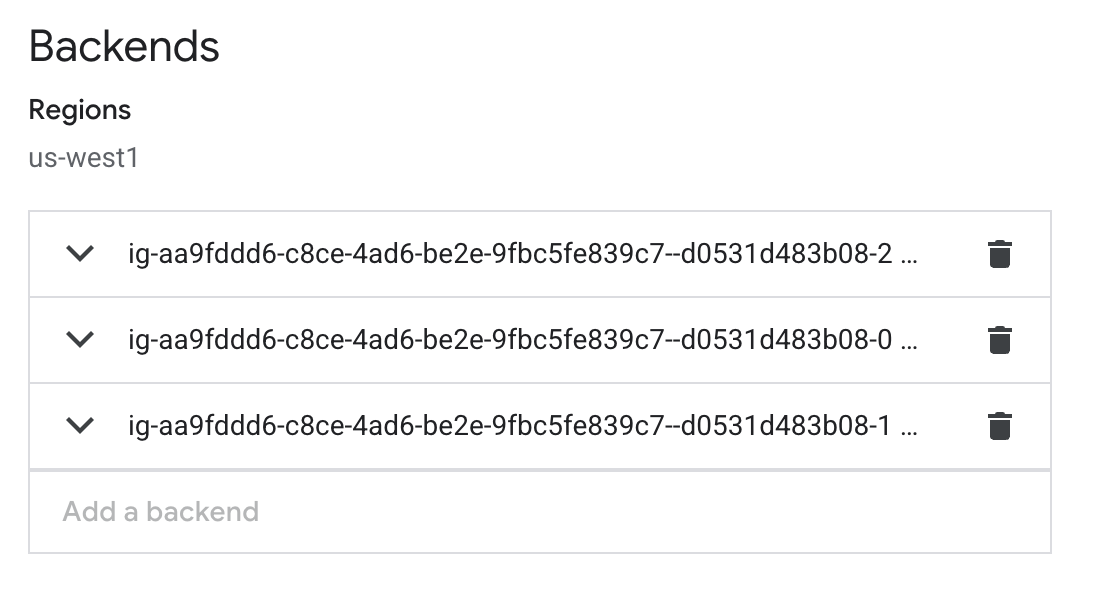
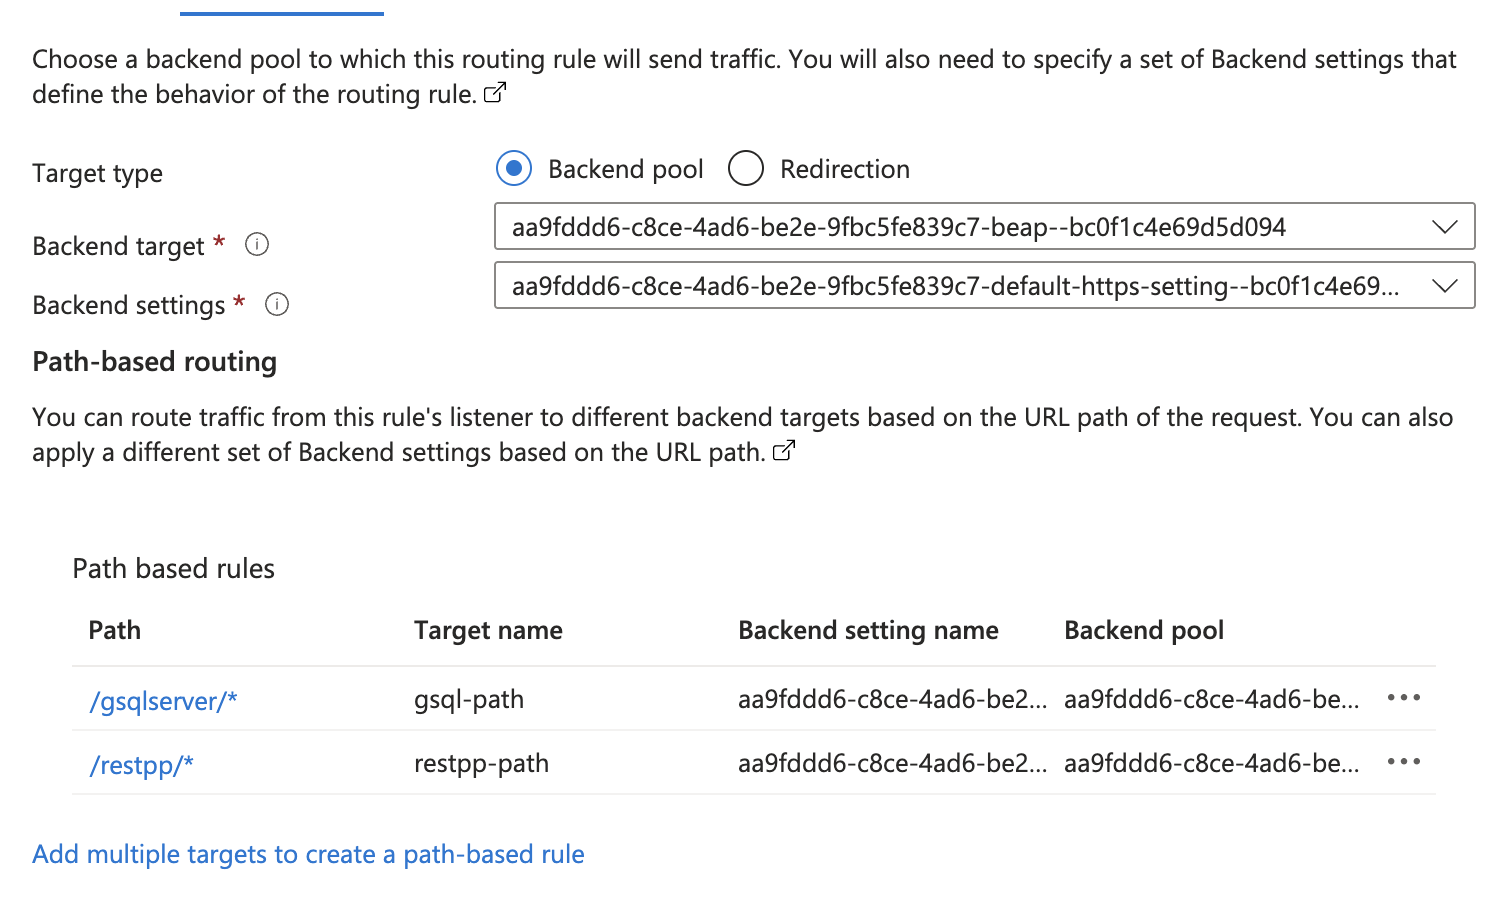
Select the GUI backend as the default target since most requests are routed here. You can also set GSQL or RESTPP as the default. This backend automatically acts as the fallback if no other rules match.
Set up GCP External HTTP(s) Load Balancer
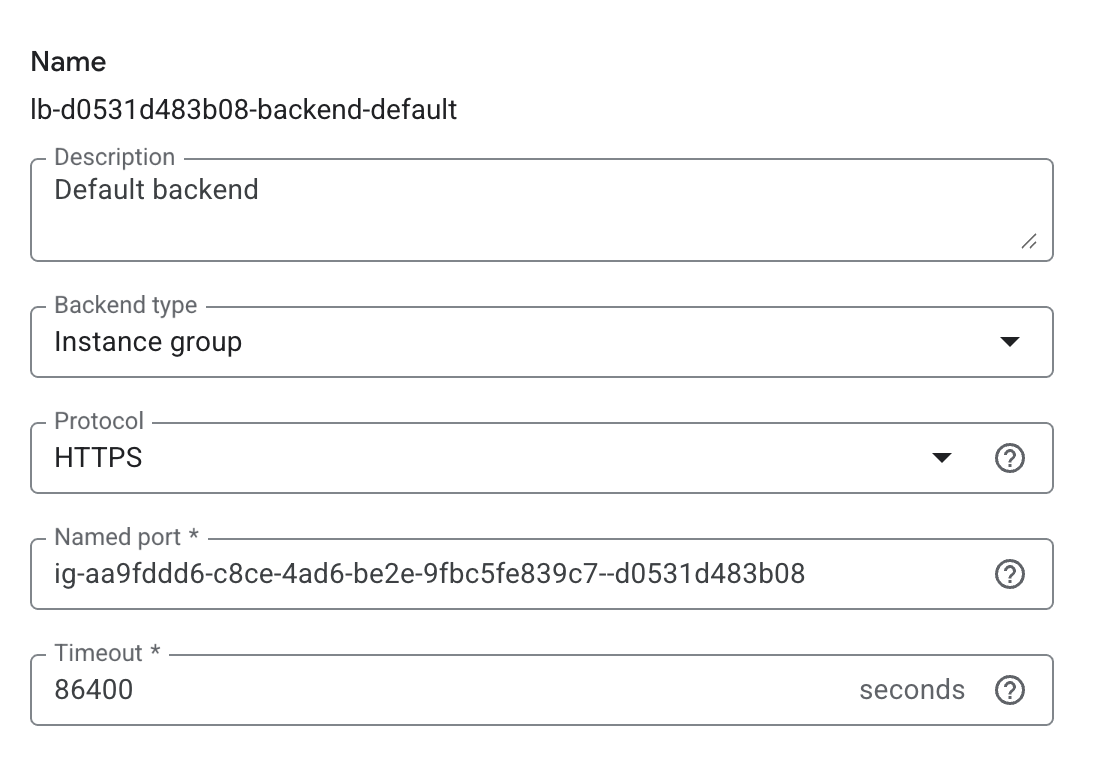
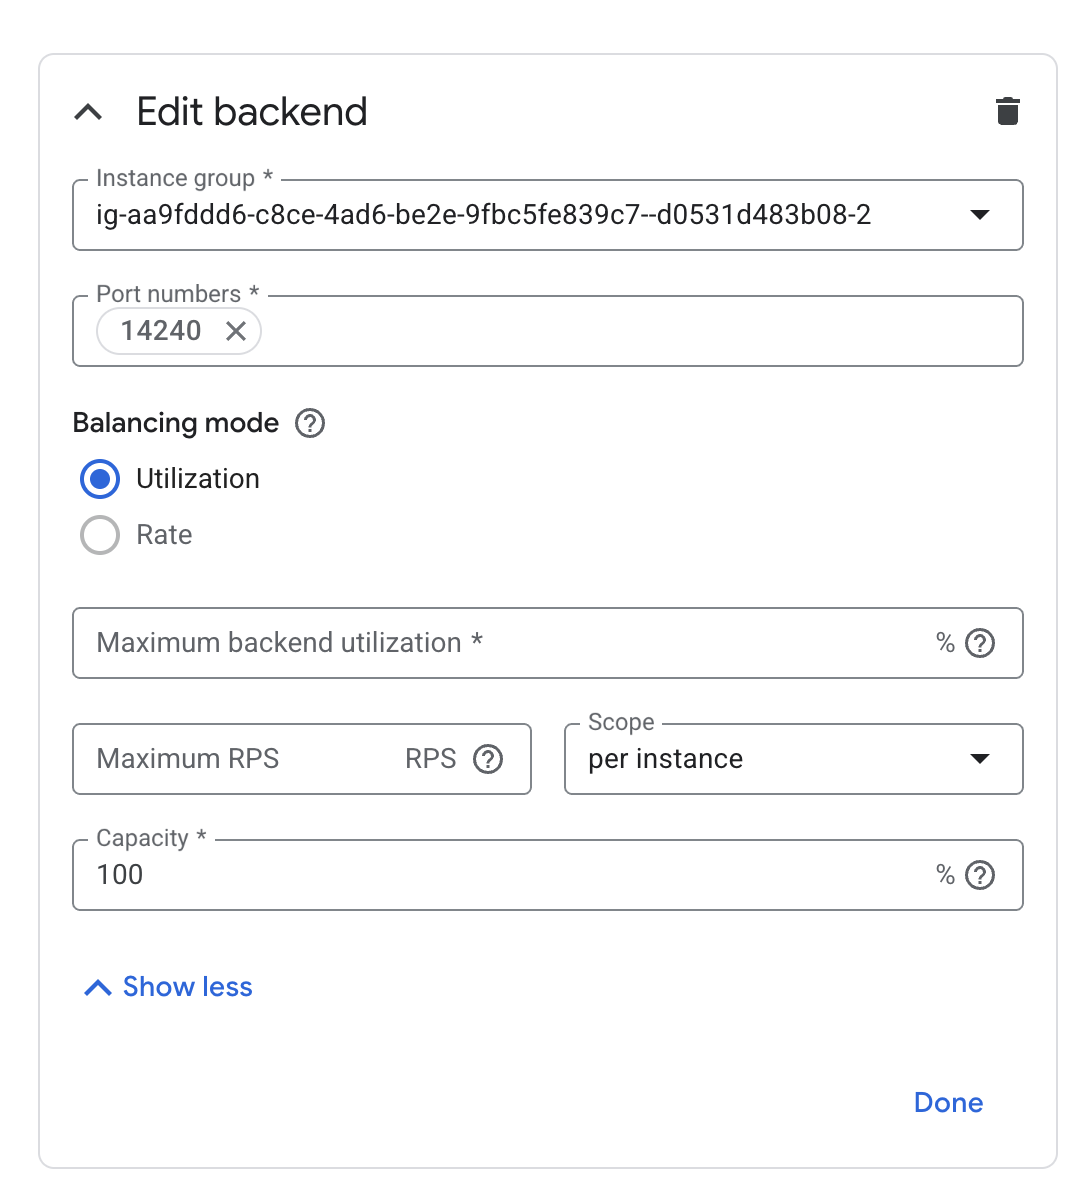
If your instances are provisioned on Google Cloud Platform (GCP), you can set up an External HTTP(s) Load Balancer:
You can follow Google’s provided steps in their documentation for setup here: Setting up an external HTTPS load balancer | Identity-Aware Proxy
Test
This section demonstrates testing on AWS, but the same approach applies to Azure and GCP.
To verify the setup, shut down one of the backend services (RESTPP, GSQL, or GUI) and observe the target group behavior.
For example, when the GUI service is shut down, its target group becomes non-functional, and any calls to /api/* will fail.

However, GSQL and RESTPP continue to function normally


If at least one instance of the GUI is running, the target group remains healthy because of the Nginx configuration.

