Get Started
This quickstart walks you through:
-
Setting up a TigerGraph schema and loading data to a TigerGraph instance.
-
Access TigerGraph GraphQL service and connecting to the graph in the TigerGraph instance.
-
Running GraphQL queries against the service.
-
(Optional) Running a web application built on top of the service
1. Download example solution and data
-
Download the example TigerGraph solution.
-
Download the example data set and unzip it.
2. Load data
-
Start up a TigerGraph instance, either locally or on TigerGraph Cloud.
-
Navigate to the GraphStudio homepage and click Import an Existing Solution. Select the
.tar.gzfile you downloaded in the previous step/.-
If you are running TigerGraph locally, you can access GraphStudio by visiting http://localhost:14240 and select GraphStudio.
-
If you are running your instance on TigerGraph Cloud, you can navigate to GraphStudio through the Cloud portal or visit your Cloud instance URL.
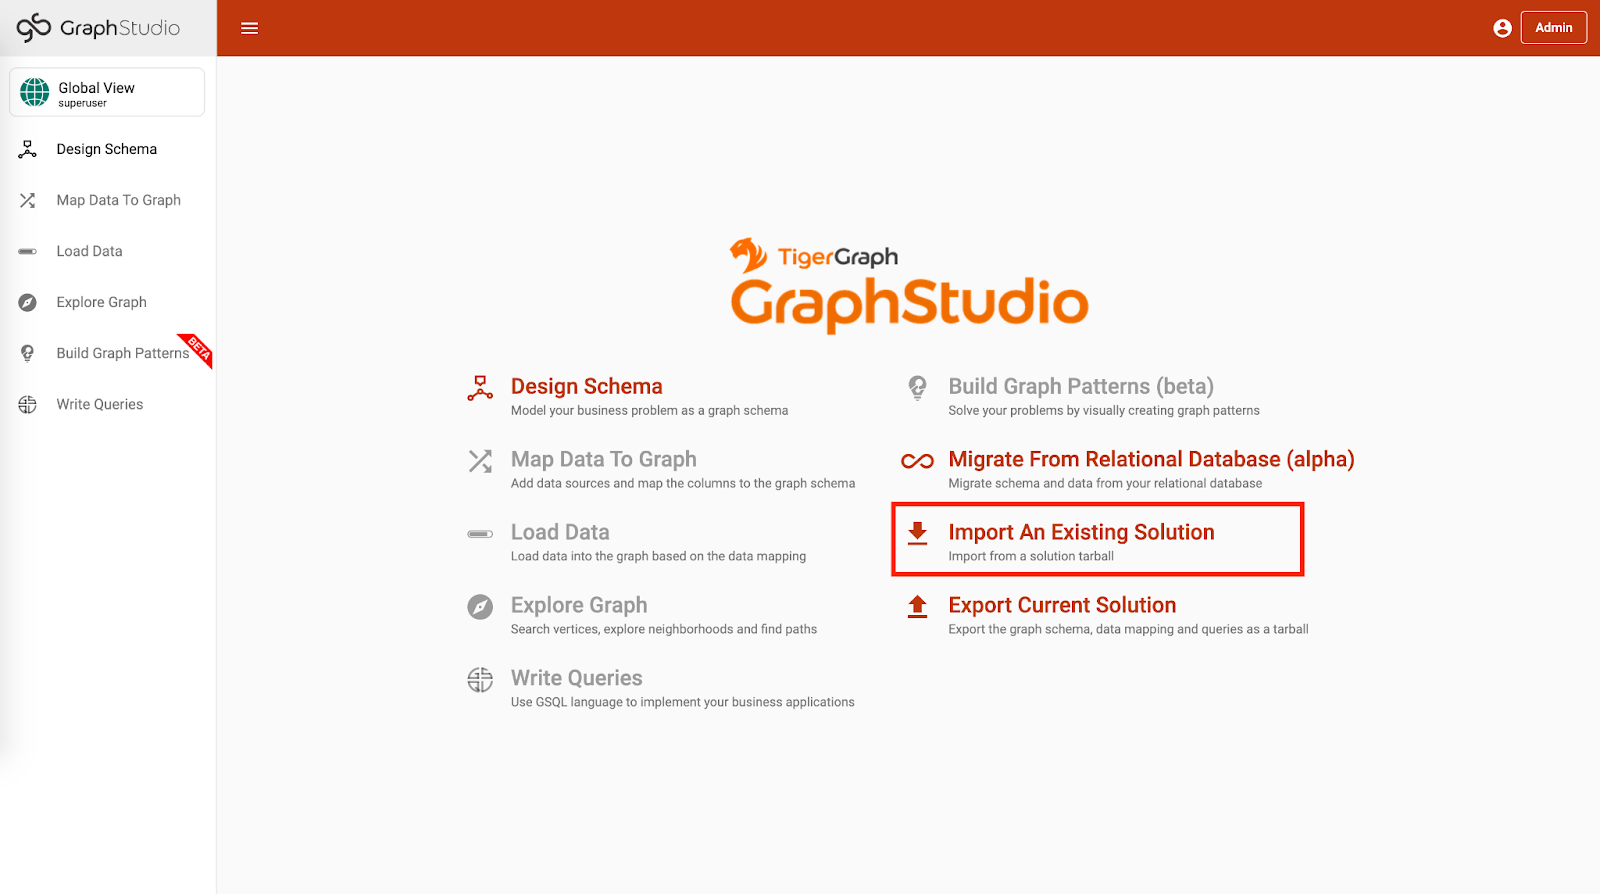 Figure 1. GraphStudio Homepage
-
-
In the upper left corner of the GraphStudio Home page, click to switch to the demo graph.
-
On the left-side navigation, click Map Data To Graph, which should no longer be grayed out after switching out of global view.
-
Click the Add Data File button and upload all the
.csvfiles from the decompressed data folder. Click Publish data mapping to publish data mapping.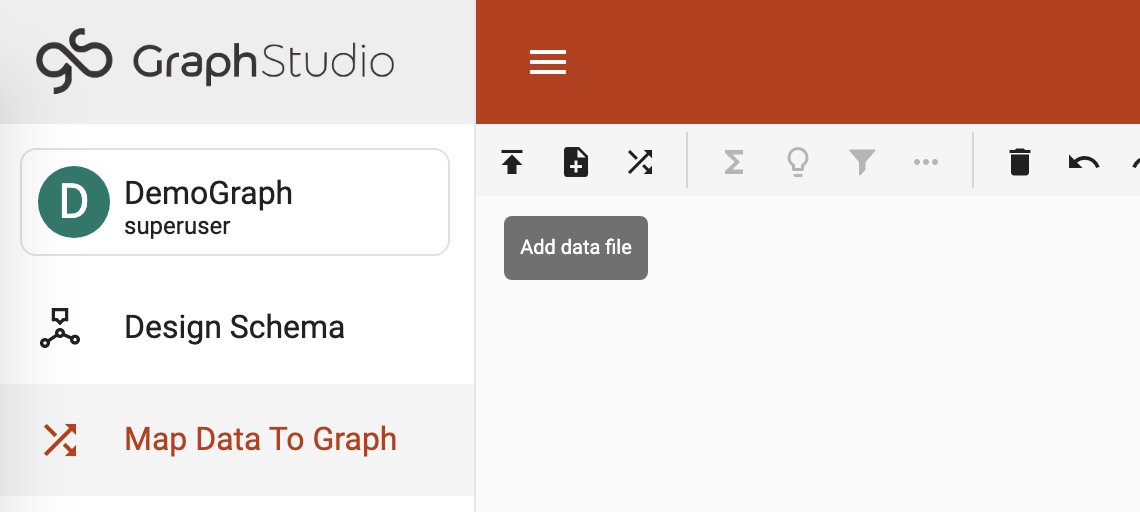 Figure 2. Add data file
 -
Navigate to the Load Data page by clicking Load Data on the left-side navigation menu. Click the ▶ button in the toolbar above the canvas to start data loading.
After data loading completes, your graph is ready for use.
3. Access TigerGraph GraphQL Service
To access the GraphQL service, click the nine-dot icon in the top right corner of the screen and click GraphQL.
Right under the top pane in the up right corner, select the graph you want to query against. In this case, we’ll select DemoGraph.
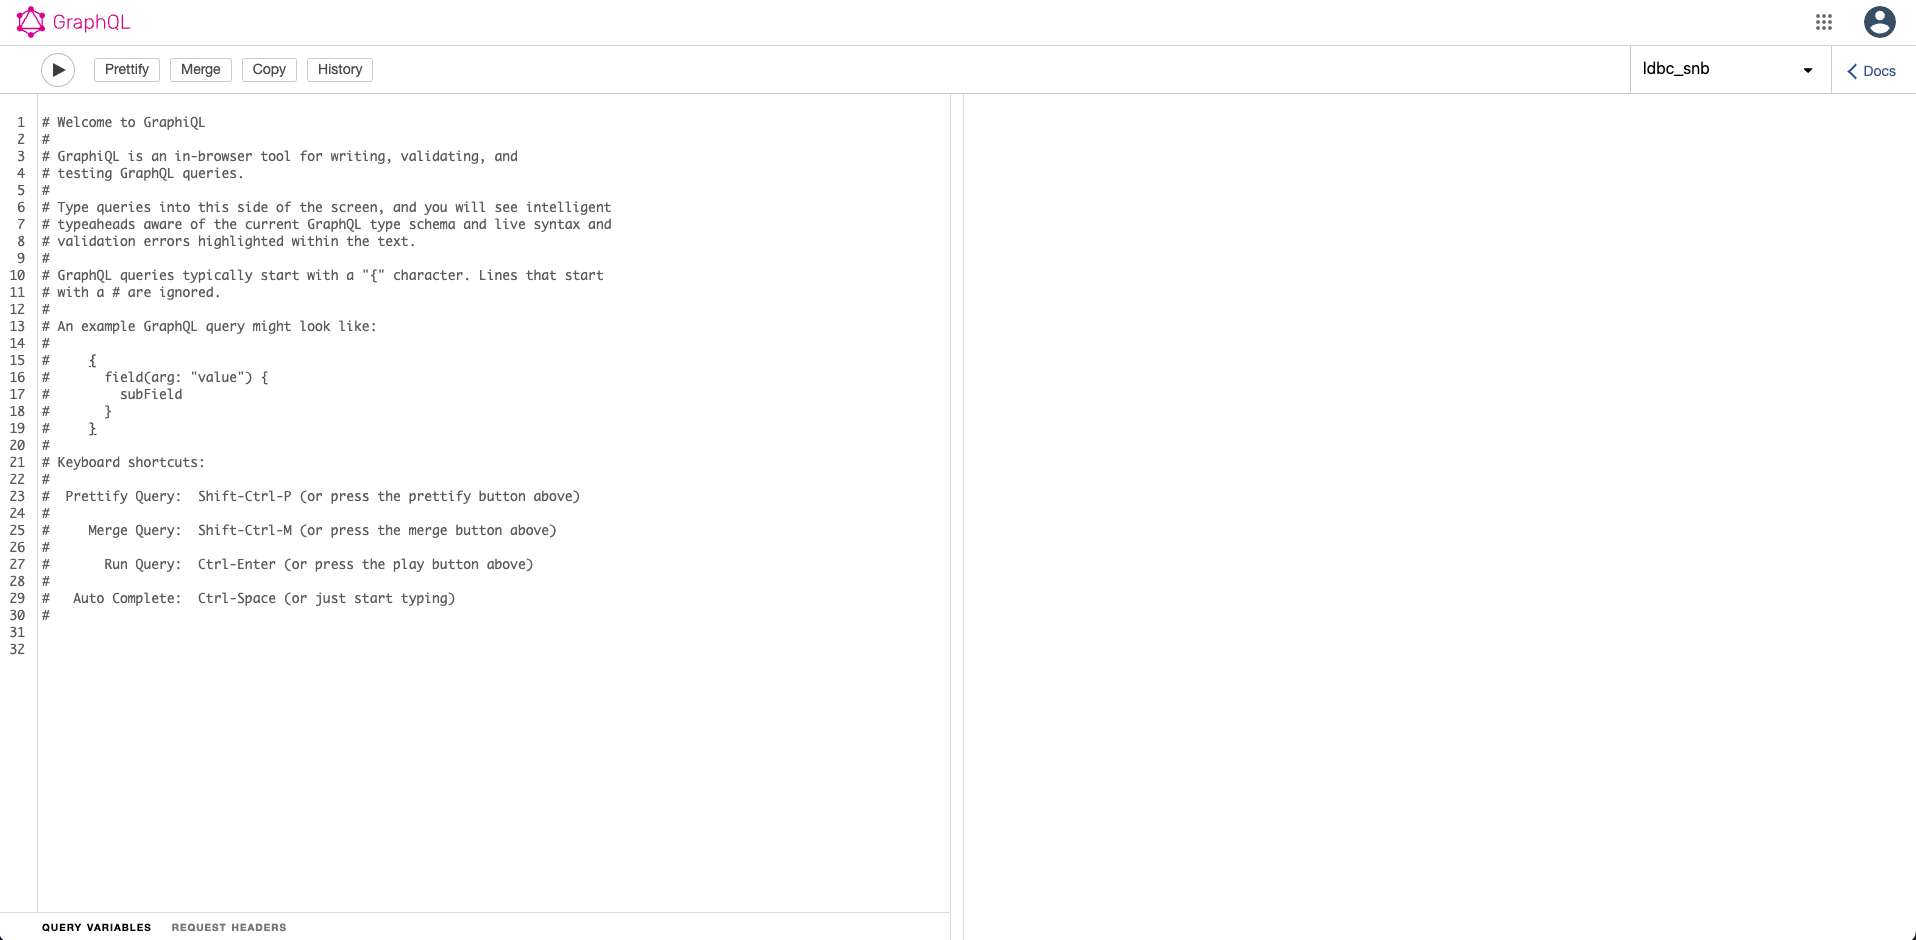
4. Run a query
Let’s try running a simple query against the API. You’ll learn about running GraphQL queries on TigerGraph in more depth in the Queries section. For now, let’s run a simple query to get all person vertices in the graph and where they are born:
query {
  DemoGraph {
    person {
      name
      born_in {
        birthday
        to {
          name
        }
      }
    }
  }
}
{
"data": {
"DemoGraph": {
"person": [
{
"born_in": [
{
"birthday": "1982-07-27 00:00:00",
"to": {
"name": "redwood city"
}
}
],
"name": "John"
},
{
"born_in": [
{
"birthday": "1991-12-21 00:00:00",
"to": {
"name": "san jose"
}
}
],
"name": "Kevin"
},
{
"born_in": [
{
"birthday": "1995-01-01 00:00:00",
"to": {
"name": "palo alto"
}
}
],
"name": "Jenny"
},
{
"born_in": [
{
"birthday": "1973-10-05 00:00:00",
"to": {
"name": "mountain view"
}
}
],
"name": "Smith"
},
{
"born_in": [
{
"birthday": "1990-09-12 00:00:00",
"to": {
"name": "redwood city"
}
}
],
"name": "Tom"
},
{
"born_in": [
{
"birthday": "1992-05-23 00:00:00",
"to": {
"name": "san jose"
}
}
],
"name": "Emily"
}
]
}
},
"errors": null
}5. Programmatically run a GraphQL query
The GraphQL service UI is a quick way to validate the query result. To programmatically run a GraphQL query or integrate with your application, you need to provide credentials to authenticate your requests. You can authenticate by including encrypted credentials in HTTP headers.
Type your TigerGraph username and password in the following format, with the two strings separated by a colon: <username>:<password>.
For example, if your username is tigergraph and your password is password, it should be tigergraph:password.
Encode <username>:<password> using base64 encoding. In this example, you get dGlnZXJncmFwaDpwYXNzd29yZA==
Use this curl command to test it out:
curl --header “Authorization: Basic dGlnZXJncmFwaDpwYXNzd29yZA==” -X POST <TigerGraph-domain>:<port>/api/graphql/gsql/DemoGraph -d ‘{“query”:”query { DemoGraph { person { name born_in { birthday to { name } } } } }”, "variables": null}’