Node Replacement (V2)
Node Replacement V2 provides a safe and consistent way to replace a cluster node with minimal downtime. Compared to Node Replacement V1, V2 no longer requires a full system-wide service restart. Only the local services on the node being replaced are restarted, which significantly reduces downtime.
This workflow applies to clusters installed using hostname-based installation.
Node Replacement V2 is supported in TigerGraph 3.10.1 and later.
Purpose of Node Replacement
Use Node Replacement V2 when:
-
A machine running a TigerGraph node becomes unreliable or fails.
-
You need to migrate a node to new hardware or a new instance.
-
You want to replace a node without interrupting the entire cluster.
-
You want to minimize downtime by using a load balancer.
Node Replacement is intended for node-level failures or maintenance tasks. If your goal is to permanently resize the cluster, consider cluster expansion or cluster shrinking.
Prerequisites
Before replacing a node:
-
The cluster must be configured for high availability (replication factor ≥ 2).
-
All other nodes in the cluster must have their services in
RUNNINGstatus. -
Hostname-based installation must be used.
-
The replacement machine must be prepared with the correct OS, configuration, and AWS credentials (if applicable).
-
If using AWS Route 53, ensure DNS updates are allowed for hostnames.
If any service is down on the remaining nodes and cannot be restarted, please open a support ticket.
Workflow
|
Stopping services on the exiting node will interrupt any traffic sent directly to it. Make sure clients are not using this node before you continue. |
Node Replacement V2 follows this sequence:
-
Stop local services on the node to be replaced.
-
Update DNS so the node’s hostname points to the new machine.
-
Detach the storage volume from the old node.
-
Attach the volume to the new node.
-
Prepare the new machine (users, environment files, directories).
-
Start local TigerGraph services on the new node.
-
Verify all services reach
RUNNING.
Optionally, using an Application Load Balancer (ALB) can reduce downtime even further.
Replace a Node Without a Load Balancer
Use this method when clients connect directly to a node using its hostname.
Preparation
Before starting:
-
Ensure client or application traffic is routed away from the node being replaced.
-
Back up user environment files on the exiting node:
cp -pr ~/.ssh/ /data/backup/
cp -p ~/.tg.cfg /data/backup
cp -p ~/.bashrc /data/backup
cp -p /etc/security/limits.d/98-tigergraph.conf /data/backup
On the Exiting Node
-
Stop local services:
gadmin stop all --local -y -
Update the DNS record to point the node’s hostname to the new machine’s private IP. For AWS, use a Route 53 UPSERT action.
-
Unmount and detach the data volume:
sudo umount /data
aws ec2 detach-volume --volume-id <volume-id>
On the New Node
-
Attach the existing volume:
aws ec2 attach-volume --volume-id <volume-id> --instance-id <new-instance-id> --device /dev/sdf -
Mount the volume:
sudo mkdir -p /data sudo mount /dev/nvme1n1 /data -
Recreate and configure the TigerGraph user:
sudo useradd tigergraph sudo passwd tigergraph cp -r /data/backup/.ssh/ /home/tigergraph/ cp /data/backup/.bashrc /home/tigergraph/ cp /data/backup/.tg.cfg /home/tigergraph/ sudo cp /data/backup/98-tigergraph.conf /etc/security/limits.d/ -
Verify that DNS resolves the hostname to the new node:
nslookup <hostname> -
Start local services:
gadmin start all --local
Wait until all services reach RUNNING.
The node has now been replaced.
Replace a Node With an Application Load Balancer
Using an AWS Application Load Balancer (ALB) ensures traffic is routed only to healthy nodes during the replacement process. This minimizes or eliminates query failures and reduces downtime.
Create an Application Load Balancer
-
Navigate to EC2:
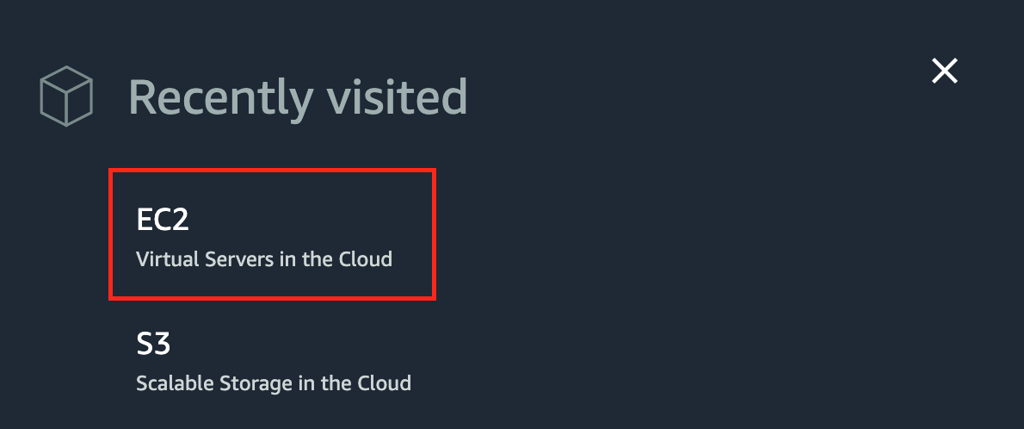
-
Open the Load Balancers section:
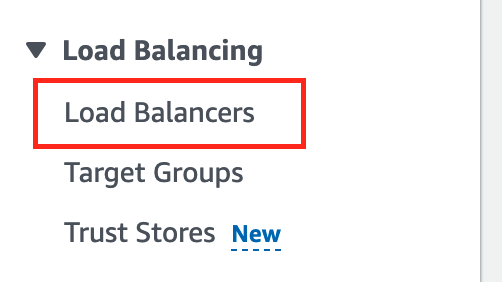
-
Choose Create load balancer:
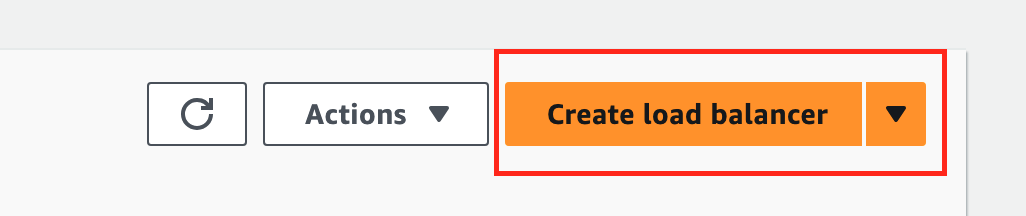
-
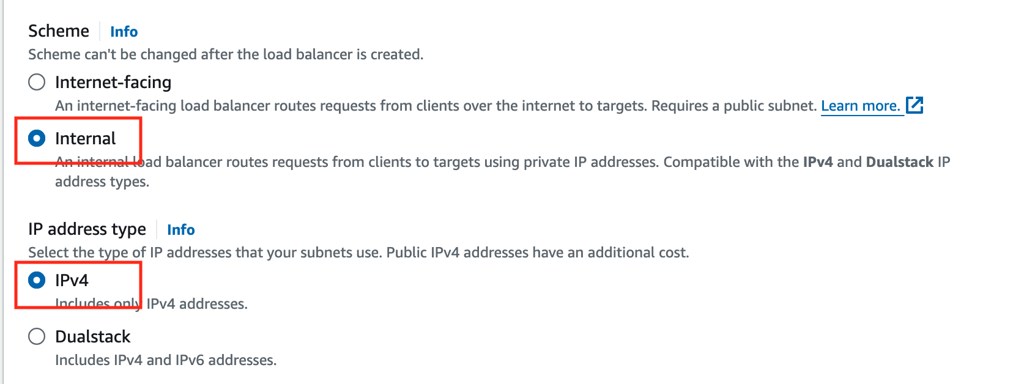
Select Application Load Balancer:
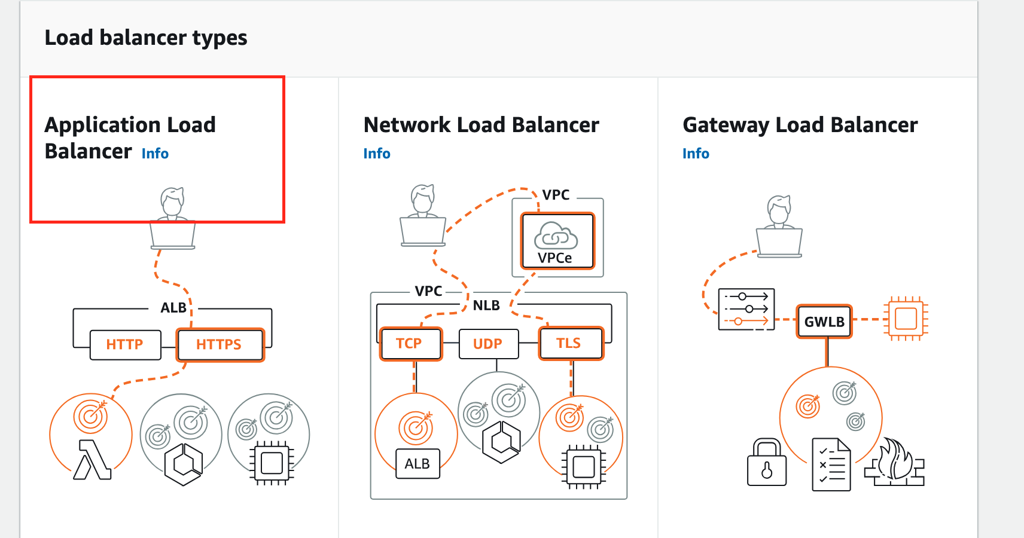
-
Choose Internal and IPv4:
Configure the Target Group
-
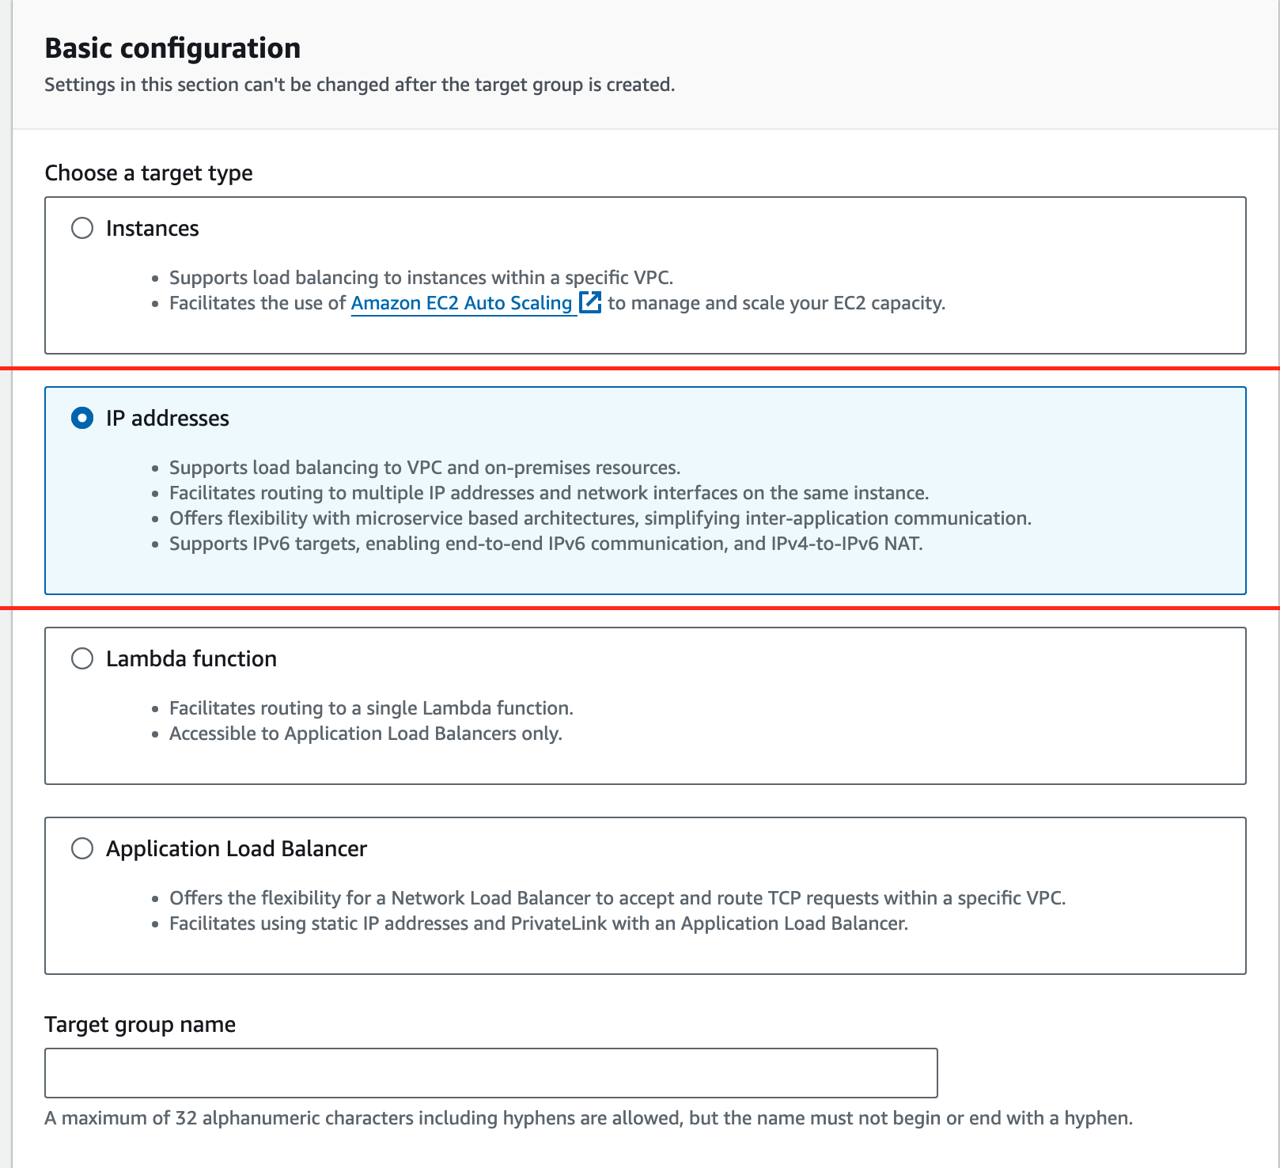
In the target group creation page, choose IP addresses and give the target group a name:
-
Set the target port to the RESTPP port:
gadmin config get restpp.nginxport -
Configure the health check path:

Use /echo as the health check endpoint.
Why Health Check Interval Matters
If the health check interval is too long, the ALB may continue sending traffic to the node even after its services have stopped.
For example:
-
Interval = 30 seconds
-
Services stop at second 31
-
ALB still considers the node healthy until the next check
Set a shorter interval (for example, 5 seconds) to reduce routing delay.
Node Replacement with an ALB
Once the ALB is configured:
-
Send all client traffic to the ALB’s DNS name.
-
Follow the same replacement steps described in:
-
The ALB automatically stops routing traffic to the node once its health check fails.
-
After the new node comes online, the ALB routes traffic to it.
Verification
When replacement completes:
-
All services on the new node should show
RUNNING. -
DNS should resolve the node hostname to the new machine.
-
The ALB target group should show the new node as healthy.
-
Queries routed through the ALB should succeed.
Troubleshooting
If the node replacement process does not behave as expected, use the following checks to identify and resolve common issues.
-
Verify that all other nodes in the cluster are healthy (
gadmin status -v). -
Confirm that the data volume is correctly attached and mounted on the new node.
-
Ensure the replacement node has the correct system configuration, user environment files, and permissions.
-
Check that DNS changes have propagated:
nslookup <hostname>
If queries are still failing through the load balancer, review the following common issues and resolutions:
-
Load balancer continues routing traffic to the old node
Lowering the health check interval (for example, to 5 seconds) helps the ALB detect the node change faster. However, shorter intervals send more frequent health checks to RESTPP, which may add minor overhead in high-QPS environments.
-
The new node remains unhealthy in the target group
Ensure the data volume is mounted under
/data, the RESTPP port matches the target group configuration, and all services on the new node are running. -
DNS does not update
Check the TTL value on the Route 53 record, verify the correct hostname was updated (UPSERT), and confirm the change with
nslookup.